Protecting Code Quality with Trunk.io
I recently went down a rabbit hole of VS code extensions and whilst doing some extension exploration of my own I came across one that looked interesting called trunk. I mused that this could help me with trunk based development along with my consistently poor code quality (what can I say, I am a fairly lazy hungovercoder). I quickly became intoxicated with everything that trunk.io had to offer and integrated it into my workflow to easily protect my code quality before committing to the main branch!
- Pre-Requisites
- What is Trunk?
- Create Trunk Account
- Initialise Trunk
- Code Quality
- Enable Precommit Action
- My New Git Workflow
- Mega Tidy Commit Example
Pre-Requisites
As always I will be using the mighty gitpod so I won’t need to configure anything other than spinning up a workspace.
What is Trunk?
Trunk is the best thing in the world for lazy and terrified developers like myself who still want to ship code as fast and easily as possible. The focus is on developer experience and automating those aspects you know are important but can often get overlooked as you race to the finish line. Their four main products are as follows:
- Code Quality: This is the first and last code linter you will ever need. The code quality product leverages linters already available and automatically adds them to your code base when you install trunk. The whole trunk approach is configurable with a yaml file. The code quality aspect is what I will be focused on in this blog.
- Merge Queue: This is to manage and accelerate the appropriate pull request merges for your team into the main branch.
- CI Analytics: These are glorious visualisations over your build and deployment pipelines to see how you are performing.
- Flaky Tests: This an upcoming project that can detect and remove flaky tests from your pipelines on any CI system. I know a few people who are going to be interested in this!
If I could play with all of these trunk toys right now I would. Watch this space for more experimentation in between meals. Now to get started with Trunk and code quality…
Create Trunk Account
First sign-up to Trunk at app.trunk.io. If you’re concerned about costs fear not as they offer a free tierTrunk which is unlimited on public repos and free for up to five committers on private repos (thank you Trunk!).
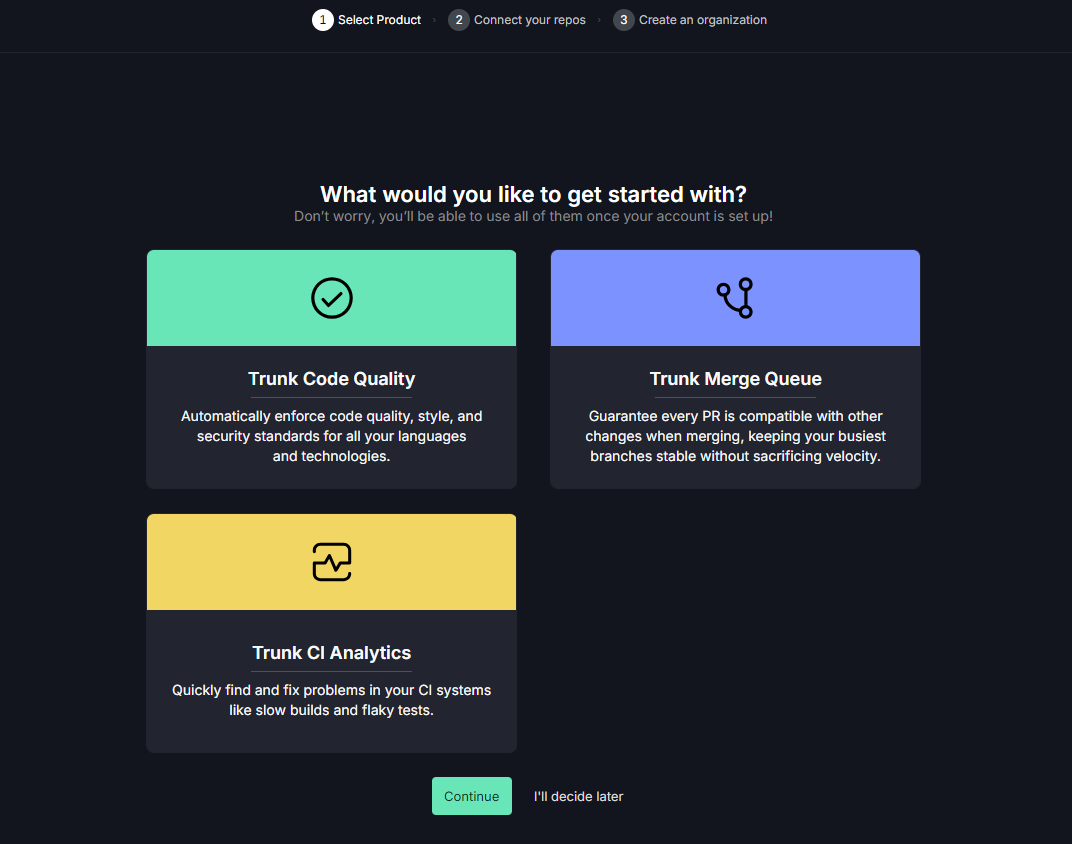
Then select “code quality” and connect the trunk app to your github organisation(s).
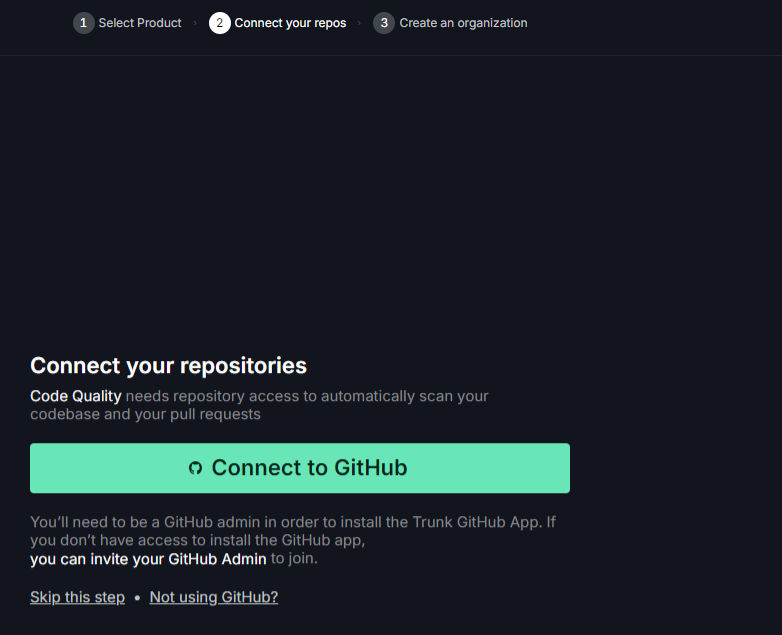
I have three organisations at this point in github and eventually added them all. This became three organisations represented in Trunk under the url format https://app.trunk.io/{organisation-name}.
Now that we have trunk setup on our organisations lets initialise it on a repo. Still in trunk on the code quality tab, select a repo in the top left hand corner. If you have not used trunk on a repo in this organisation before you will be asked to setup a .trunk repository. This is the github action that gets added to all organisations that leverage trunk to perform appropriate checks. You can see mine are identical on my personal datagriff, hungovercoders and hungovercoders-blog organisations.
You can then configure trunk to run on every pull request to that repository (critical!) and/or at certain time intervals.
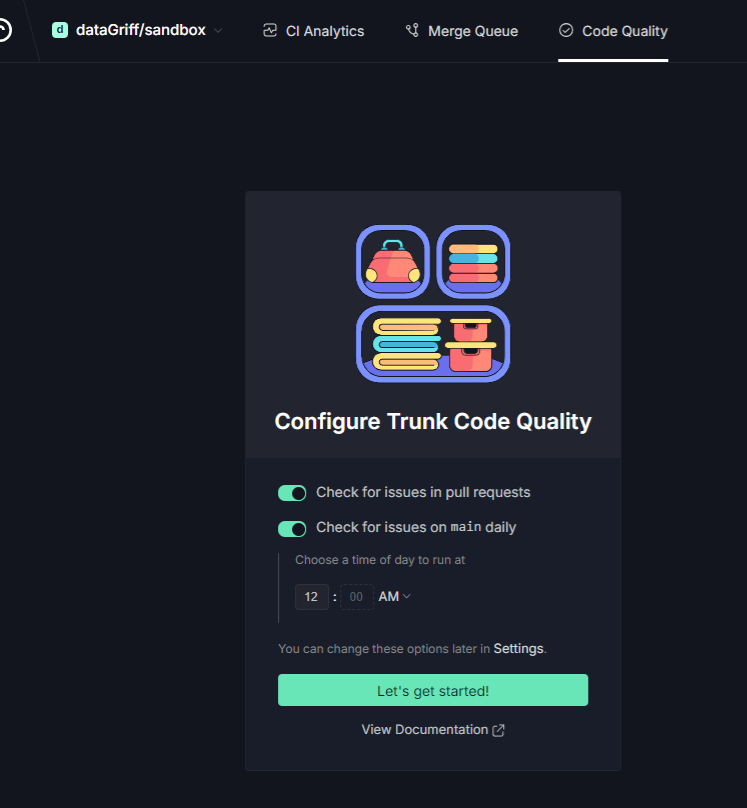
Its worth noting that there is native slack integration if you wanted to receive notifications on poor code quality scenarios.
Next we’ll look at how we can start leveraging trunk in our codebases while we develop to start embedding code quality in our workflow.
Initialise Trunk
To initialise trunk you first need to install the CLI as per the docs by running the below.
curl https://get.trunk.io -fsSL | bash -s -- -y ## executes without prompts
trunk upgrade
I have added this installation to the gitpod configuration files of the repos I have added Trunk to so far. I may eventually just create a standard image with this in as I feel so enamoured with it right now.
To initialise trunk in a repo you run:
trunk init
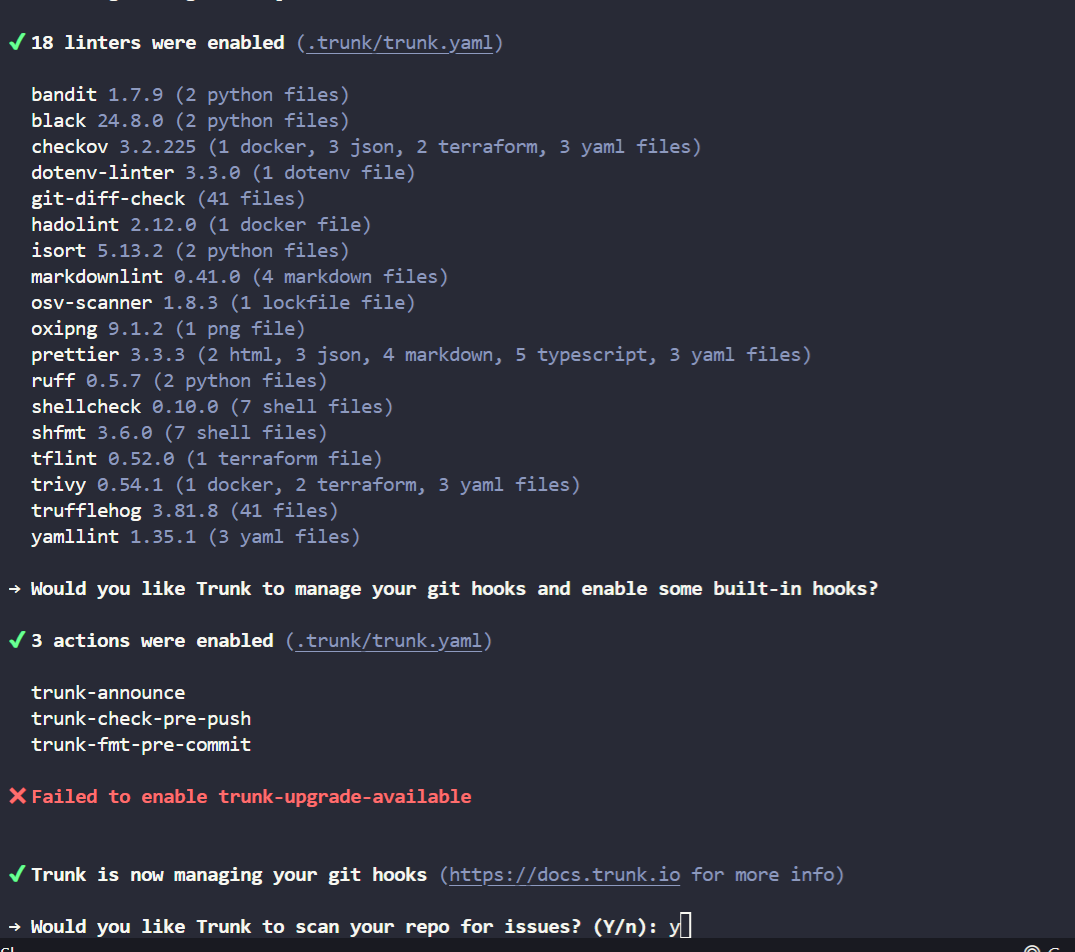
This will create the initial trunk.yml file of your repo that controls things like the linters you want to use and what actions you want enabled. The linters installed will be inferred by the code you already have in your repo. The yaml file will look something like the following.
# This file controls the behavior of Trunk: https://docs.trunk.io/cli
# To learn more about the format of this file, see https://docs.trunk.io/reference/trunk-yaml
version: 0.1
cli:
  version: 1.22.2
# Trunk provides extensibility via plugins. (https://docs.trunk.io/plugins)
plugins:
  sources:
    - id: trunk
      ref: v1.6.1
      uri: https://github.com/trunk-io/plugins
# Many linters and tools depend on runtimes - configure them here. (https://docs.trunk.io/runtimes)
runtimes:
  enabled:
    - go@1.21.0
    - node@18.12.1
    - python@3.10.8
# This is the section where you manage your linters. (https://docs.trunk.io/check/configuration)
lint:
  enabled:
    - sqlfmt@0.23.2
    - bandit@1.7.9
    - black@24.8.0
    - checkov@3.2.225
    - dotenv-linter@3.3.0
    - git-diff-check
    - hadolint@2.12.0
    - isort@5.13.2
    - markdownlint@0.41.0
    - osv-scanner@1.8.3
    - oxipng@9.1.2
    - prettier@3.3.3
    - ruff@0.5.7
    - shellcheck@0.10.0
    - shfmt@3.6.0
    - tflint@0.52.0
    - trivy@0.54.1
    - trufflehog@3.81.8
    - yamllint@1.35.1
actions:
  enabled:
    - trunk-announce
    - trunk-check-pre-push
    - trunk-fmt-pre-commit
    - trunk-upgrade-available
There is also an option to login during this process to get all of trunks features. We went through all the effort of setting up an account so lets do eet! (you can also login using trunk login).
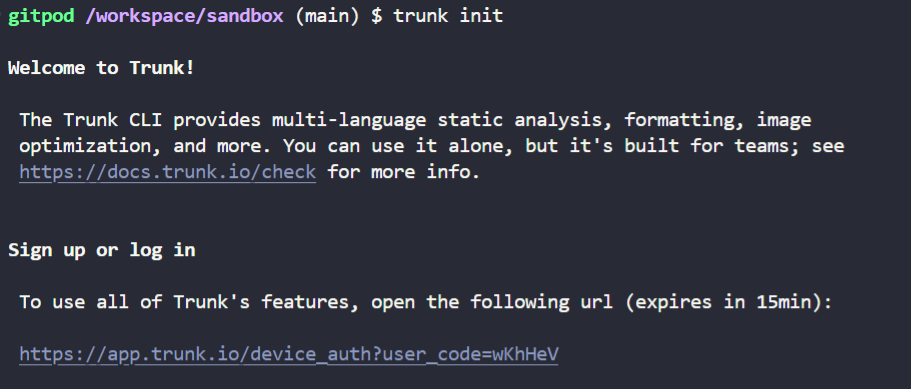
You also get asked if you want trunk to manage your githooks and enable some built-in hooks along with performing a scan, why not?
This was my sandbox and as you can see, ahem, my code quality is not quite up to scratch!
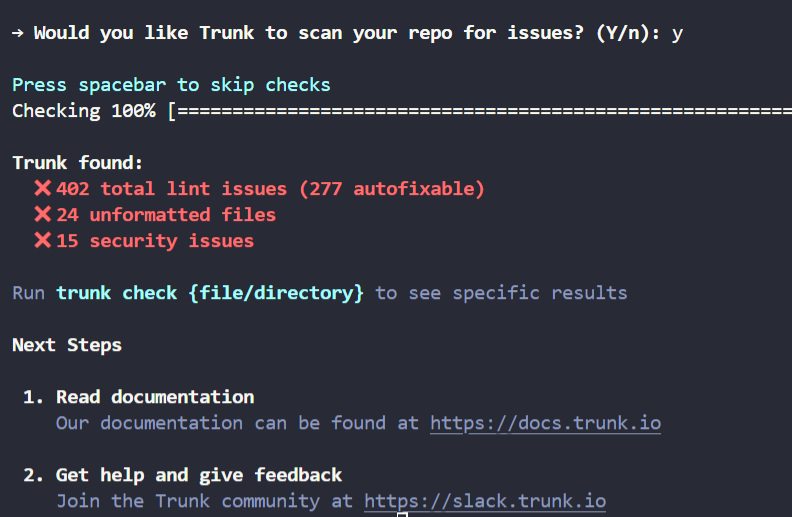
Moving on now to how we will improve our code quality…
Code Quality
Code quality tends to rely on code linting that highlights where code is not meeting certain standards of readability or security. Its something we rely often manually to be done by other developers when performing pull requests. The amount of code linters out there suggest this should be automated and this is exactly where trunk comes in.
Trunk Check
Trunk automatically adds the linters required for your repo when you run trunk init. You can explicitly suggest which linters more granularly using the following commands:
trunk init --only-detected-formatters
trunk init --only-detected-linters
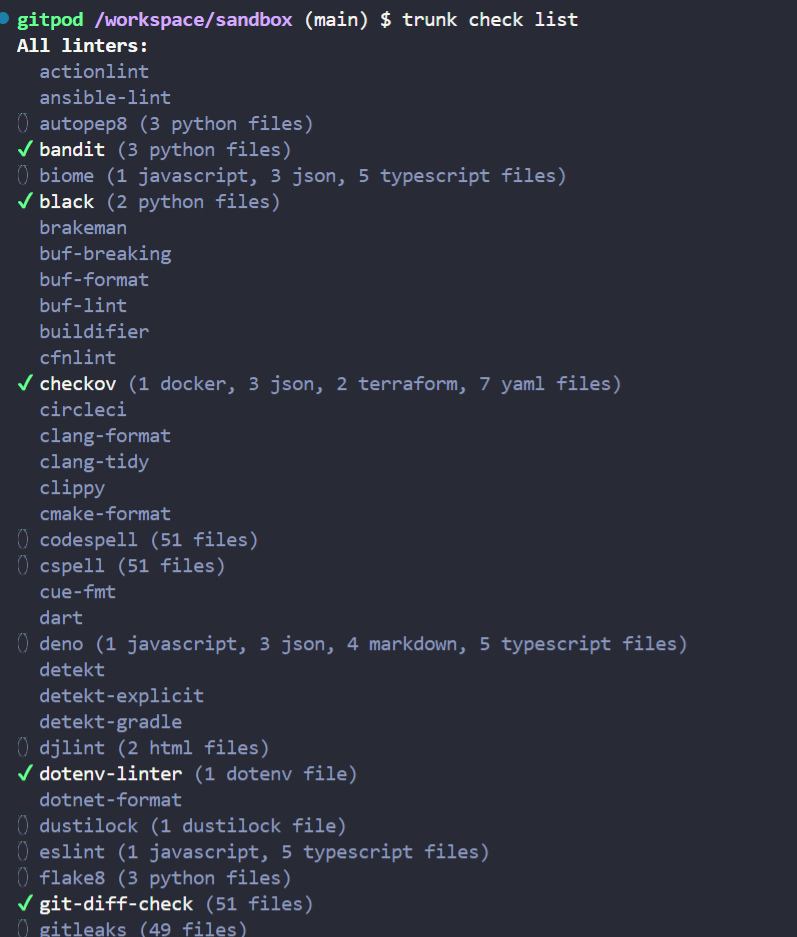
To see then which are available and which are enabled run:
trunk check list
To enable a specific check you can use the command by executing trunk check enable with the specific formatter/linter. e.g.
trunk check enable sqlfmt
To perform a trunk check to determine the code quality of your repository, simply run:
trunk check

Hooray I have no issues! Oh hang on, that only checked ten files, that is the ones I am going to commit. This is great going forward when I only want to check changes for merging, but what about that initial overhaul of your code? To do this run the below:
trunk check --all
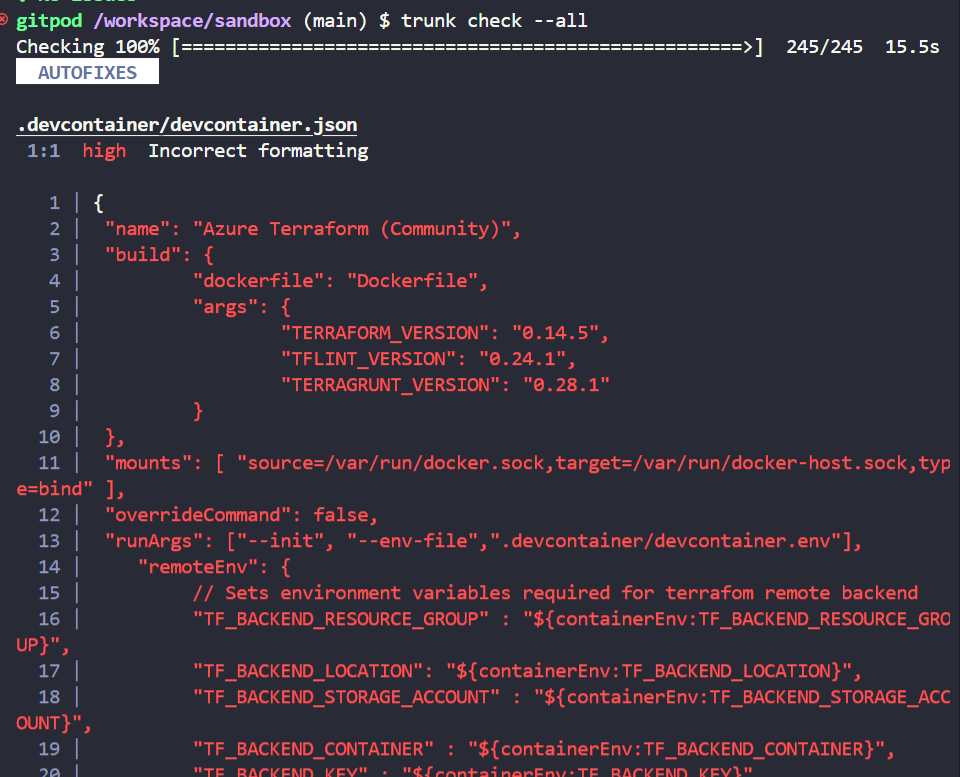
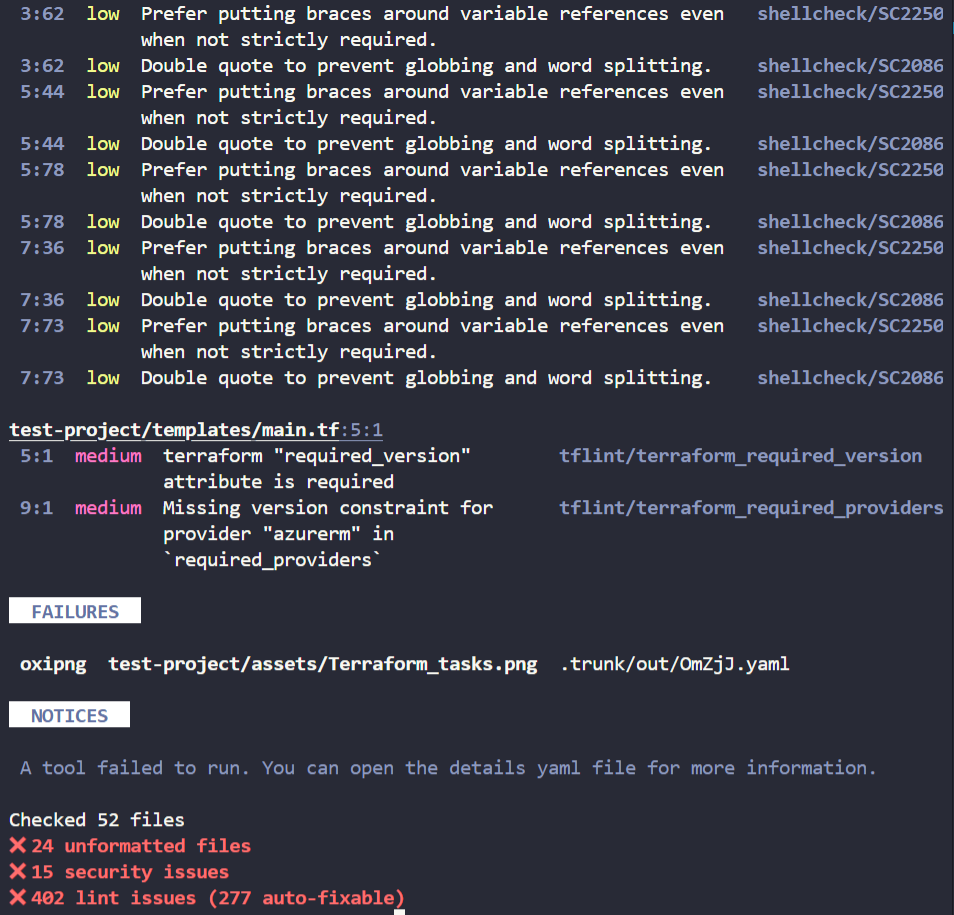
Now that looks more like my sandbox! Using the –all parameter you’ll then be faced with all the current issues with your code (in my case the same ones I saw earlier!).
Trunk has now become the authority on linters for me and automated the entire code quality check process. This is one last decision for me to make as a developer and you can literally feel the cognitive weight start to fall off your shoulders. Now to fix that pesky code!
Trunk Format
Next we want to fix our poor quality code. This is again extremely simple thanks to our friends as trunk using the following command:
trunk fmt
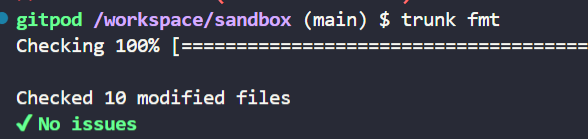
Again trunk fmt alone will only work on the current set of files to commit. If you want to perform formatting on the entire repo, you’ll need to use:
trunk fmt --all
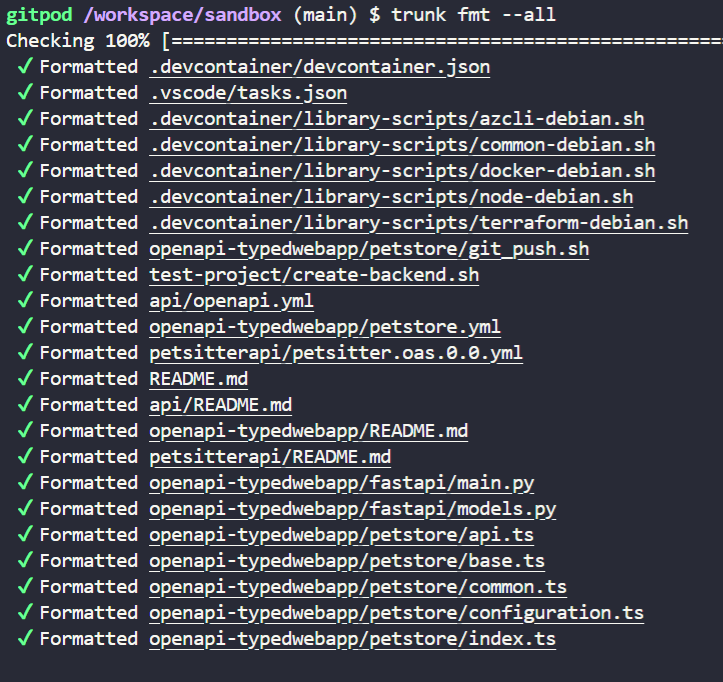
This can obviously be quite a radical approach to take if performing over a large codebase when the linting options are not historically what you may have used. I would say it be mandatory that you test your code changes if you do decide to perform wholesale code quality changes like this, or more likely you’ll just want to fix going forwards for now and just ensure you have code quality checks on any new commits. I wonder if there’s a way to automate this - enter trunk pre-commits!
Enable Precommit Action
I want to make sure I don’t commit any new poor code quality changes into my repo. I can do this using the built-in actions provided by Trunk.
To see a list of the actions that are available and which are enabled run the following:
trunk actions list
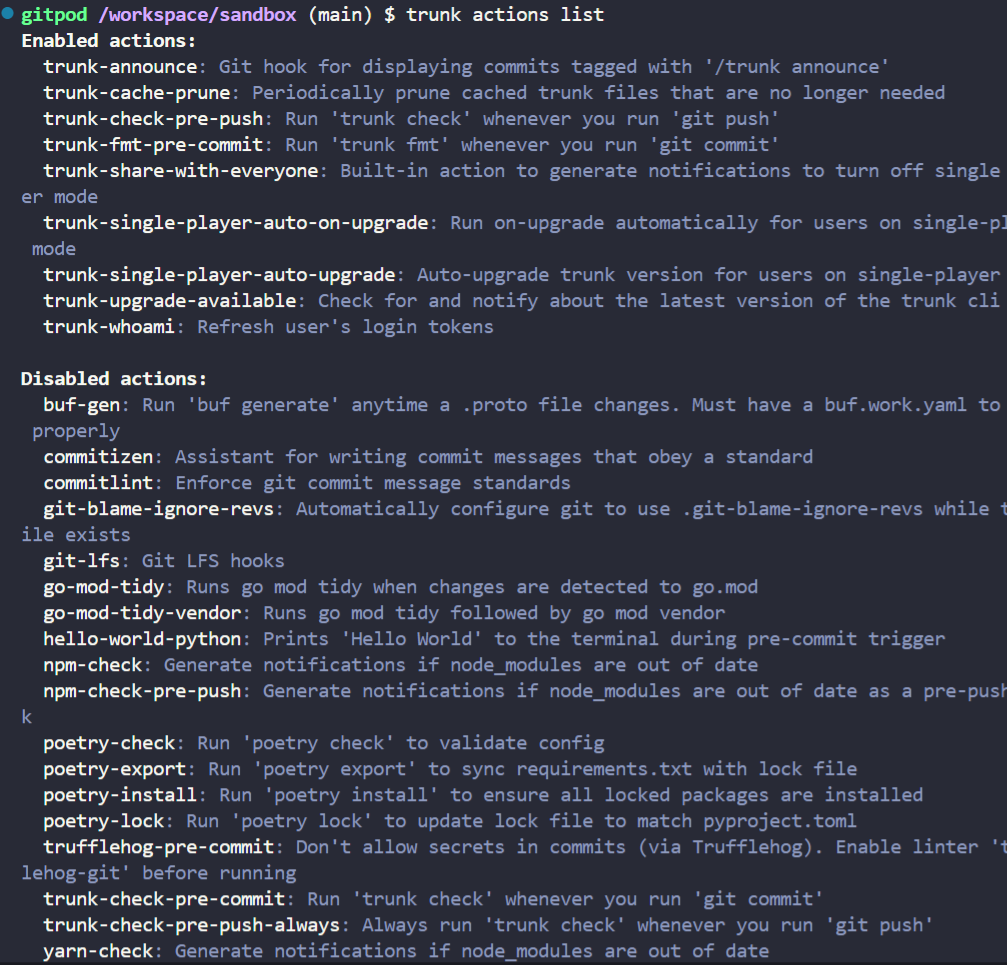
To enable an action you can run the enable command. In order to embed the trunk checking in my workflow and protect every commit, I have run the following:
trunk actions enable trunk-check-pre-commit
trunk actions enable trunk-check-pre-push-always

To ensure this configuration is applied to multiple users, so the repo is always protected, run the following command which will ensure that your trunk.yaml file is shared with anyone who uses the repo.
trunk config share
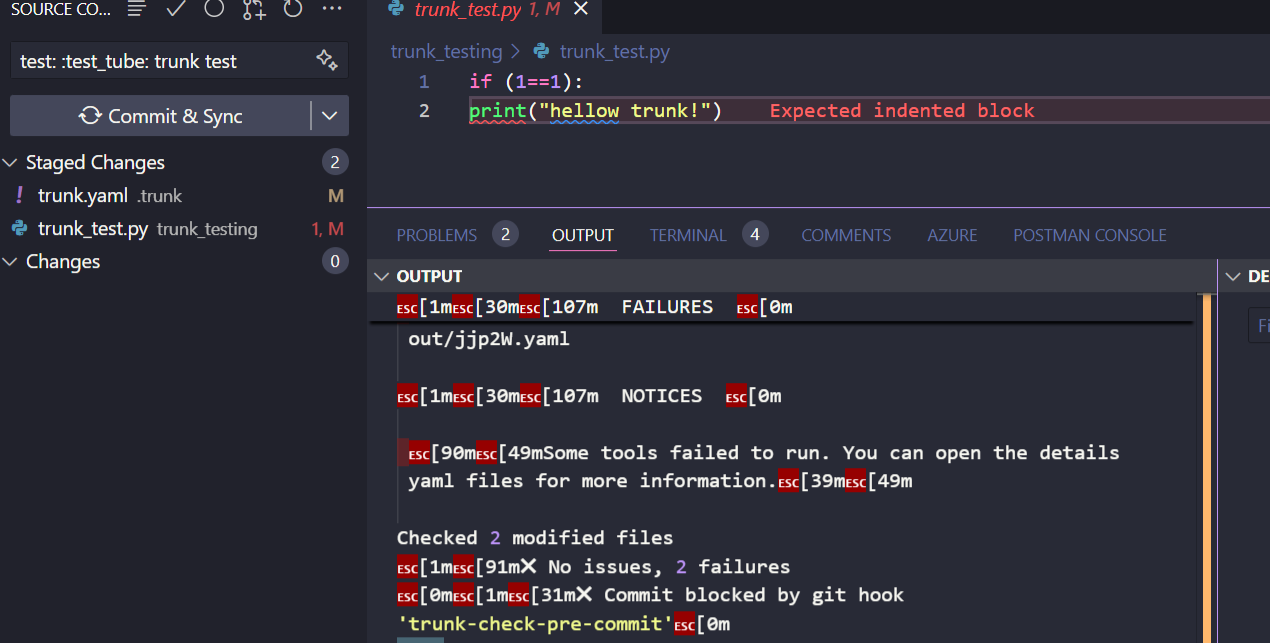
Next if I perform a change with some bad python indentation in there for example…
if (1==1):
print("hello trunk!")
Then I go to commit… I get prevented from doing so and keep my code quality up to scratch!
First I fix the code and add the indent (this is syntax and not code quality).
if (1==1):
  print("hello trunk!")
Then I can run and say yes to the suggestion:
trunk check
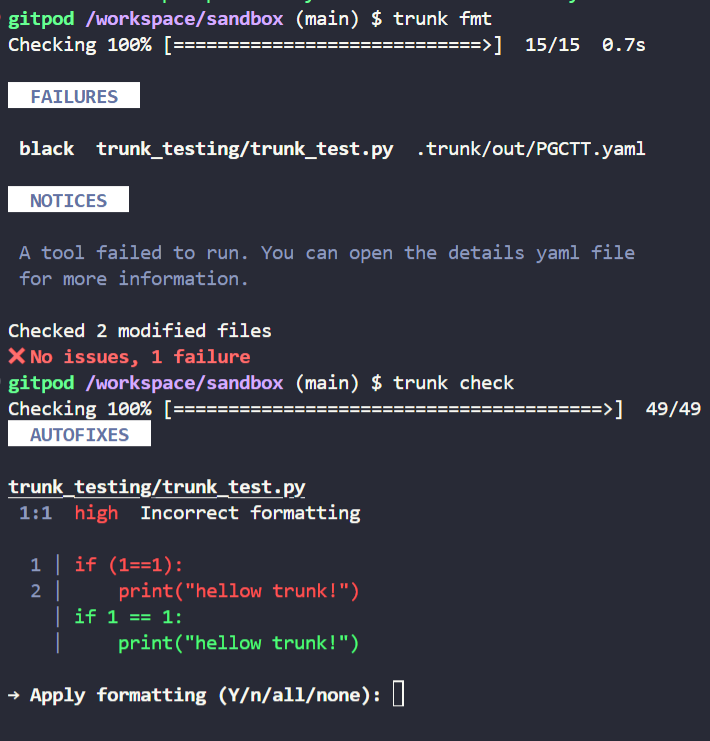
I could also have just run trunk fmt but I wanted to highlight the issue first. Completing these scripts then removes the superfluous brackets as part of code quality checks from black and I end up with:
if 1==1:
  print("hello trunk!")
Then I can perform the now rather beautiful commit.
My New Git Workflow
Along with previous post on conventional commit setup my new git workflow straight to main is as follows.
- Use the keyboard shortcut of CTRL+S to start the conventional commit flow as per the VS Code extension.
- Enter my conventional commit details following the prompts.
- Perform code linting as a pre-commit (automated).
- Correct any errors thrown up (manual - though I may automate this as well).
- Commit better quality code (automated).
- Synchronise code to remote main branch (automated).
This is still my individual workflow at the moment when not working with other developers. This is so much faster and of higher quality than what I was doing just 2 days ago. I’d also like to shout out to the Error Lens VS Code extension too which is helping me see errors more clearly as I go.
Next, to protect myself and others I want to investigate how to perform testing before allowing merging into main, to hopefully safely meet the goal of trunk based development. Those over at Trunk have definitely made this journey a lot easier! I highly recommend checking out the docs over at Trunk as I am just scratching the surface on what is possible.
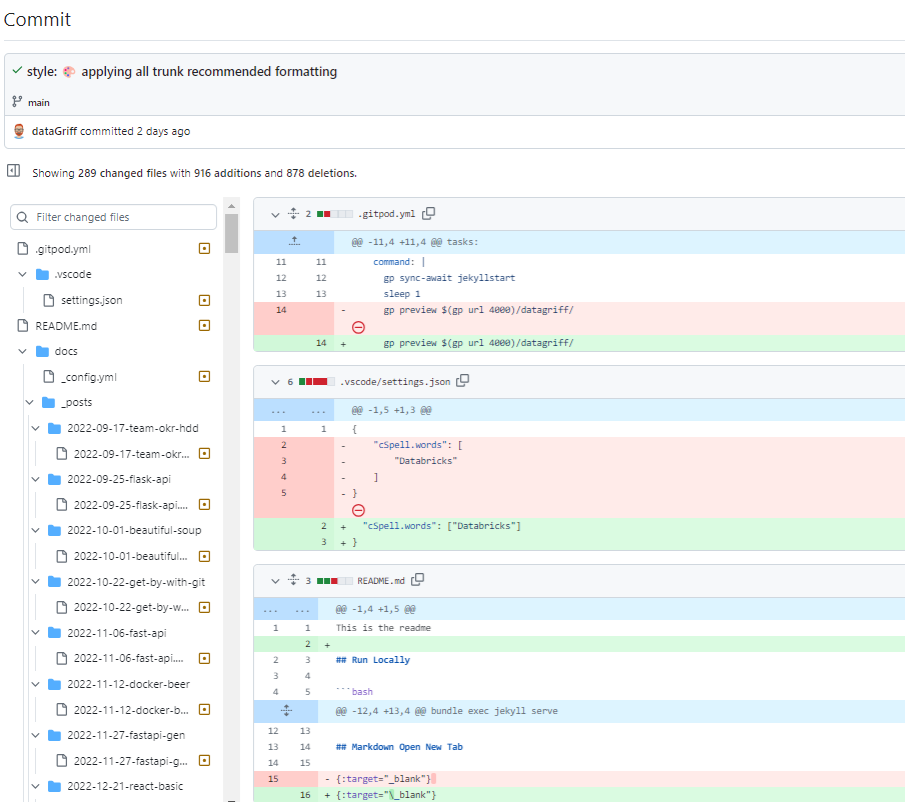
Mega Tidy Commit Example
I first installed trunk on my datagriff blog and it is here that I had that first “wow” moment of how powerful trunk could be in doing a big tidy up of my code in the real world. Here is the link to the commit and also a screenshot below showing how much of the code, and images, it brought up to standard for me. I am highly likely going to be embedding trunk in all my workflows and adding as a standard to my gitpod configuration files. Sweet sweet code protection is just what a gung-ho, lazy and terrified hungovercoder needs!