
Simplify Python Package Development with UV and Taskfile
I’d never made a python package before and I was keenly aware of my mismanagement of python environments in the past, especially after a few beers. Leveraging the power of UV I was quickly able to create a virtual environment and manage my dependencies with a sobering ease.Combining this with Taskfile allowed me to further simplify my development processes with abstractions for all my commands. This also allowed me to leverage very easily the same commands for local development and my CI. I cannot wait to use taskfile … everywhere!
- Pre-Requisites
- Create a Python Package with UV
- Create a Github Action
- Introduce a Task File
- Simplify Github Action
- Use the Package
Pre-Requisites
I’ll be leveraging codespaces as part of the setup for this demo and you can find the most up to date version of this at https://github.com/hungovercoders/template.python.package.
Create a Python Package with UV
UV is a single tool that will replace all your python package management and virtual environment concerns of the past. Its written in rust and is designed to be fast and efficient. I used to end up with virtual environments all over the shop or my own machine bloated with python versions and libraries I no longer recognised due to my lazy hungover ways. This is no longer the case with UV…
Install UV
You can install UV in a number of ways including pip install.
pipx install uv
or a curl request and execution
curl -LsSf https://astral.sh/uv/install.sh | sh
Once you have it installed confirm the version with
uv --version

Initiate Package
Next create your package using the --package argument for your uv init command. This means you are creating package.
uv init --package
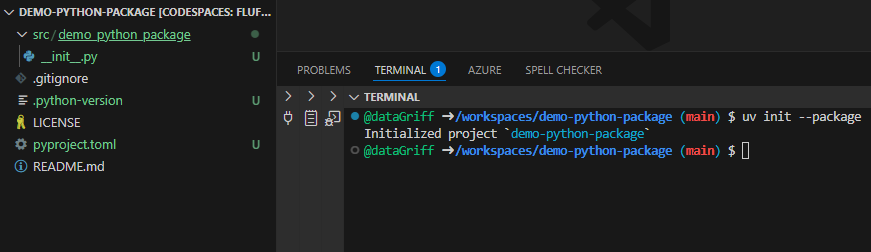
You can provide a name for the package as an argument as well, but I have deliberately not provided one so that toml file ends up in the root along with the src directory. This does mean your github repo naming is important to reflect the name of the package. This later allows us to treat the github repo directly as a package and we can install from it using pip install without needing to publish to pypi. This is very handy for a quick turnaround and testing of our package!
You can also initiate apps, libraries or completely bare python projects using uv. Use the following command to see what’s on offer.
uv init --help
Run the package locally
The package comes initiated with one main method in the code src/hungovercoders_demo/__init__.py
def main() -> None:
    print("Hello from demo-python-package!")
To try this out we can run the package using uv
uv run demo-python-package
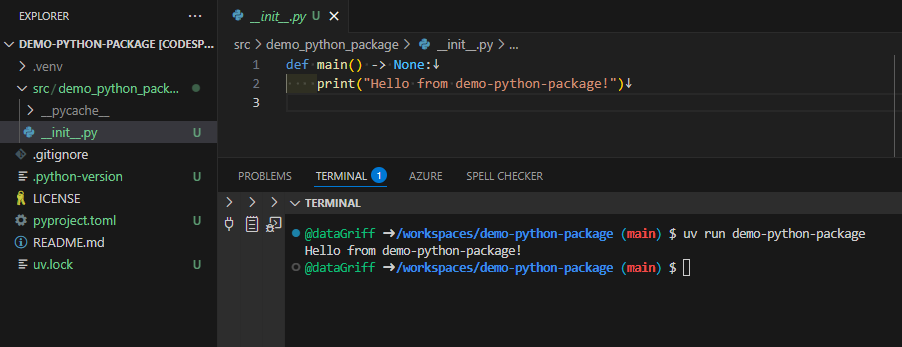
Uv will automatically create a virtual environment for you (woop! woop!) and create a uv.lock file. The uv.lock file will ensure consistent environments for anyone who uses your package.
Convert the Package into a CLI
Next we’re going to convert the package into a CLI. Keeping this simple for the demo we’ll leverage the simple greetings package laid out in packaging python - creating and packaging command-line tools, and tweak it to make it slightly simpler. The package will leverage the typer library which makes creating a CLI tool even easier.
First create a greetings.py file and add the following code
import typer
from typing_extensions import Annotated


def greet(
    name: Annotated[str, typer.Option(help="The name of the person to greet")] = ""
):
    greeting = f"Hello {name}!"
    print(greeting)
This means we’re going to expose a command called greet that takes a --name option as a parameter then prints this out to the terminal.
Then add a cli.py file and add the following code
import typer

from .greetings import greet


app = typer.Typer()
app.command()(greet)


if __name__ == "__main__":
    app()
This means we’re creating a typer application and adding the greet command we defined in greetings. We’re then going to expose this typer application through our main entry point.
Then add a main.py file and add the following code
if __name__ == "__main__":
    from demo_python_package.cli import app
    app()
This imports the app into the main entry point and allows us to run the CLI.
We’ll remove all the code from the __init__.py file. We still need the file to mark the directory as a package.
We then need to update the pyproject.toml file to include an entry point for the script and include a dependency on typer. By adding typer as a dependency UV will automatically install this into our virtual environment for us.
##...
dependencies = ["typer"]

[project.scripts]
demo-python-greet = "demo_python_package.cli:app"
###..
Finally to install and test the cli locally we can run the following to install it locally
uv pip install . e
then run the following to see it work based off the alias we gave it in the toml
uv run demo-python-greet --name griff

Lint the Package
Next up we can lint our python package using ruff. This is also brought to us by the same people as UV so is extremely fast and lightweight.
Run the following to perform the ruff checks.
uvx ruff check

These are all passing which is a bit boring, so lets break some linting rules, such as an f -string without any variable, and run it again. Now we get an error.
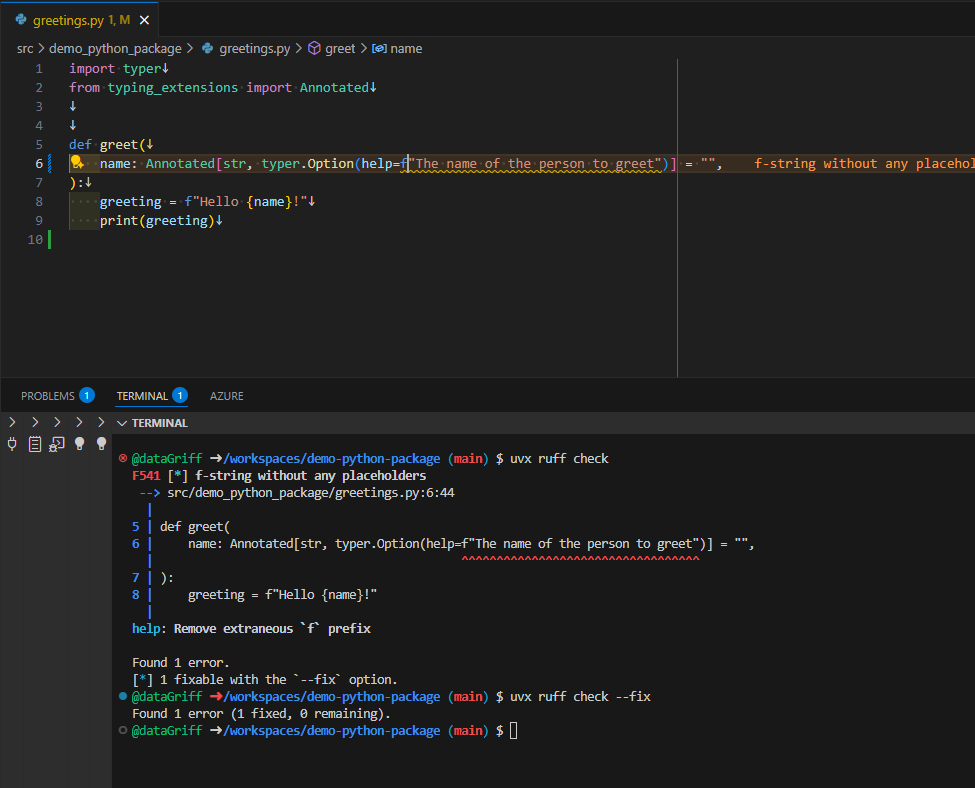
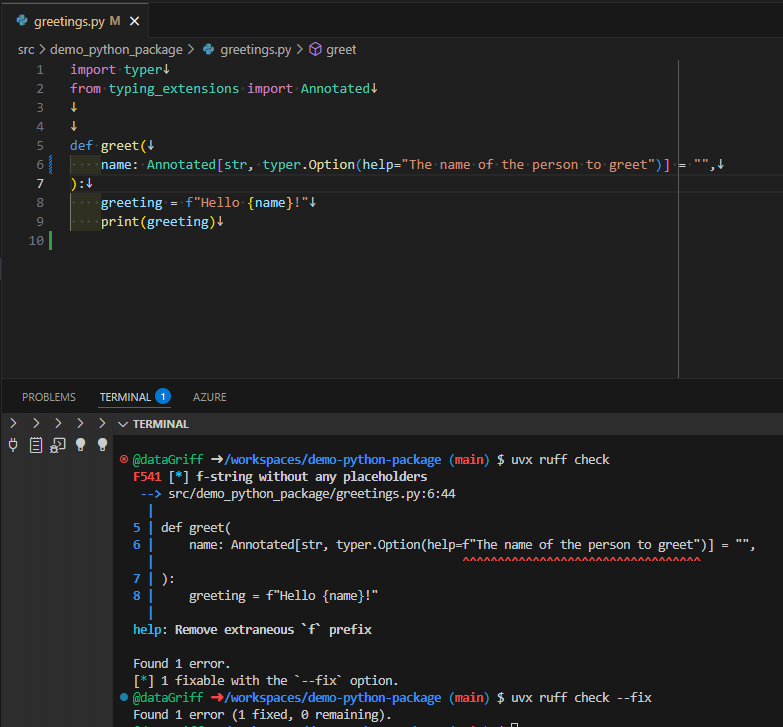
We can fix this by running
uvx ruff check --fix
Next run uv build so we can get the packaged up wheel files and ensure that they are also pass linting checks correctly.
uv build
These will be created in the dist directory.
Then run the following to ensure that the files built all have the appropriate metadata as part of the lint checks.
uvx twin
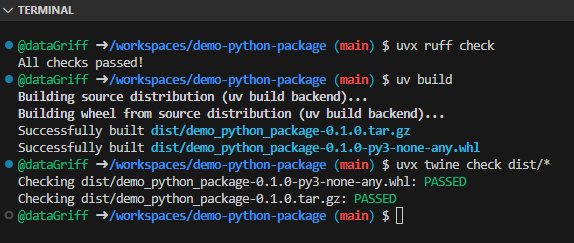
Right we’re looking good from a linting point of view, lets move on to testing!
Test the Package
We’re going to add a straight forward test that will check the functionality of the cli itself.
In a tests directory add a test_cli.py file with the following contents.
import subprocess
import sys
import pytest
from pathlib import Path

@pytest.mark.parametrize("name,expected", [
    ("Alice", "Hello Alice!"),
    ("Bob", "Hello Bob!"),
    ("", "Hello !"),
])
def test_greet_cli(name, expected):
    result = subprocess.run(
        [sys.executable, "-m", "demo_python_package.cli", "--name", name],
        capture_output=True,
        text=True,
        check=True,
    )
    assert expected in result.stdout
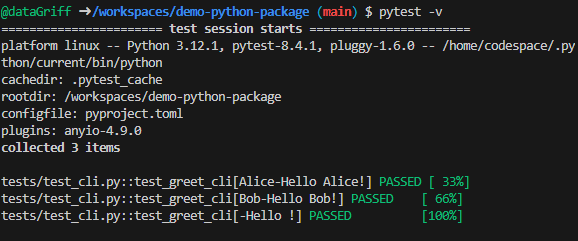
Then run the following command to run the tests
pytest -v
Create a Github Action
Next, we can create a GitHub Action to automate our CI process which will include building, linting and testing. Create a .github/workflows/ci.yml file with the following contents:
name: continuous-integration

on:
  push:
    branches:
      - main
    tags:
      - "v*"
    paths:
      - "src/**"
      - "tests/**"
      - "pyproject.toml"
      - ".python-version"
      - ".github/workflows/ci.yml"
  pull_request:

permissions:
  contents: read
  actions: read
  checks: write
  pull-requests: write

jobs:
  build-and-publish:
    runs-on: ubuntu-latest

    steps:
      - uses: actions/checkout@v4

      - name: Install uv
        uses: astral-sh/setup-uv@v5

      - name: Install dependencies (dev + extras)
        run: uv sync --all-extras --dev

      - name: Run linter
        run: uvx ruff check

      - name: Build distribution
        run: uv build

      - name: Check distribution with twine
        run: uvx twine check dist/*

      - name: Install package for testing
        run: |
          pip install -e .
          pip install pytest pytest-cov

      - name: Run tests with coverage and JUnit output
        run: |
          pytest \
            --junit-xml=pytest-results.xml \
            --cov=src \
            --cov-report=xml \
            --cov-report=term \
            > test_output.txt
          status=$?
          coverage_failed=0
          test_failed=0
          if [ $status -ne 0 ]; then
            if grep -q 'FAIL Required test coverage of 100%' test_output.txt; then
              echo '❌ Pipeline failed: Code coverage is below 100%.'
              coverage_failed=1
            fi
            if grep -q 'FAILED' test_output.txt; then
              echo '❌ Pipeline failed: One or more tests failed.'
              test_failed=1
            fi
            cat test_output.txt
          fi
          exit $status

      - name: Upload test results
        if: always()
        uses: actions/upload-artifact@v4
        with:
          name: pytest-results
          path: pytest-results.xml

      - name: Upload coverage report
        if: always()
        uses: actions/upload-artifact@v4
        with:
          name: coverage-report
          path: coverage.xml

      - name: Publish test results
        uses: EnricoMi/publish-unit-test-result-action@v2
        if: always()
        with:
          files: pytest-results.xml

      - name: Write test summary to GitHub Actions UI
        if: always()
        run: |
          echo "## 🧪 Test Results and Coverage" >> $GITHUB_STEP_SUMMARY
          echo "\`\`\`" >> $GITHUB_STEP_SUMMARY
          cat test_output.txt >> $GITHUB_STEP_SUMMARY
          echo "\`\`\`" >> $GITHUB_STEP_SUMMARY

      - name: Write coverage summary to GitHub Actions UI
        if: always()
        run: |
          echo "## 📊 Coverage Report" >> $GITHUB_STEP_SUMMARY
          echo "\`\`\`" >> $GITHUB_STEP_SUMMARY
          uvx coverage report --show-missing >> $GITHUB_STEP_SUMMARY
          echo "\`\`\`" >> $GITHUB_STEP_SUMMARY
This will install all the appropriate python packages, perform linting and testing. Once complete you should get successful workflow passing and successful test output.
We’ll be making this workflow considerably simpler in the next section using taskfiles…
Introduce a Task File
Now to simplify both our CI pipeline and our development approach we are going to introduce a taskfile! Taskfiles are a great way to abstract away common command you want to run and also to keep consistency between your development process and the eventual CI.
Install Task
You can install task in a number of ways, but here we can just pip install.
pip install go-task-bin
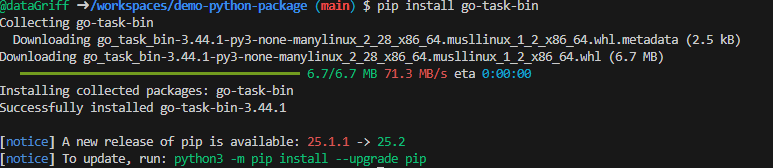
Then confirm your version with ..
task --version
You can then run the following to initiate a Taskfile:
task init
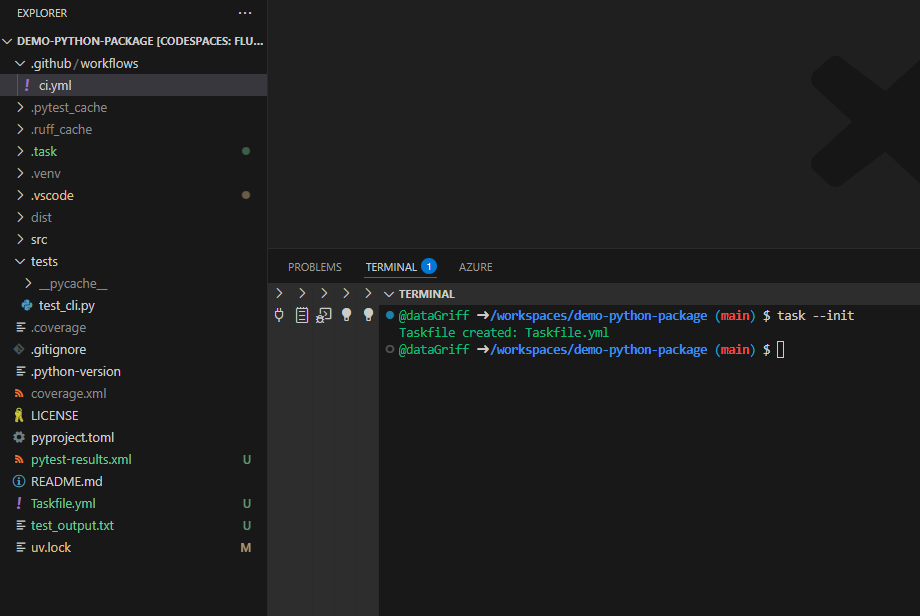
You should also add task/ to your .gitignore file.
Default
First we’ll amend our default task to show we can make our variables in taskfiles dynamic like so
# https://taskfile.dev

version: "3"

vars:
  GITUSER:
    sh: git config user.name || echo "Unknown User"

tasks:
  default:
    cmds:
      - echo "Hello "
    silent: true
Then when we run
task
We get get the output and our user name

Install and Dependencies
Next we’ll add a task to install our package and its dependencies
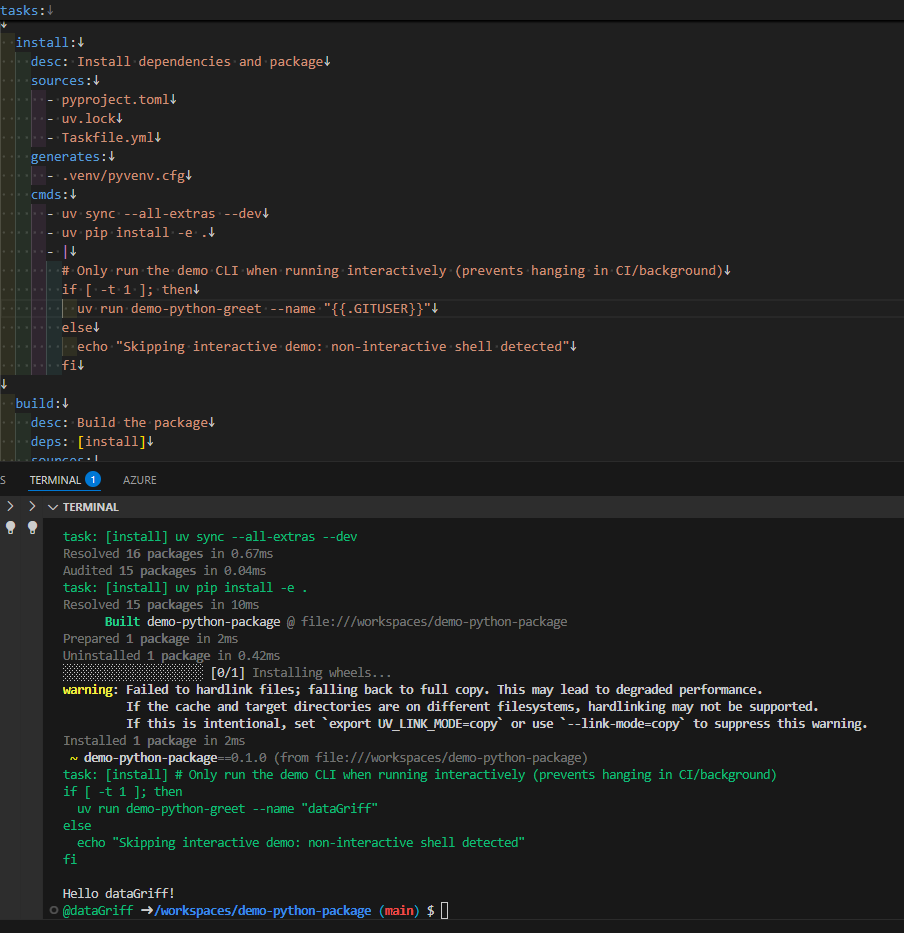
install:
  desc: Install dependencies and package
  sources:
    - pyproject.toml
    - uv.lock
  generates:
    - .venv/pyvenv.cfg
  cmds:
    - uv sync --all-extras --dev
    - uv pip install -e .
    - |
      # Only run the demo CLI when running interactively (prevents hanging in CI/background)
      if [ -t 1 ]; then
        uv run demo-python-greet --name ""
      else
        echo "Skipping interactive demo: non-interactive shell detected"
      fi
When we run
task install
We get
Sweet sweet abstraction and less commands we have to remember! Also note the sources property in the schema, this means that the taskfile will only rerun if anything in those directories have changed. Therefore if I run the task again it doesn’t waste either of our time and just prints out the below.

If we want to ensure a task runs again we can use the --force` argument and it will ensure the task always runs.
task install --force
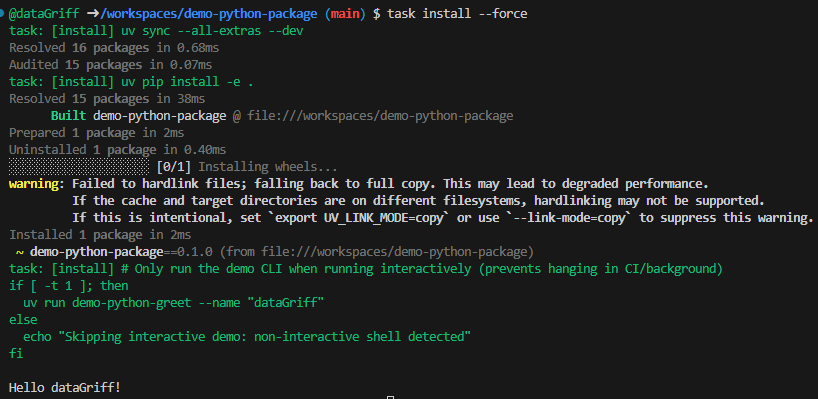
Taskfile keeps track of its status of each tasks using checksums in the .task directory.
Build
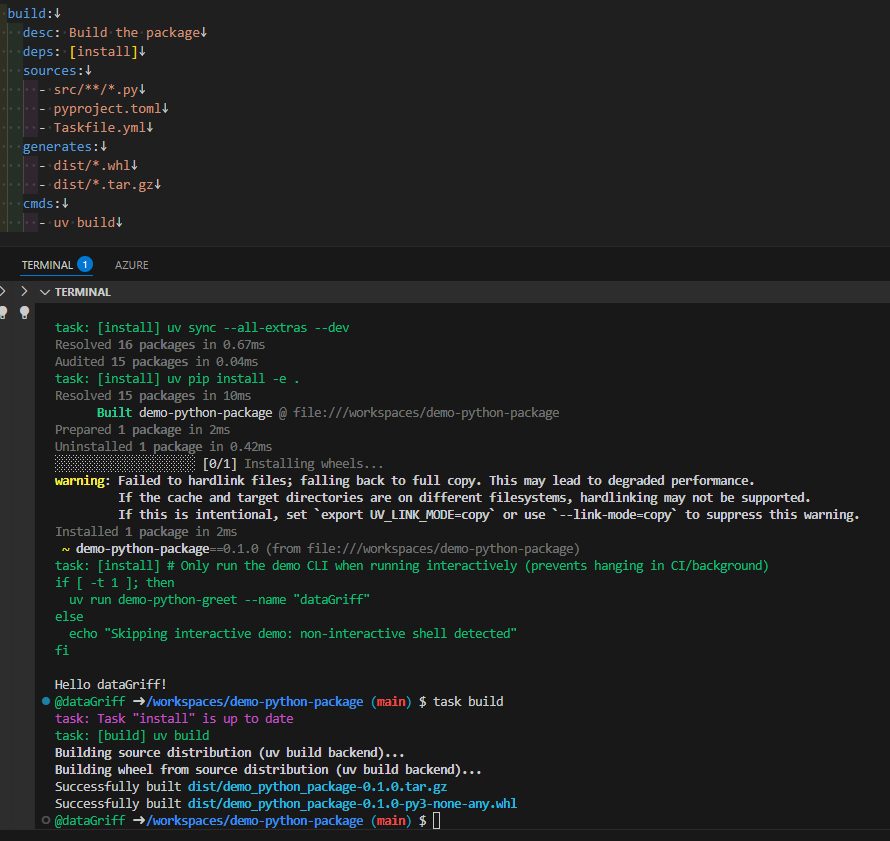
Next up lets add a build command to our taskfile that will turn our package into a wheel.
build:
  desc: Build the package
  deps: [install]
  sources:
    - src/**/*.py
    - pyproject.toml
  generates:
    - dist/*.whl
    - dist/*.tar.gz
  cmds:
    - uv build
Now we can easily run
task build
To get the following
Lint
Next up lets make our lint commands easier to remember by adding the following to our taskfile.
lint:
  desc: Run linting and build checks
  deps: [build]
  sources:
    - src/**/*.py
    - tests/**/*.py
    - pyproject.toml
  cmds:
    - |
      # Fail fast if lint hangs: 5 minute timeout
      timeout 5m uvx ruff check
    - uvx twine check dist/*
Yup you guessed it…
task lint
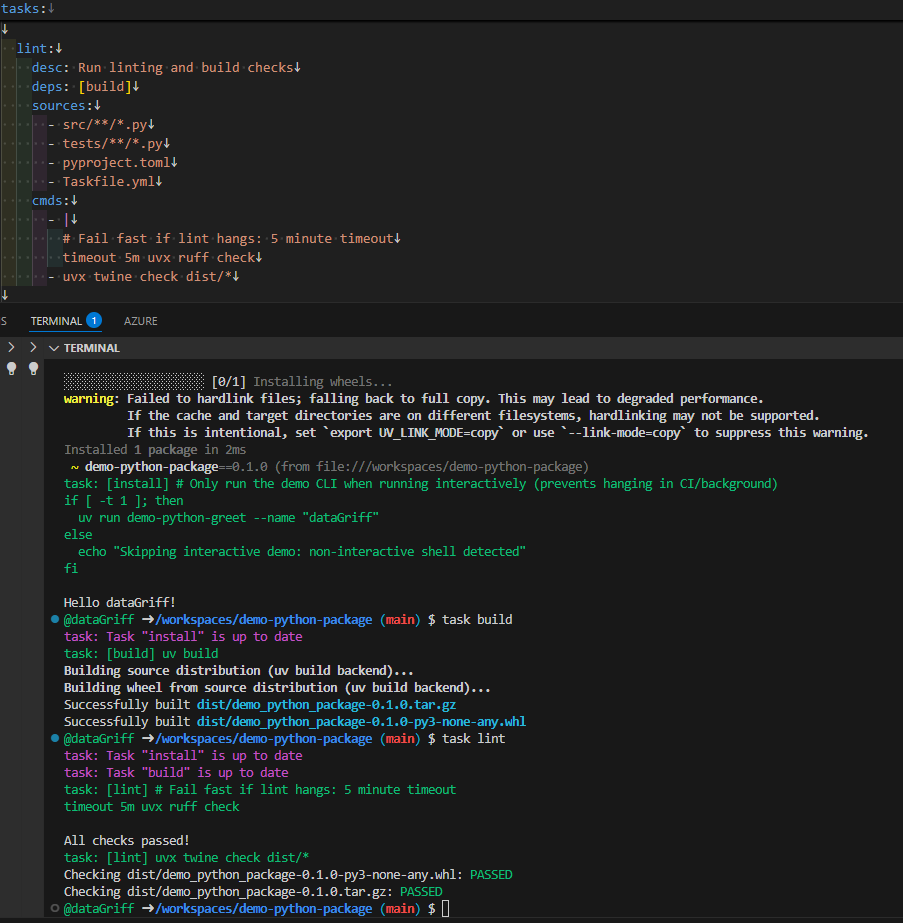
Note the deps attribute in the schema here on the build task. This attribute ensures that certain prerequisites for tasks will always run if need be before the task if requires. If there have been no changes though and the dependency has already run then it won’t run again. You will see the ci task later is simple as its just a collection of dependencies and a nice success message!
Lint Fix
Well we don’t want to be messing around remembering the automated commands to fix our linting issues so yup lets add a task for that!
lint-fix:
  desc: Run linting and build checks
  deps: [build]
  sources:
    - src/**/*.py
    - tests/**/*.py
    - pyproject.toml
  cmds:
    - |
      uvx ruff format
      uvx ruff check --fix
task lint-fix
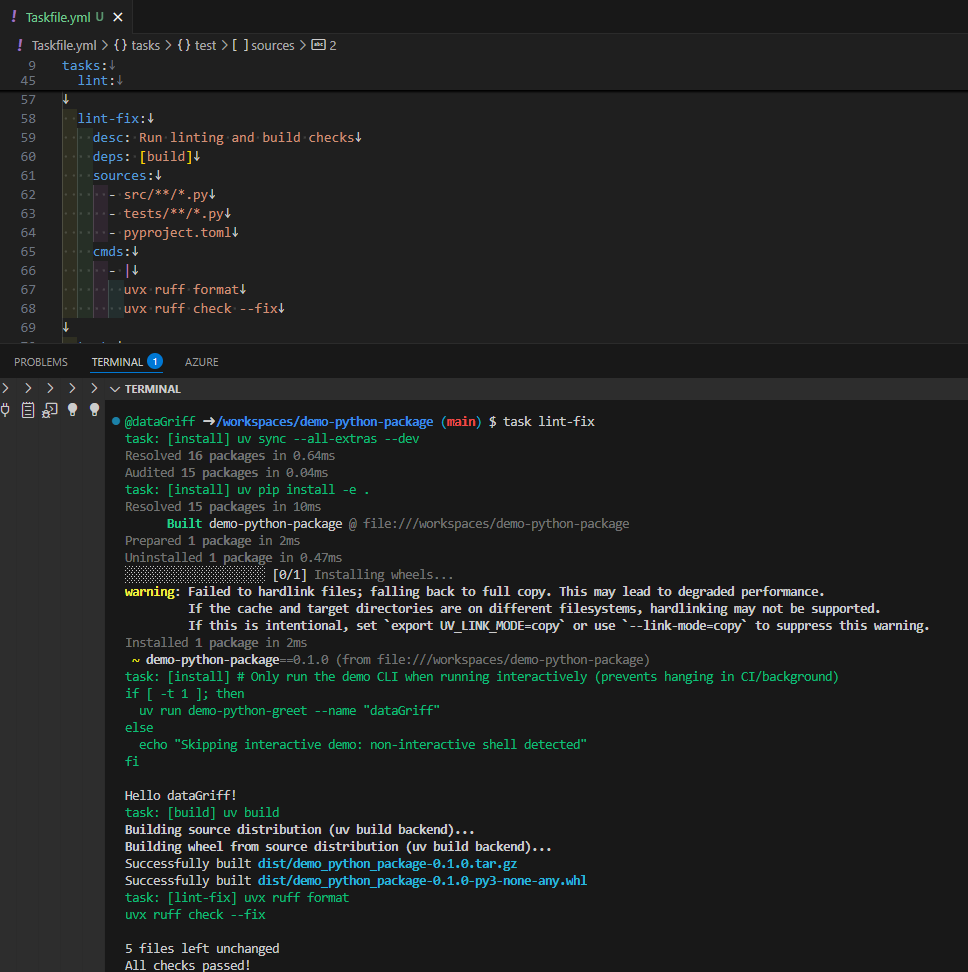
Bosh! You can feel your brain freeing up all that space…
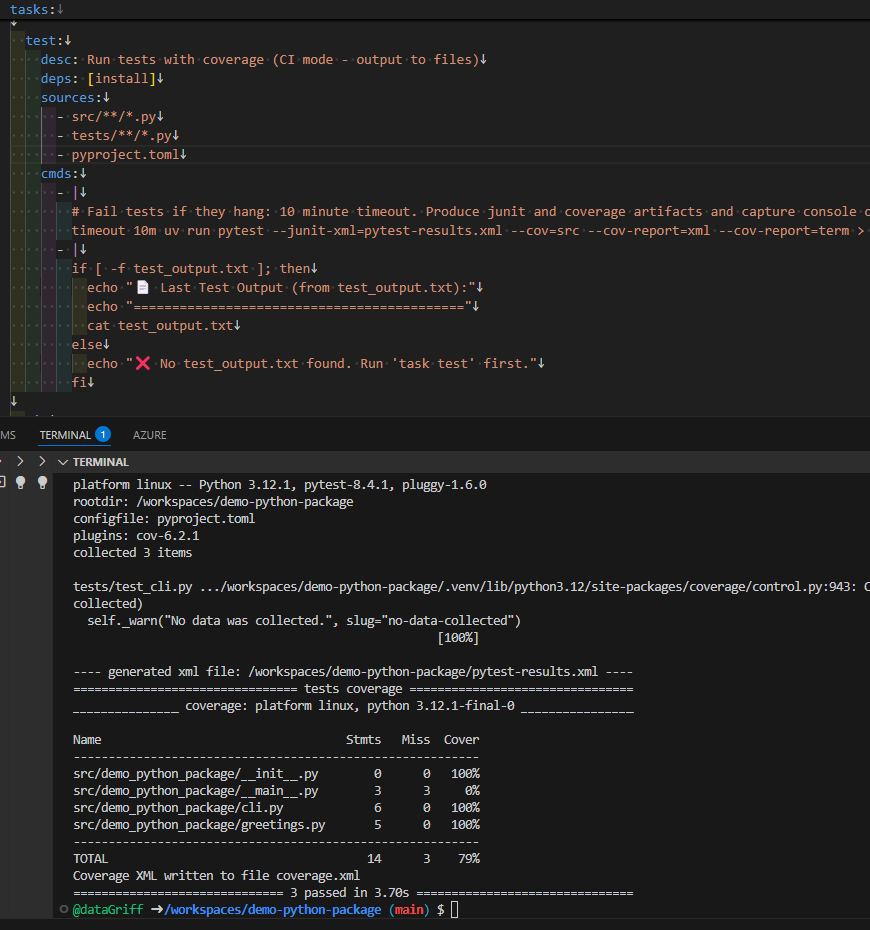
Test
Lets add our final regular task .. testing!
test:
  desc: Run tests with coverage (CI mode - output to files)
  deps: [install]
  sources:
    - src/**/*.py
    - tests/**/*.py
    - pyproject.toml
  cmds:
    - |
      # Fail tests if they hang: 10 minute timeout. Produce junit and coverage artifacts and capture console output.
      timeout 10m uv run pytest --junit-xml=pytest-results.xml --cov=src --cov-report=xml --cov-report=term > test_output.txt 2>&1 || { cat test_output.txt; exit 1; }
    - |
      if [ -f test_output.txt ]; then
        echo "📄 Last Test Output (from test_output.txt):"
        echo "==========================================="
        cat test_output.txt
      else
        echo "❌ No test_output.txt found. Run 'task test' first."
      fi
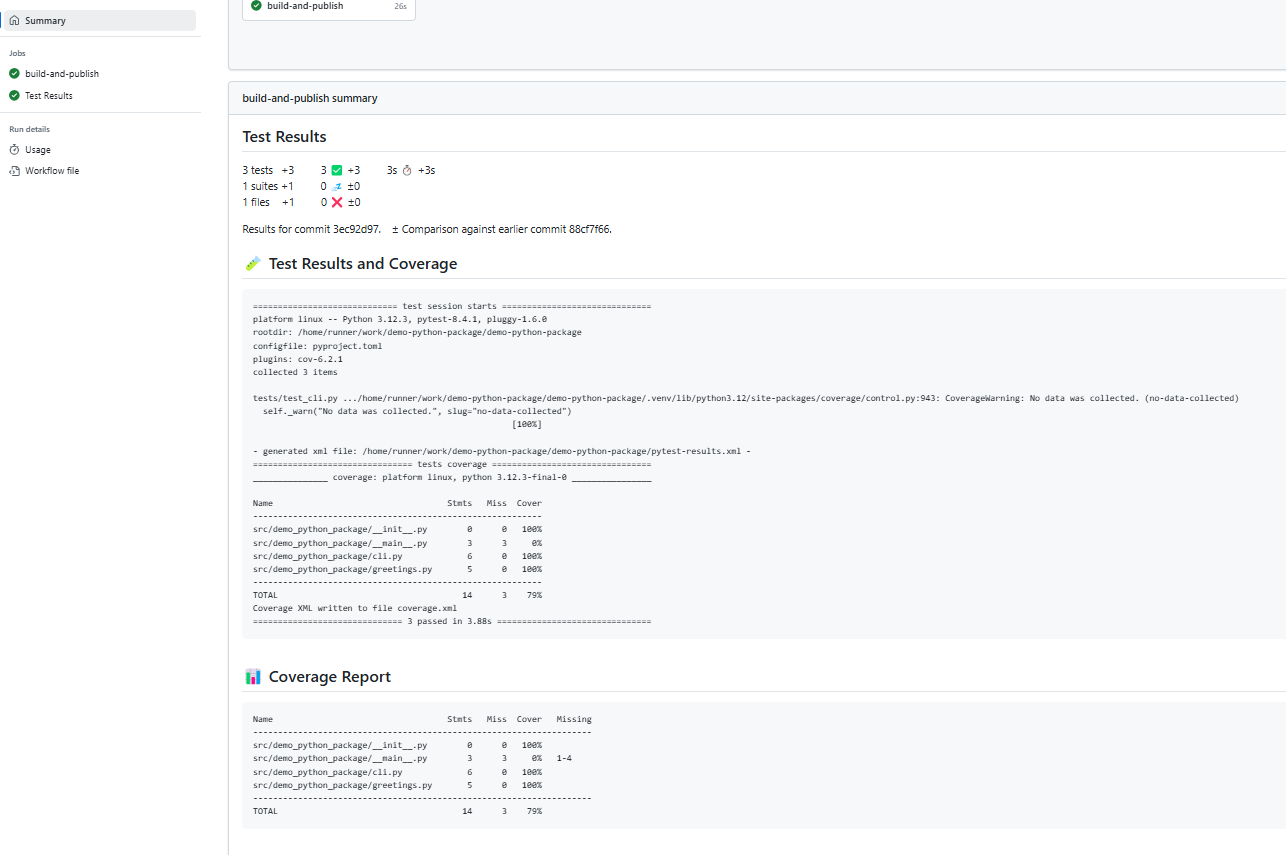
This will output all of the appropriate reporting files to your local directory which handily will also be used in our github action reporting later…
task test
CI
Last but not least our super simple CI stage which is now just a collection of dependencies on test and lint, which also have an upstream dependency on the appropriate builds and installation.
ci:
  desc: Run full CI pipeline
  deps: [lint, test]
  cmds:
    - echo "✅ CI pipeline completed successfully"
Now we can easily execute our CI locally or in a pipeline super easily with…
task ci
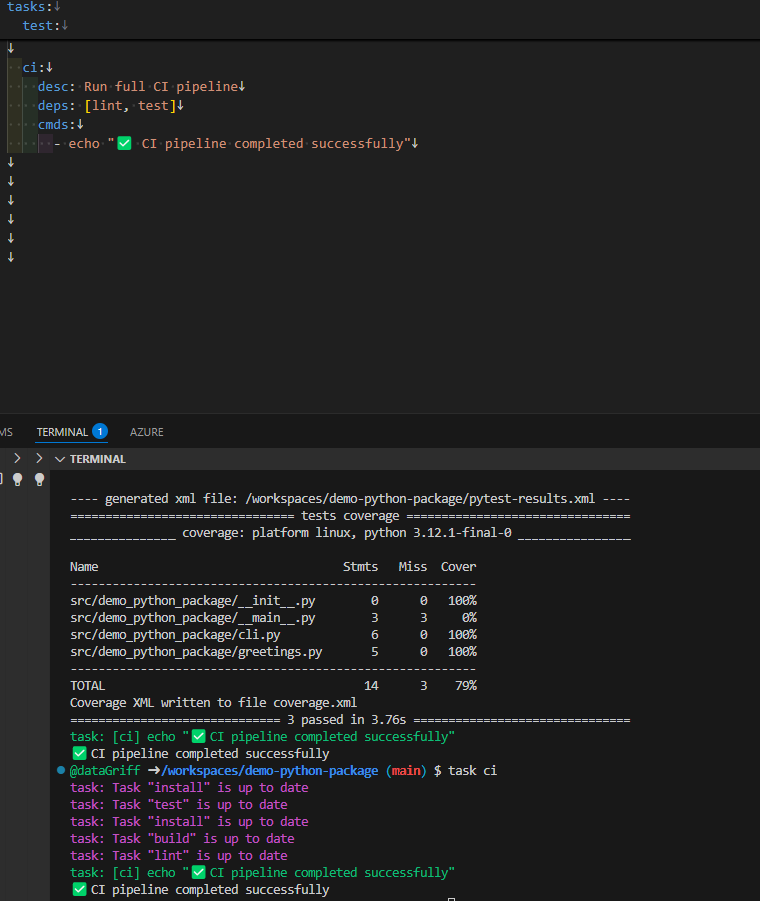
As everything has already run it just prints out that its happy because nothing has changed. While its a time saver we may want to make the CI run just in case… We can use the force parameter to make this happen.
task ci --force
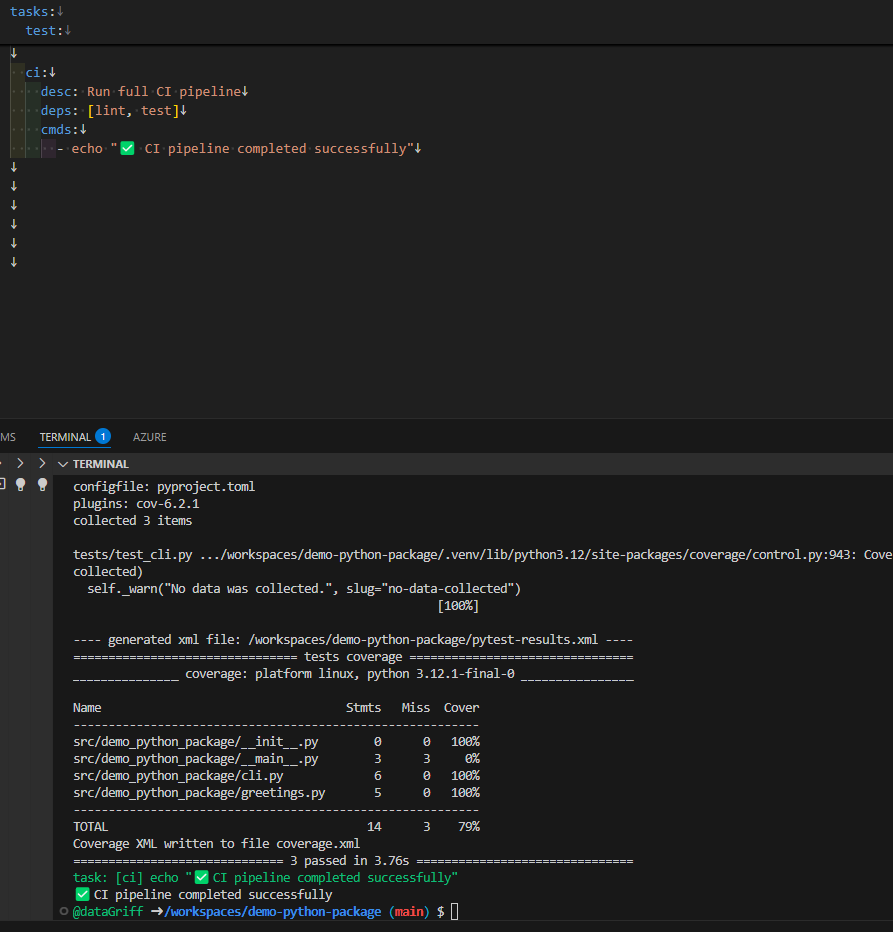
Task List
If you want to quickly see what tasks are available to you in a repo you can run
task --list
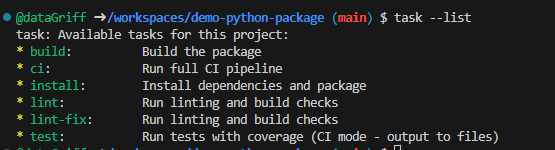
This is something that will be fantastic to keep your README and CONTRIBUTING lean whilst still allowing people to have all the developer functionality they need.
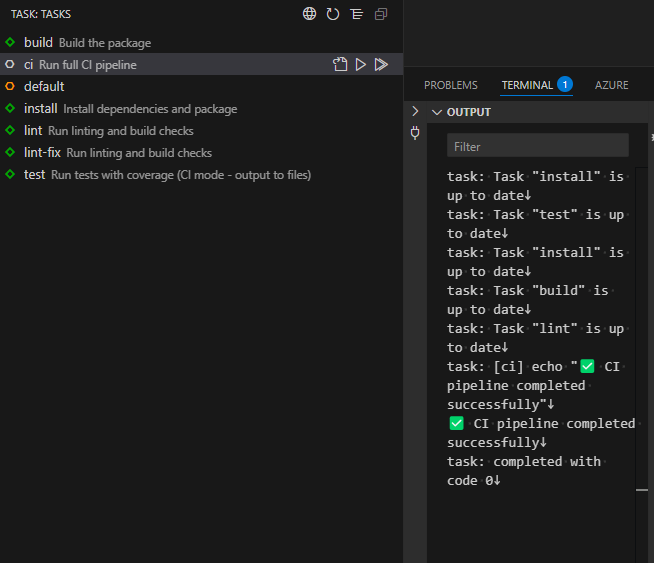
Task VS Code Extension
There is also a nice vs code extension for task if you’re a GUI monster and you can discover and execute all your tasks from there too.
Simplify Github Action
You can now reduce your github action down by leveraging the taskfile as follows. This also guarantees consistency with the CI you run locally and in the pipeline!
name: continuous-integration

on:
  push:
    branches:
      - main
    tags:
      - "v*"
    paths:
      - "src/**"
      - "tests/**"
      - "pyproject.toml"
      - ".python-version"
      - ".github/workflows/ci.yml"
  pull_request:

permissions:
  contents: read
  actions: read
  checks: write
  pull-requests: write

jobs:
  build-and-publish:
    runs-on: ubuntu-latest

    steps:
      - uses: actions/checkout@v4

      - name: Install Taskfile (task CLI)
        run: |
          # install task (go-task) using official installer
          curl -sSfL https://taskfile.dev/install.sh | sh -s -- -d -b /usr/local/bin
          task --version

      - name: Install Python CLI 'uv'
        run: |
          python3 -m pip install --upgrade pip setuptools wheel
          python3 -m pip install uv

      - name: Use Taskfile to install deps, lint and build
        run: |
          task ci --force --verbose

      - name: Upload test results
        if: always()
        uses: actions/upload-artifact@v4
        with:
          name: pytest-results
          path: pytest-results.xml

      - name: Upload coverage report
        if: always()
        uses: actions/upload-artifact@v4
        with:
          name: coverage-report
          path: coverage.xml

      - name: Publish test results
        uses: EnricoMi/publish-unit-test-result-action@v2
        if: always()
        with:
          files: pytest-results.xml

      - name: Write test summary to GitHub Actions UI
        if: always()
        run: |
          echo "## 🧪 Test Results and Coverage" >> $GITHUB_STEP_SUMMARY
          echo "\`\`\`" >> $GITHUB_STEP_SUMMARY
          cat test_output.txt >> $GITHUB_STEP_SUMMARY
          echo "\`\`\`" >> $GITHUB_STEP_SUMMARY

      - name: Write coverage summary to GitHub Actions UI
        if: always()
        run: |
          echo "## 📊 Coverage Report" >> $GITHUB_STEP_SUMMARY
          echo "\`\`\`" >> $GITHUB_STEP_SUMMARY
          uvx coverage report --show-missing >> $GITHUB_STEP_SUMMARY
          echo "\`\`\`" >> $GITHUB_STEP_SUMMARY
I actually fixed a bug by using task and having consistency with my local dev and have all test reports working correctly when I publish in github actions.
Use the Package
To easily use the package immediately you can pip install from the github repo as long as it is public
pip install git+https://github.com/hungovercoders-blog/demo-python-package
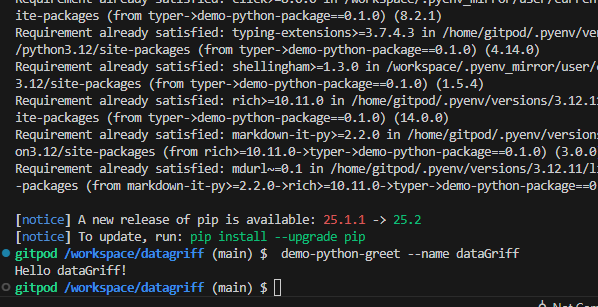
and then execute it like so
demo-python-greet --name dataGriff
In a future blog I will be showing how to publish this to pypi and improve your documentation so that its both more user and contributing friendly!