
Developing locally with cosmos emulator in a container
A problem came up recently whereby we needed to run the cosmos emulator in a docker container for local development and subsequently in the CI stage of our deployment pipeline to reduce the need for a permanent environment. This was a right head scratcher due to the slowness of the emulator to start along with the need for a cert to interact with the emulator. This started to make me feel worse than a classic hungovercoder hangover, there was only way to cure myself of this… Solve the problem with my favourite of all hangover cures - doggos! Lets jump in and demonstrate how we can create a local developer experience with a dotnet app and the cosmo emulator running docker.
- Pre-Requisites
- Compose your Cosmos Emulator
- Create your Console App
- Dockerise your Console App
- Compose your Console App
- Run your Application
Pre-Requisites
In order to carry out this walkthrough you’ll need the following:
For development on your local machine your going to need the following tools installed:
However, I am again using the mighty gitpod to cater for these needs and my docker file looks like this (I’m using this as a base for other Azure dotnet work which is why there are other things in there - handy though right??).
FROM gitpod/workspace-dotnet

USER gitpod

# Install Homebrew
RUN /bin/bash -c "$(curl -fsSL https://raw.githubusercontent.com/Homebrew/install/HEAD/install.sh)" && \
    echo 'eval "$(/home/linuxbrew/.linuxbrew/bin/brew shellenv)"' >> ~/.bashrc

# Update Homebrew, Install Terraform & Azure CLI
RUN eval "$(/home/linuxbrew/.linuxbrew/bin/brew shellenv)" && \
    brew update && \
    brew tap hashicorp/tap && \
    brew install hashicorp/tap/terraform && \
    brew upgrade terraform && \
    brew install azure-cli  && \
    brew install aztfexport && \
    brew install maven

# Install Azure Functions Core Tools
RUN curl https://packages.microsoft.com/keys/microsoft.asc | gpg --dearmor > microsoft.gpg && \
    sudo mv microsoft.gpg /etc/apt/trusted.gpg.d/microsoft.gpg && \
    sudo sh -c 'echo "deb [arch=amd64] https://packages.microsoft.com/repos/microsoft-ubuntu-$(lsb_release -cs)-prod $(lsb_release -cs) main" > /etc/apt/sources.list.d/dotnetdev.list' && \
    sudo apt-get update && \
    sudo apt-get install azure-functions-core-tools-4
And my gitpod yaml looks like this
image:
  file: .cde.Dockerfile

vscode:
  extensions:
    - hashicorp.terraform
    - ms-azuretools.vscode-azureresourcegroups
    - formulahendry.code-runner
    - gitpod.gitpod-desktop
    - ms-dotnettools.csdevkit
    - patcx.vscode-nuget-gallery
    - ms-vscode.azurecli
Now that was so easy. Did I mention I love gitpod?
Compose your Cosmos Emulator
The first thing we want to do is get the cosmos emulator running in a docker container. Full disclosure this blog post was made significantly easier by the discover of these emulator recipes provided by Microsoft. You’ll notice a lot of stolen materials from there! Therefore in order to pull and run the cosmos emulator in a container we’re going to use the following docker compose file (we know the app will come later which is why we’re going straight compose).
networks:
  default:
    external: false
    ipam:
      driver: default
      config:
        - subnet: "172.16.238.0/24"

services:
  cosmosdb:
    restart: always
    container_name: "azure-cosmos-emulator-latest"
    hostname: "azurecosmosemulator"
    image: "mcr.microsoft.com/cosmosdb/linux/azure-cosmos-emulator:latest"
    mem_limit: 4GB
    tty: true
    ports:
      - "8081:8081" # Data Explorer
      - "8900:8900"
      - "8901:8901"
      - "8902:8902"
      - "10250:10250"
      - "10251:10251"
      - "10252:10252"
      - "10253:10253"
      - "10254:10254"
      - "10255:10255"
      - "10256:10256"
      - "10350:10350"
    expose:
      - "8081"
    environment:
      - AZURE_COSMOS_EMULATOR_PARTITION_COUNT=11
      - AZURE_COSMOS_EMULATOR_ENABLE_DATA_PERSISTENCE=true
      - AZURE_COSMOS_EMULATOR_IP_ADDRESS_OVERRIDE=172.16.238.246
    volumes:
      - cosmosdb-dog_adopter_console-data:/var/lib/cosmosdb
    networks:
      default:
        ipv4_address: 172.16.238.246

volumes:
  cosmosdb-dog_adopter_console-data:
The compose file is pretty self explanatory. We are pulling the latest cosmos emulator image from the Microsoft container registry and exposing the ports that the cosmos explorer uses. We are also setting the environment variables for the emulator and creating a volume for the data persistence. A network is also created ready for the app to connect to the emulator. Its also worth noting the hostname as this what we will be using in the URL of the application when running in the docker environment instead of localhost. This tripped me for ages so that will teach me to read the documentation properly!
Run this following bash command with detach to start the cosmos emulator in a container.
docker compose up --detach
Its important to use the detach for the cosmos emulator as it take ages to start and so you want to make sure you don’t accidentally cancel if you ran it interactively, which would bring down the container. Pretty much when you get the cosmos emulator running you want to leave it running to save time! Later on we will see how we rebuild solely on the app when performing docker compose so we leave the slow starting cosmos emulator running.
You can then run this command to see the logs of the cosmos emulator. This can be safely cancelled without bringing down the emulator. Phew.
docker compose logs --follow
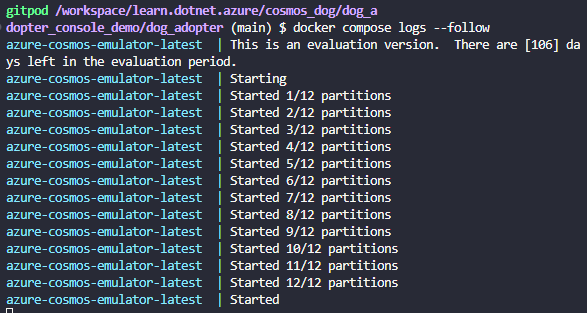
Once the emulator is up and running (can be up to 2 minutes and not just when partitions started!) you can then navigate to the cosmos explorer at https://localhost:8081/_explorer/index.html as we exposed port 8081 in the docker compose file.
Don’t panic when you see the unsafe message…
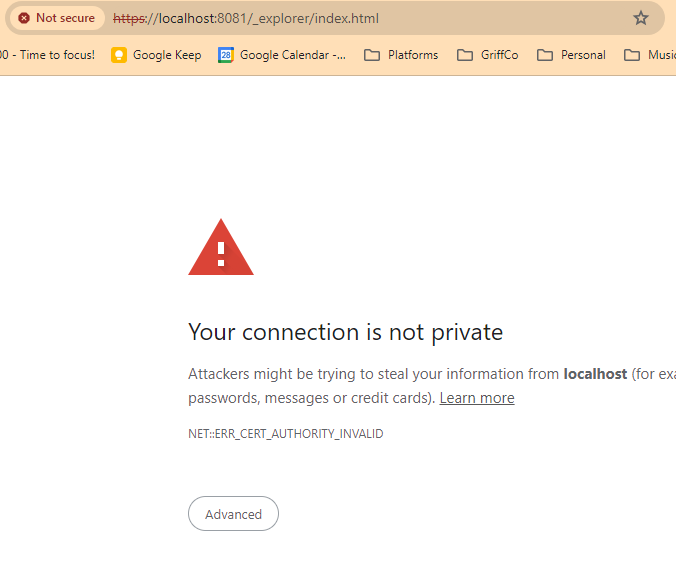
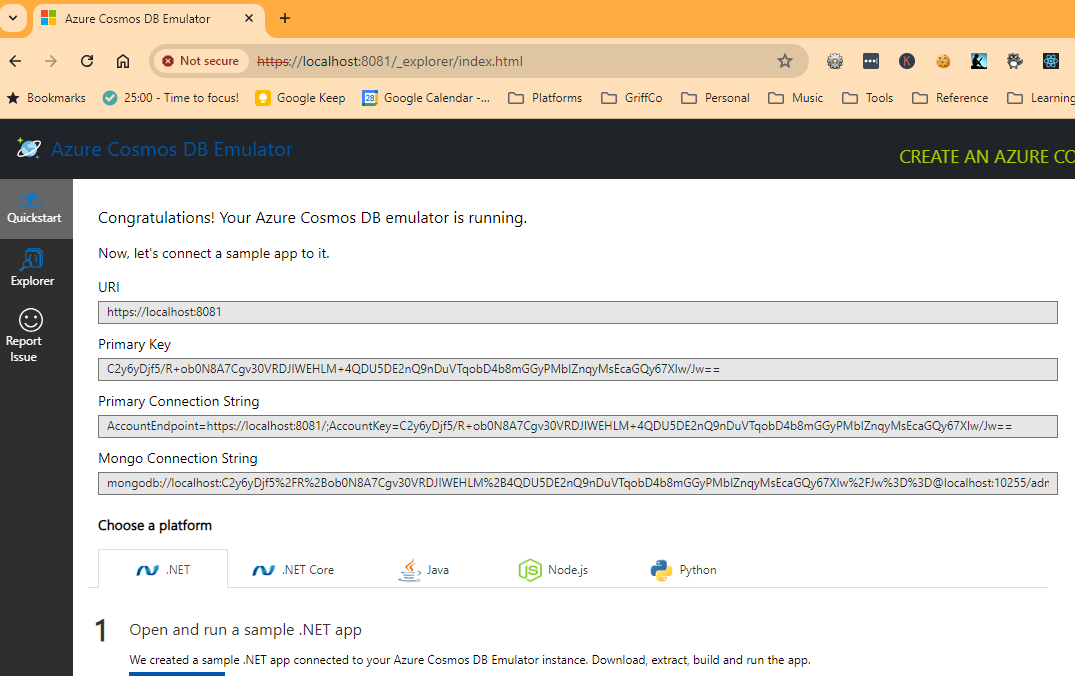
Just proceed and you will see the cosmos explorer.
Create your Console App
Lets create our dog adopter dotnet console app with the following command
dotnet new console --name dog_adopter
Next create a Models directory and add a class called RescueDog.cs with the following code
using System;
using Newtonsoft.Json;
using Newtonsoft.Json.Converters;

namespace dog_adopter.Models
{
    public class RescueDog
    {
        public RescueDog(string name, Breed breed, Status status, Guid id, DateTime timestamp)
        {
            Name = name;
            Breed = breed;
            Status = status;
            Id = id;
            Timestamp = timestamp;
        }

        [JsonProperty("name")]
        public string Name { get; set; }

        [JsonProperty("id")]
        public Guid Id { get; set;}

        [JsonProperty("breed")]
        public Breed Breed { get; set; }

        [JsonProperty("status")]
        public Status Status { get; set; }

        [JsonProperty("timestamp")]
        public DateTime Timestamp { get; set;}
    }
}

 [JsonConverter(typeof(StringEnumConverter))]
public enum Breed
{
    Beagle,
    Boxer,
    Bulldog,
    Chihuahua,
    Dalmatian,
    GermanShepherd,
    GoldenRetriever,
    GreatDane,
    LabradorRetriever,
    Poodle,
    Rottweiler,
    SiberianHusky,
    YorkshireTerrier
}

[JsonConverter(typeof(StringEnumConverter))]
public enum Status
{
    Adopted,
    Available,
    Fostered,
    Reserved
}
The class creates a simple model for a rescue dog with a name, breed, status, id and timestamp. It’s important to note that I had to fallback to use the Newtonsoft.Json library as the System.Text.Json library does not support serializing enums to strings. This is a bit of a pain but I’m sure it will be resolved in the future - see this ongoing github issue here.
Next create a Data directory and add an IDataAdapter.cs file with the following contents:
using System.Collections.Generic;
using System.Threading.Tasks;
using dog_adopter.Models;

namespace dog_adopter.Data
{
    public interface IDatabaseAdapter
    {
        Task<bool> CreateRescueDog(RescueDog rescueDog);

        Task<bool> UpdateRescueDog(RescueDog rescueDog);

        Task<List<RescueDog>> GetRescueDogs();

        Task<RescueDog> GetRescueDog(Breed breed, Guid id);

    }
}
This interface uses the rescue dog model and defines the methods for creating, updating, getting all and getting a single rescue dog. When we create out code to interface with the Cosmos database we’ll need to implement these methods to satisfy the interface.
Without further ado add a CosmosSQLDatabase.cs file to the same Data directory with the following contents:
using Microsoft.Azure.Cosmos;
using dog_adopter.Models;

namespace dog_adopter.Data
{
    public class CosmosSQLDatabase : IDatabaseAdapter
    {
        public CosmosClient _cosmosClient;
        private Database _database;
        private Container _container;

        string cosmos_conn = Environment.GetEnvironmentVariable("COSMOS_CONN");

        string environment = Environment.GetEnvironmentVariable("ASPNETCORE_ENVIRONMENT");

        public CosmosSQLDatabase()
        {
            // Initialize CosmosClient
            _cosmosClient = new CosmosClient(cosmos_conn, new CosmosClientOptions
            {
                SerializerOptions = new CosmosSerializationOptions
                {
                    PropertyNamingPolicy = CosmosPropertyNamingPolicy.CamelCase
                },
                HttpClientFactory = () =>
                {
                    if (environment != "Development")
                    {
                        return new HttpClient(new HttpClientHandler());
                    }
                    /*                               *** WARNING ***
                        This code is for development purposes only. It should not be used in production.
                    */
                    HttpMessageHandler httpMessageHandler = new HttpClientHandler
                    {
                        ServerCertificateCustomValidationCallback = HttpClientHandler.DangerousAcceptAnyServerCertificateValidator
                    };
                    return new HttpClient(httpMessageHandler);
                },
                ConnectionMode = ConnectionMode.Direct
            });

        }

        public async Task InitializeAsync()
        {
            _database = await _cosmosClient.CreateDatabaseIfNotExistsAsync("dog_adopter");
            _container = await _database.CreateContainerIfNotExistsAsync("rescue_dogs", "/breed");
            Console.WriteLine("Cosmos DB and Container initialized successfully.");
        }

        public async Task<RescueDog> GetRescueDog(Breed breed, Guid id)
        {
            try
            {
                ItemResponse<RescueDog> response = await _container.ReadItemAsync<RescueDog>(id.ToString(), new PartitionKey(breed.ToString()));
                return response.Resource;
            }
            catch (CosmosException ex) when (ex.StatusCode == System.Net.HttpStatusCode.NotFound)
            {
                Console.WriteLine("Failed to get rescue dog.");
                throw;
            }
        }

        public async Task<List<RescueDog>> GetRescueDogs()
        {
            try
            {
                var query = new QueryDefinition("SELECT * FROM c");
                FeedIterator<RescueDog> resultSet = _container.GetItemQueryIterator<RescueDog>(query);

                List<RescueDog> results = new List<RescueDog>();

                while (resultSet.HasMoreResults)
                {
                    FeedResponse<RescueDog> response = await resultSet.ReadNextAsync();
                    results.AddRange(response.ToList());
                }

                return results;
            }
            catch (Exception)
            {
                Console.WriteLine("Failed to get rescue dogs.");
                throw;
            }
        }

        public async Task<bool> CreateRescueDog(RescueDog rescueDog)
        {
            try
            {
                ItemResponse<RescueDog> response = await _container.CreateItemAsync<RescueDog>(rescueDog);

                return true;
            }
            catch (Exception)
            {
                Console.WriteLine("Failed to create rescue dog.");
                throw;
            }
        }

        public async Task<bool> UpdateRescueDog(RescueDog rescueDog)
        {
            try
            {
                ItemResponse<RescueDog> response = await _container.UpsertItemAsync<RescueDog>(rescueDog);

                return true;
            }
            catch (Exception)
            {
                Console.WriteLine("Failed to update rescue dog.");
                throw;
            }
        }
    }
}
This file initiates a cosmos client and utilises the environment variables we pass in that defines the environment (e.g Development!) and the cosmos connection string. Its important to note the options we’re using here in the cosmos client setup. We’re using the CosmosSerializationOptions to set the property naming policy to camel case. This is because the cosmos emulator uses camel case for the property names and we want to ensure our model properties are serialized correctly. We’re also setting the HttpClientFactory to a lambda function that checks if the environment is development and if so it will accept any server certificate. This is because the cosmos emulator uses a self signed certificate and we need to accept this in development. This is a bit of a hack and should not be used in production. We then implement the methods defined in the IDatabaseAdapter interface to interact with rescue dogs.
Finally we’ll add the Program.cs file to the root of the project with the following contents:
using System;
using Microsoft.Azure.Cosmos;
using dog_adopter.Models;
using dog_adopter.Data;
using System.Threading;
using System.Diagnostics;

class Program
{
    static async Task Main(string[] args)
    {

        var cosmosSQLDatabase = new CosmosSQLDatabase();
        await cosmosSQLDatabase.InitializeAsync();
        int runDuration = 60;
        int waitBetweenUpdate = 2000;
        Console.WriteLine($"Program will run for {runDuration} seconds and waits between update will be {2000} milliseconds.");

        Stopwatch timer = new Stopwatch();
        timer.Start();
        while (timer.Elapsed.TotalSeconds < runDuration)
        {

            RescueDog rescueDog = GetRandomRescueDog();

            var success = await cosmosSQLDatabase.CreateRescueDog(rescueDog);

            Console.WriteLine($"Created rescue dog: {rescueDog.Name} ({rescueDog.Breed}) has a status of {rescueDog.Status}");
            Console.WriteLine($"The rescue dog has an id of {rescueDog.Id} and was created on {rescueDog.Timestamp}");

            Console.WriteLine("Sleep for 2 seconds.");
            Thread.Sleep(2000);

            rescueDog.Status = Status.Adopted;

            success = await cosmosSQLDatabase.UpdateRescueDog(rescueDog);

            RescueDog updatedRescueDog = await cosmosSQLDatabase.GetRescueDog(rescueDog.Breed, rescueDog.Id);

            Console.WriteLine($"Updated rescue dog: {updatedRescueDog.Name} ({updatedRescueDog.Breed}) has a status of {updatedRescueDog.Status}");
            Console.WriteLine($"The rescue dog has an id of {updatedRescueDog.Id} and was updated on {updatedRescueDog.Timestamp}");

            TimeSpan ts = timer.Elapsed;

            // Format and display the TimeSpan value.
            string elapsedTime = String.Format("{0:00}:{1:00}:{2:00}.{3:00}",
                ts.Hours, ts.Minutes, ts.Seconds,
                ts.Milliseconds / 10);
            Console.WriteLine("RunTime " + elapsedTime);
        }

        timer.Stop();
    }

    public static RescueDog GetRandomRescueDog()
    {
        Guid newId = Guid.NewGuid();
        DateTime newTimestamp = DateTime.UtcNow;
        string[] dogNames = new string[] { "Harvey", "Mika", "Peppa", "Colin", "Kevin", "Betty", "Bandit", "Bobby", "Hank", "Pip" };
        var random = new Random();
        var randomName = dogNames[(random.Next(dogNames.Length))];
        var valuesBreed = Enum.GetValues(typeof(Breed));
        var randomBreed = (Breed)valuesBreed.GetValue(random.Next(valuesBreed.Length));
        var valuesStatus = Enum.GetValues(typeof(Status));
        var randomStatus = (Status)valuesStatus.GetValue(random.Next(valuesStatus.Length));
        return new RescueDog(randomName, randomBreed, randomStatus, newId, newTimestamp);
    }
}
This program file creates a cosmos instance based on the cosmos adapter we made previously and then starts looping every 2 seconds for 60 seconds. During this loop is creates a random rescue dog, writes it to the cosmos database, sleeps for 2 seconds, updates the rescue dog to be adopted, then moves on to the next dog. If only all rescue dogs could be adopted so quickly! The program also outputs logs to the console which will be important when we check the logs in the docker compose environment later.
We’ll have some errors in our code at the moment as we’re missing the cosmos and newtonsoft.json libraries. We can add these with the following commands:
dotnet add package Microsoft.Azure.Cosmos
dotnet add package Newtonsoft.Json
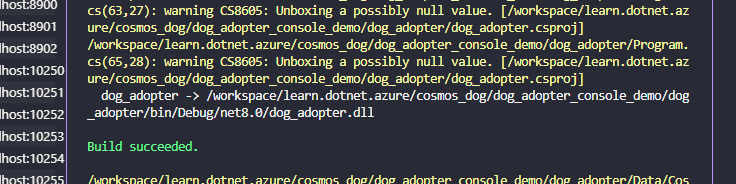
Lets play it safe at this point and just perform a build to ensure the app is all tickety boo.
dotnet build
Dockerise your Console App
Magic Entry Script
In order for the console app you create to interact with the cosmos emulator we need to ensure a cert is installed. We can do this by creating an entrypoint script that will download the cert and add it to the trusted certs if the emulator is available. Availability checking can be performed by a while loop every 5 seconds that checks the status of the emulator.
We therefore want to create an entrypoint.sh file in the root of the project with the following contents and use it as the entrypoint in the docker file instead of the usual dll file. The file will only perform the emulator cert work if the environment is development and will then run the console app. I’d never thought of using a script as an entrypoint before but it totally makes sense here and another weapon in the docker arsenal!
#!/bin/bash
#set -e

echo "$ASPNETCORE_ENVIRONMENT environment..."

if [ "$ASPNETCORE_ENVIRONMENT" == "Development" ]; then

    cosmosHost=azurecosmosemulator
    cosmosPort=8081

    # Wait for CosmosDB to be available, a health check from the container that is connecting to CosmosDB
    echo "Waiting for local dev CosmosDB emulator at $cosmosHost:$cosmosPort..."
    until [ "$(curl -k -s --connect-timeout 5 -o /dev/null -w "%{http_code}" https://$cosmosHost:${cosmosPort}/_explorer/emulator.pem)" == "200" ]; do
        sleep 5;
        echo "Waiting for CosmosDB at $cosmosHost:$cosmosPort..."
    done;
    echo "CosmosDB is available."

    # Download the CosmosDB Cert and add it to the Trusted Certs
    echo "Downloading CosmosDB Cert..."
    curl -k https://$cosmosHost:${cosmosPort}/_explorer/emulator.pem > emulatorcert.crt

    echo "Adding CosmosDB Cert to Trusted Certs..."
    cp emulatorcert.crt /usr/local/share/ca-certificates/
    update-ca-certificates
fi

echo "Running Dog Adopter console app using .NET SDK.."
dotnet dog_adopter.dll
Docker File
Our docker file looks pretty standard for the application, taking the base from microsoft, copying files, performing a build and then using the script file defined above as the entry point. Its worth noting the ARG for the environment which allows us to pass in the environment as a build time variable to only install curl in development and also this will then be a runtime environment variable declared by the following ENV which means the running environment knows its in the development environment too! This might be a little bit suspect though and I may just install curl regardless if this does give me issues later on in the development process.
Its also worth noting that originally I had some issues running the entrypoint.sh file due to permissions. I had to run the following manually once and then everything was fine.
chmod +x entrypoint.sh
The resulting docker file looks like this:
FROM mcr.microsoft.com/dotnet/aspnet:8.0 AS base
WORKDIR /app

LABEL author="datagriff"

USER app

#RUN chmod +x entrypoint.sh

FROM --platform=$BUILDPLATFORM mcr.microsoft.com/dotnet/sdk:8.0 AS build
ARG configuration=Release
WORKDIR /dog_adopter_console
COPY ["dog_adopter.csproj", "dog_adopter_console/"]
RUN dotnet restore "dog_adopter_console/dog_adopter.csproj"
COPY . .
WORKDIR "/dog_adopter_console"
RUN dotnet build "dog_adopter.csproj" -c $configuration -o /app/build

FROM build AS publish
ARG configuration=Release
RUN dotnet publish "dog_adopter.csproj" -c $configuration -o /app/publish /p:UseAppHost=false

FROM base AS final
WORKDIR /app

COPY --from=publish /app/publish .

ARG environment=Production
ENV ASPNETCORE_ENVIRONMENT=$environment

# Install curl to check for CosmosDB Emulator in Development
USER root
RUN if [ "$ASPNETCORE_ENVIRONMENT" = "Development" ]; then \
    apt-get update && apt-get install -y curl; \
    fi

COPY ["entrypoint.sh", "entrypoint.sh"]

USER root
ENTRYPOINT ["./entrypoint.sh" ]
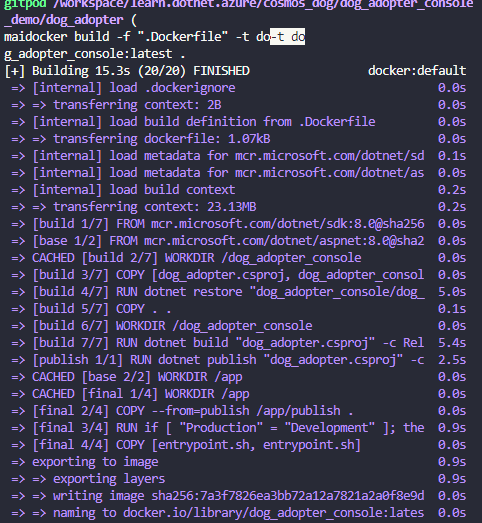
Lets do a build of the image and ensure everything still works.
docker build -f ".Dockerfile" -t dog_adopter_console:latest .
We’re now going to skip straight to running the docker application via compose as we want it to integrate with the cosmos emulator we have running so we’ll need to pass in some environment variables.
Compose your Console App
we need to add the app to the docker compose file we create earlier and place it in the same network as the cosmos emulator. Below is the docker compose file with the app service added. The app service is dependent on the cosmosdb service and we pass in the cosmos connection string as an environment variable. Note that the argument for the Development environment and the docker file being sourced from the work we did above. Its also really important to note that in the emulator connection string which we pass in as an environment variable we have changed localhost to be the hostname we have given the cosmosemulator - azurecosmosemulator. I missed this for ages and it was a real pain!
networks:
  default:
    external: false
    ipam:
      driver: default
      config:
        - subnet: "172.16.238.0/24"

services:
  cosmosdb:
    restart: always
    container_name: "azure-cosmos-emulator-latest"
    hostname: "azurecosmosemulator"
    image: "mcr.microsoft.com/cosmosdb/linux/azure-cosmos-emulator:latest"
    mem_limit: 4GB
    tty: true
    ports:
      - "8081:8081" # Data Explorer
      - "8900:8900"
      - "8901:8901"
      - "8902:8902"
      - "10250:10250"
      - "10251:10251"
      - "10252:10252"
      - "10253:10253"
      - "10254:10254"
      - "10255:10255"
      - "10256:10256"
      - "10350:10350"
    expose:
      - "8081"
    environment:
      - AZURE_COSMOS_EMULATOR_PARTITION_COUNT=11
      - AZURE_COSMOS_EMULATOR_ENABLE_DATA_PERSISTENCE=true
      - AZURE_COSMOS_EMULATOR_IP_ADDRESS_OVERRIDE=172.16.238.246
    volumes:
      - cosmosdb-dog_adopter_console-data:/var/lib/cosmosdb
    networks:
      default:
        ipv4_address: 172.16.238.246

  app:
    container_name: dog_adopter_console
    build:
      context: .
      dockerfile: .Dockerfile
      args:
        - environment=Development
    depends_on:
      - cosmosdb
    environment:
      - COSMOS_CONN=AccountEndpoint=https://azurecosmosemulator:8081/;AccountKey=C2y6yDjf5/R+ob0N8A7Cgv30VRDJIWEHLM+4QDU5DE2nQ9nDuVTqobD4b8mGGyPMbIZnqyMsEcaGQy67XIw/Jw==;
    networks:
      default:
        ipv4_address: 172.16.238.242

volumes:
  cosmosdb-dog_adopter_console-data:
Lets run this bad boy… I mean good boy.
Run your Application
For development iterations the way I tend to work is the following script flow. This limits the potential of the cosmos emulator going down and saves you the pain of waiting for it to come back up.
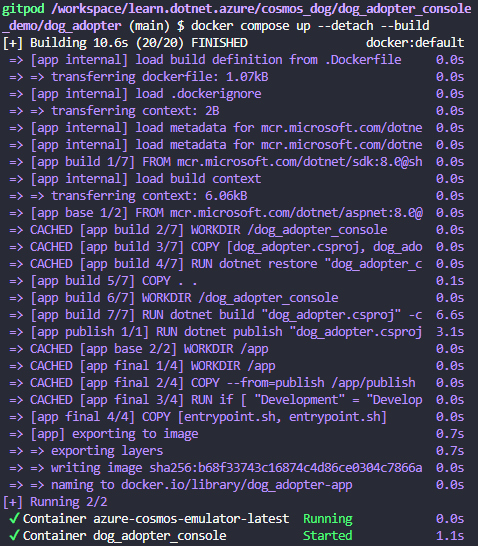
Bring the emulator (if not running) and the app up with the following command, which also builds the app so you can see changes while debugging. The detach command will ensure you don’t cancel the emulator. Repeated as you don’t know how lucky you are to have the emulator running if it already is!!
docker compose up --detach --build
If you get an entrypoint file permissions error remember to run this!
chmod +x entrypoint.sh
You should then see something like this:
You can run this as much as you like safely and always bring in the changes of the app because of the build parameter. To check the logs of your docker environment during debugging you can then run:
docker compose logs --follow
You should see all our rescue dogs getting adopted for a minute in the console app logs as per below:
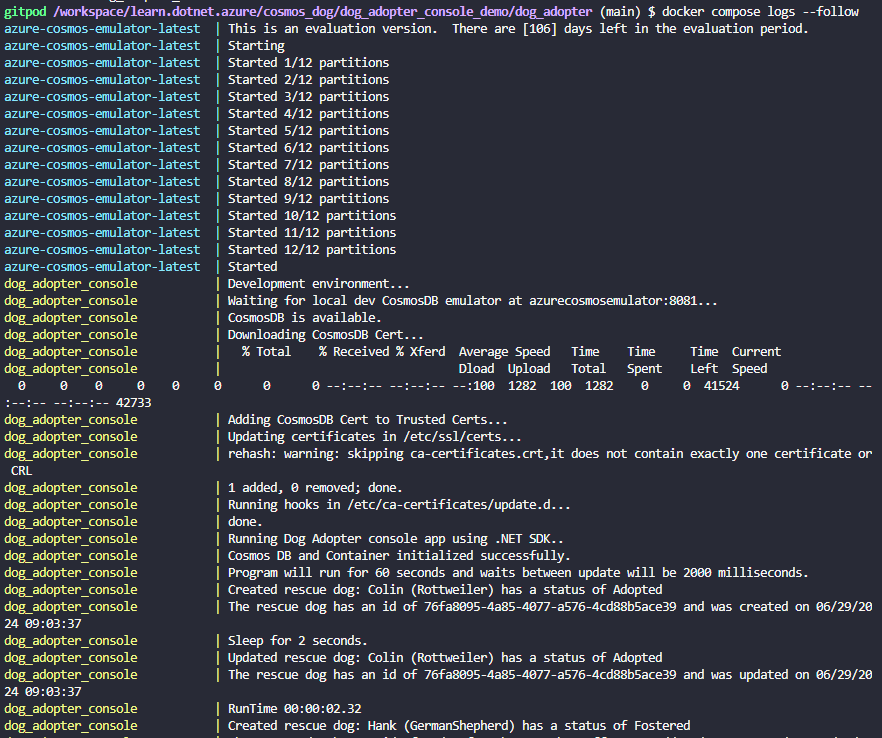
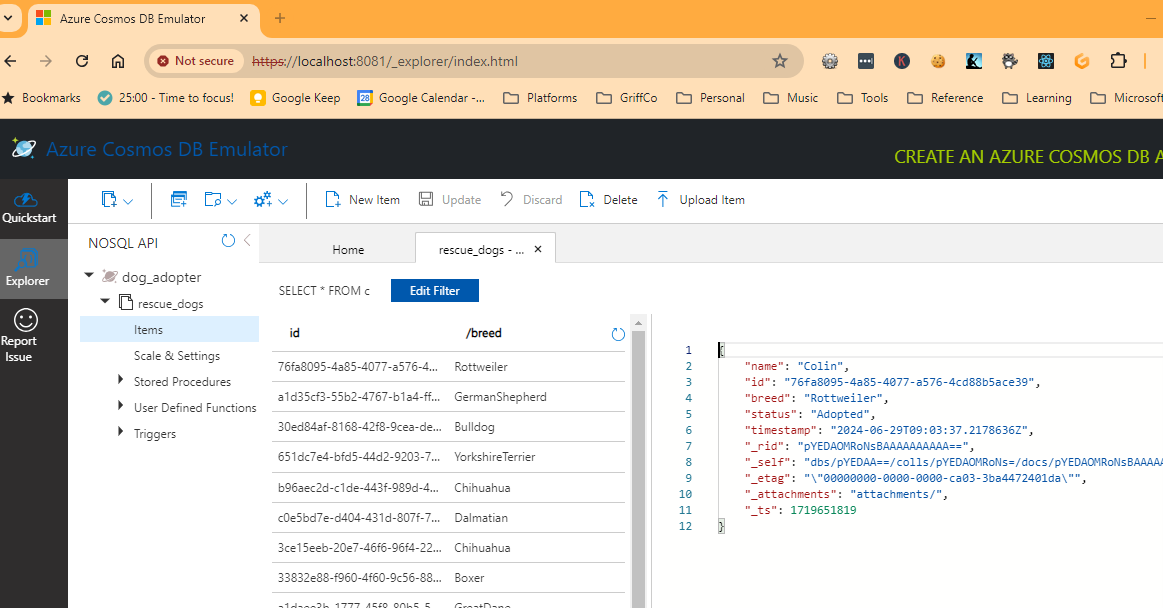
Pretty happy ended up with Colin the random rottweiler getting adopted. You can safely cancel this command (CTRL+C) and the cosmos emulator will still be running. You can also then check the rescue dogs in cosmos explorer at your local host, as we exposed port 8081, via https://localhost:8081/_explorer/index.html to confirm the application is writing to the database. Note the glorious enums converted to strings!
If you really want to bring your environment down and have definitely finished development (did I mention the cosmos emulator is slow to start?), run the following command:
docker compose down
Woof! That was possibly a bit barking mad but we got there in the end. I hope this helps you with your local development with the cosmos emulator in a container. Next I will have a think and either ensure this works in a CI build and deploys to an environment working, or I might have a play with mongo and see what the local experience is like with that. It might be a walk in the park compared to this! (tee hee).