
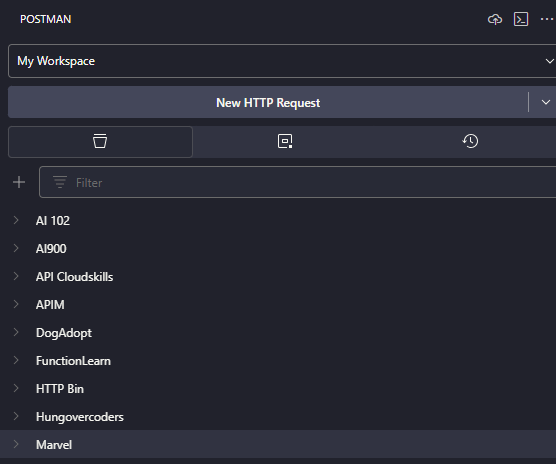
Creating postman collection for Marvel API in VS Code
I am way behind on my blogging given tis the season to be hungover and not coding… Below describes how to create a simple postman collection using the super Marvel API leveraging environments and variables using the postman VS Code extension. This I thought would be a great opportunity for me to see how API endpoints get structured and documented for a public facing API. I then show how you can add some examples, descriptions and tests (using AI no less!) in the Postman app. dataGriff SMASH!
Prerequisites
- Postman Account - This will be so you can use postman and ensure your settings are synced between the application and the VS code extension.
- Postman App - This will provide some more functionality over the VS code extension such as AI assistant for test generation.
- VS Code - This to leverage the postman VS code extension.
- Postman Extension - This to VS code extension we will experiment with.
- Marvel Account - This is to get your own public and private keys so that you can experiment with the Marvel API.
VS Code Extension
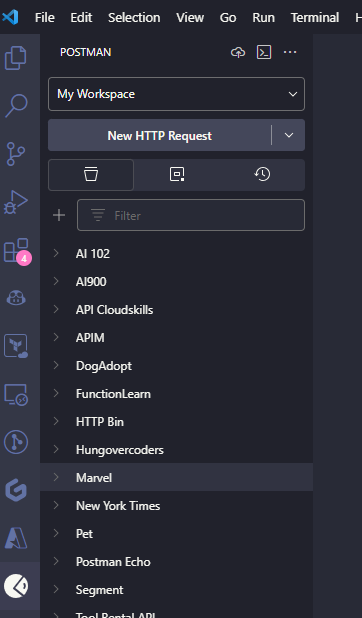
First we’re going to kick the tyres of the postman VS code extension and see how far we can get. If you have installed VS code postman as per the pre-requisites you should see postman available on the left-hand side.
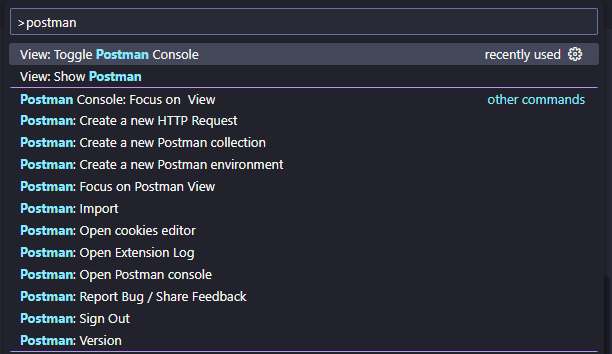
You’ll also notice postman commands in the command palette (CTRL+SHIFT+P).
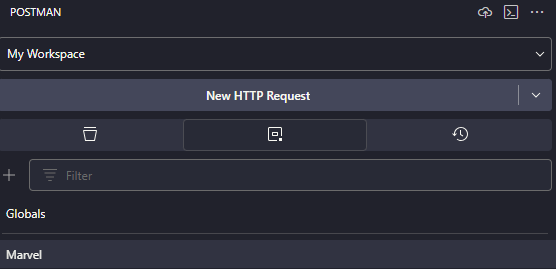
Create a Postman Environment
In the postman extension, select environments, click add and call it “Marvel”.
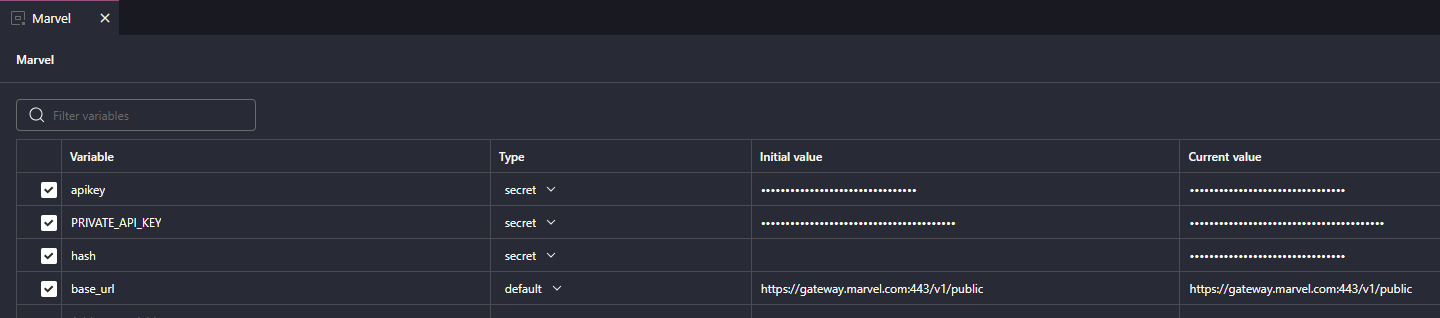
Add two variables:
- apikey: This will be the public api key from your Marvel developer portal.
- PRIVATE_API_KEY: This will be the private api key from your Marvel developer portal. Set both of these to be of type secret.

Add another two variables:
- hash: This wll store the dynamically generated hash of the public key, the private key and the timestamp as per the marvel documentation to authenticate. Set this variable to be secret.
- base_url- This will hold the base url “https://gateway.marvel.com:443/v1/public” of the marvel API so we don’t have to repeat it in our requests.
Create Postman Collection
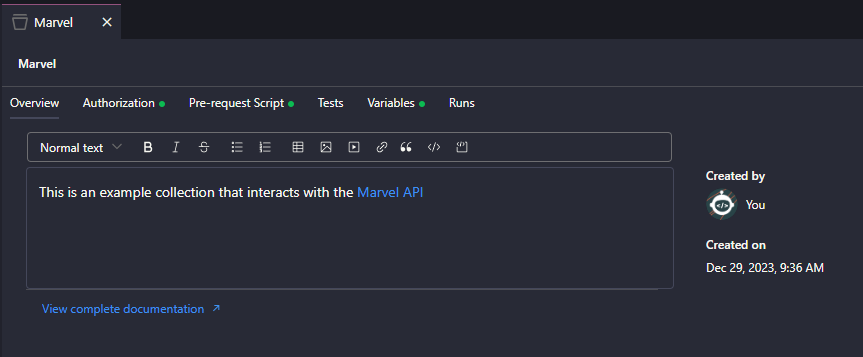
In the postman extension, select collections, click add and call it “Marvel”.
Give the collection a description.
Ensure the collection is set to use the “Marvel” environment. This will ensure all the variables we have set will be inherited into this collection.
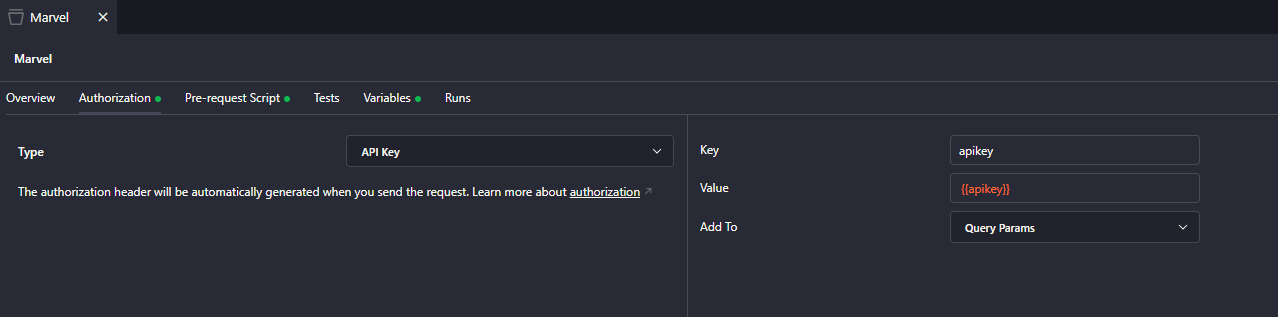
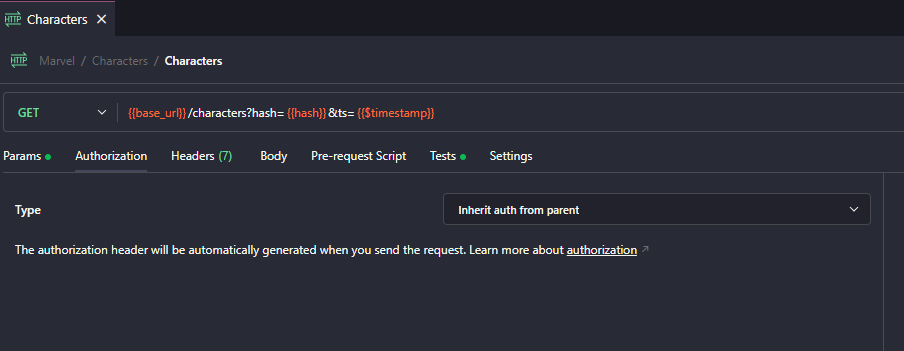
Set the authorisation of the collection to use API Key with the key named apikey, the value to be the which we have already set in the environment, and finally add this to the query params.
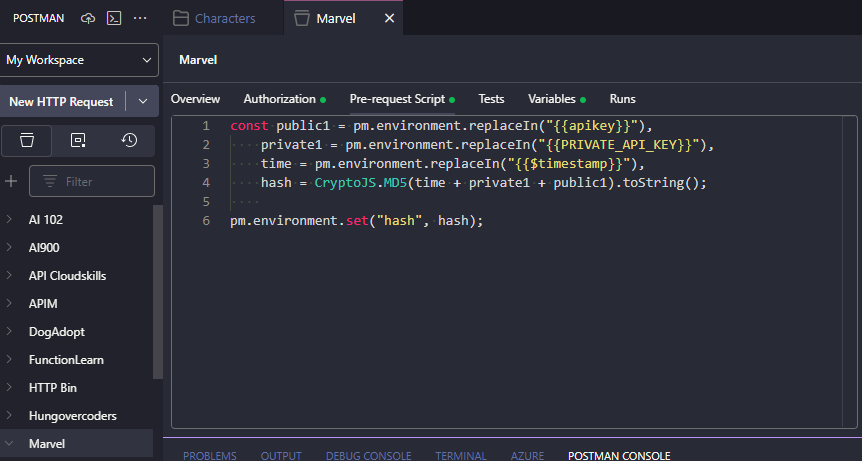
Create a pre-request script that will generate a hash for us based on the public api key, the private api key and the built-in timestamp of the request. This will then set the Marvel environment has variable to be that hash at the point of request. This is a requirement to authenticate with the Marvel API.
Here is the script:
const public1 = pm.environment.replaceIn(""),
  private1 = pm.environment.replaceIn(""),
  time = pm.environment.replaceIn(""),
  hash = CryptoJS.MD5(time + private1 + public1).toString();

pm.environment.set("hash", hash);
This is what it looks like in postman:
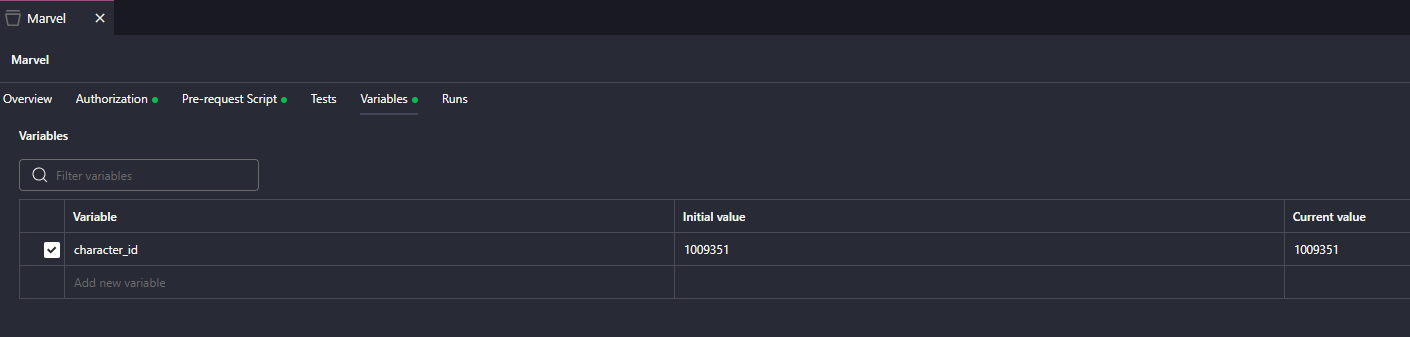
We’re going to set one variable at the collection level and that will be for the character id so that we can easily set it for the single character endpoint URL when calling multiple instances of it later. I have gone for 1009351 which is… HULK SMASH!
Create a Characters Request
First create a folder for “Characters” under your Marvel collection. This will just make your collection a little bit neater and we would likely want to keep comics and stories requests separate for ease of use.
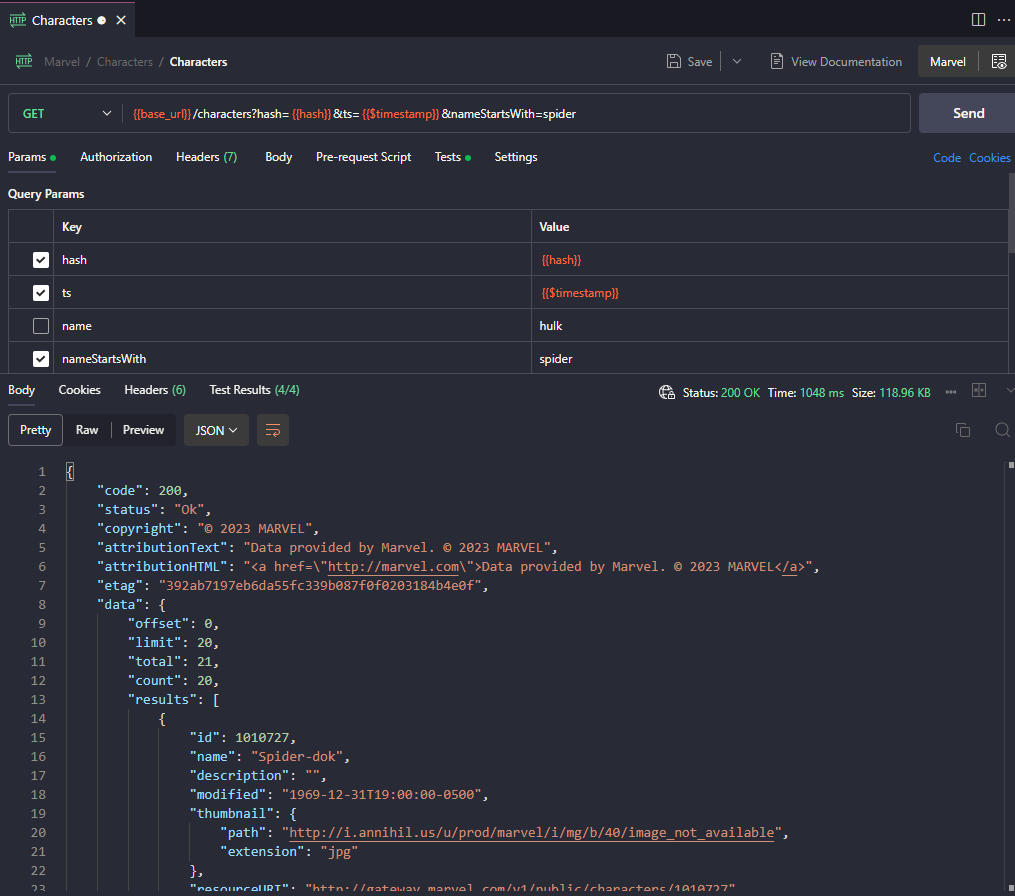
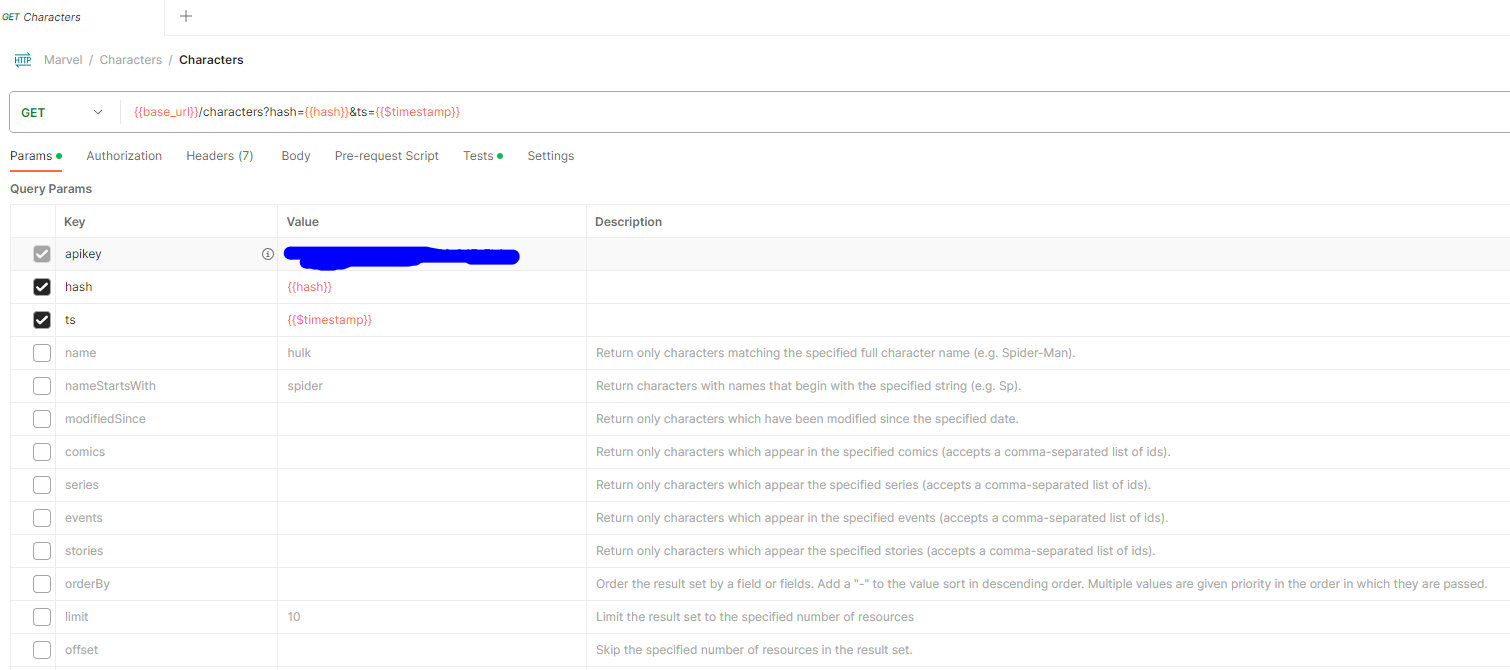
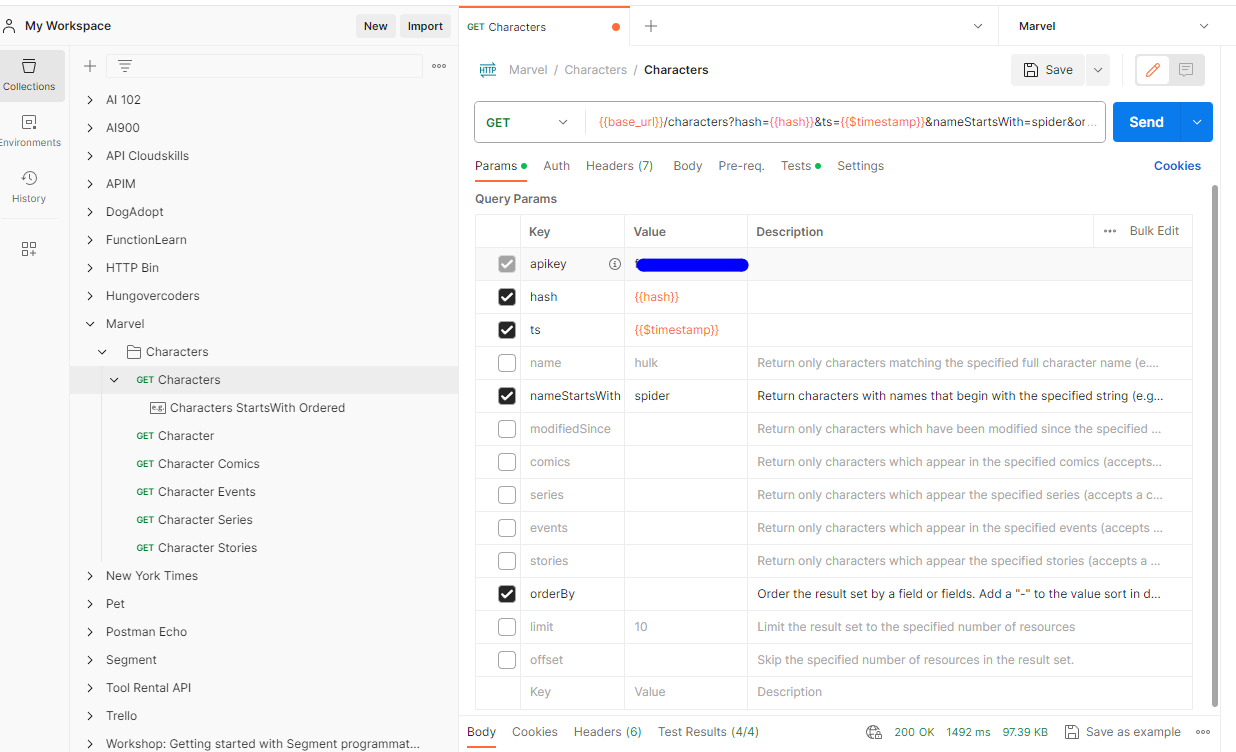
Add a GET request with the URL being {{base_url}}/characters?hash={{hash}}&ts={{$timestamp}}. This will inherit the base_url and hash variables from our environment whilst also leveraging the built-in timestamp variable. We can also add each of the params documented in the characters API but not tick them so they’re not used yet.
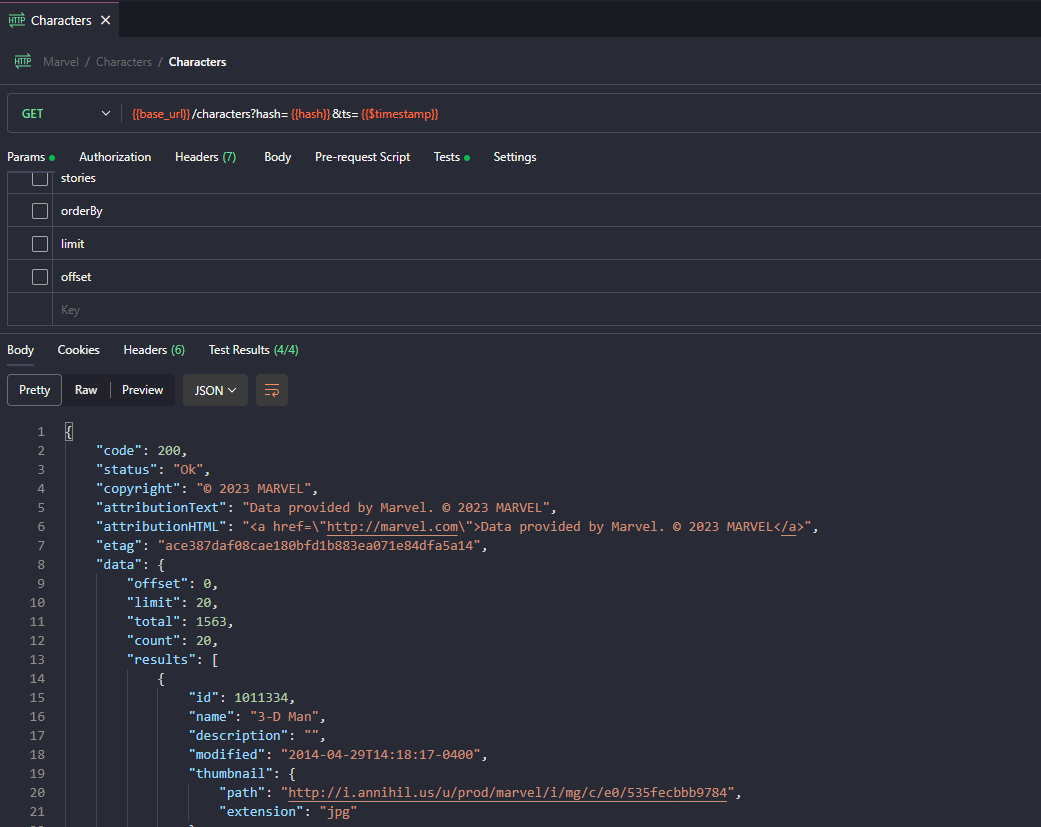
The apikey is also added as a request parameter. This is because in the Authorization section we set “Inherit auth from parent” which in the collection we know is the apikey set as a request parameter.
All of this this ensures that the hash is consistent with the public api key and the timestamp query parameters that constructs it, along with the private key.
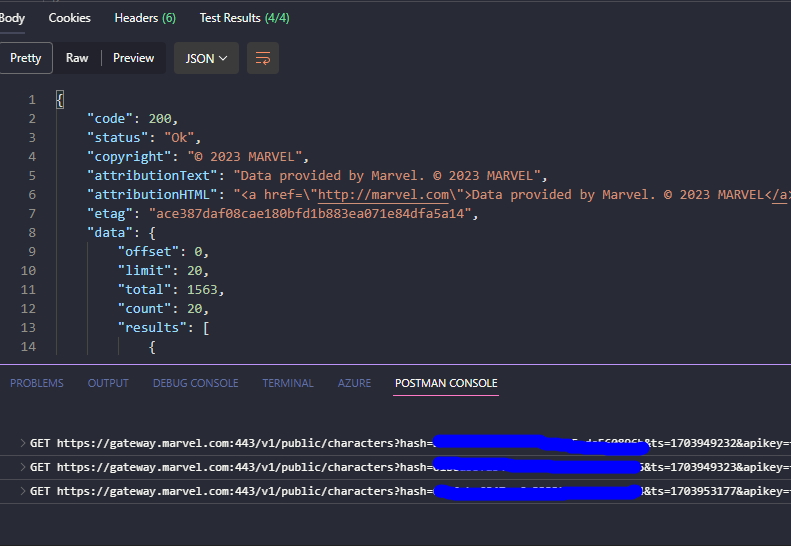
You can also debug your requests by turning the Postman console on (CTRL+SHIFT+P).

You can then see all the logs and statuses in the Postman console below the request.
Now try another request with the nameStartsWith parameter set to “spider”. You will see in the request response that only characters that begin with spider are returned.
Create a Character Request
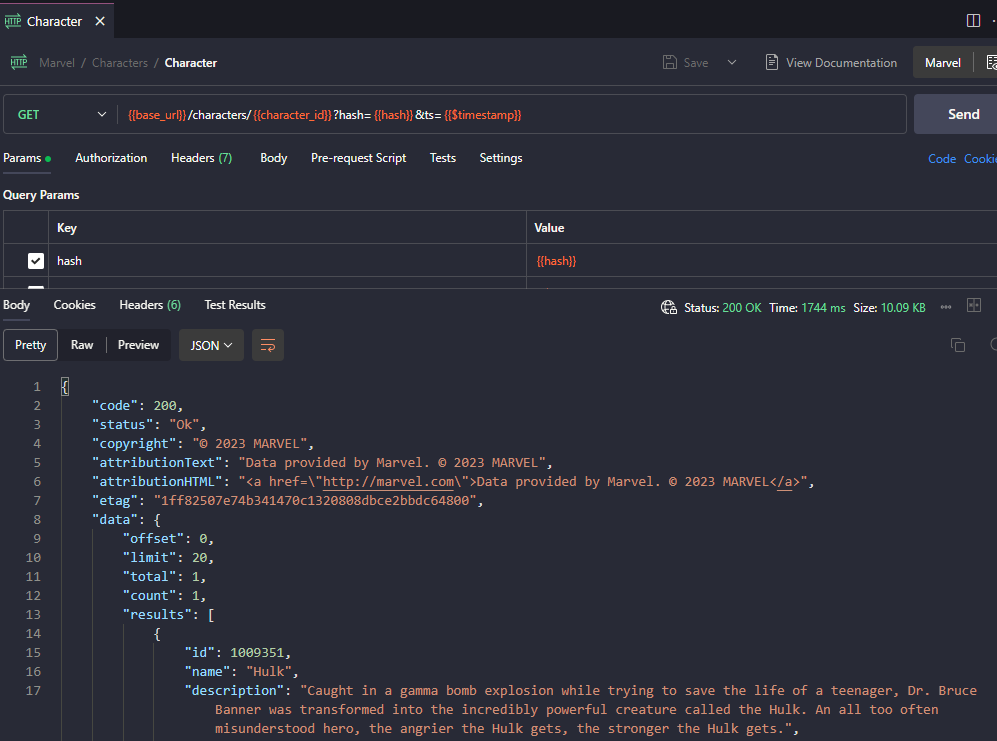
Add a GET request with the URL being {{base_url}}/characters/{{character_id}}?hash={{hash}}&ts={{$timestamp}}. This will again inherit everything from the environment and parent as before. The only difference is it has a “character_id” variable as part of the URL which will only return the hulk. Send the request and see the response is indeed the hulk!
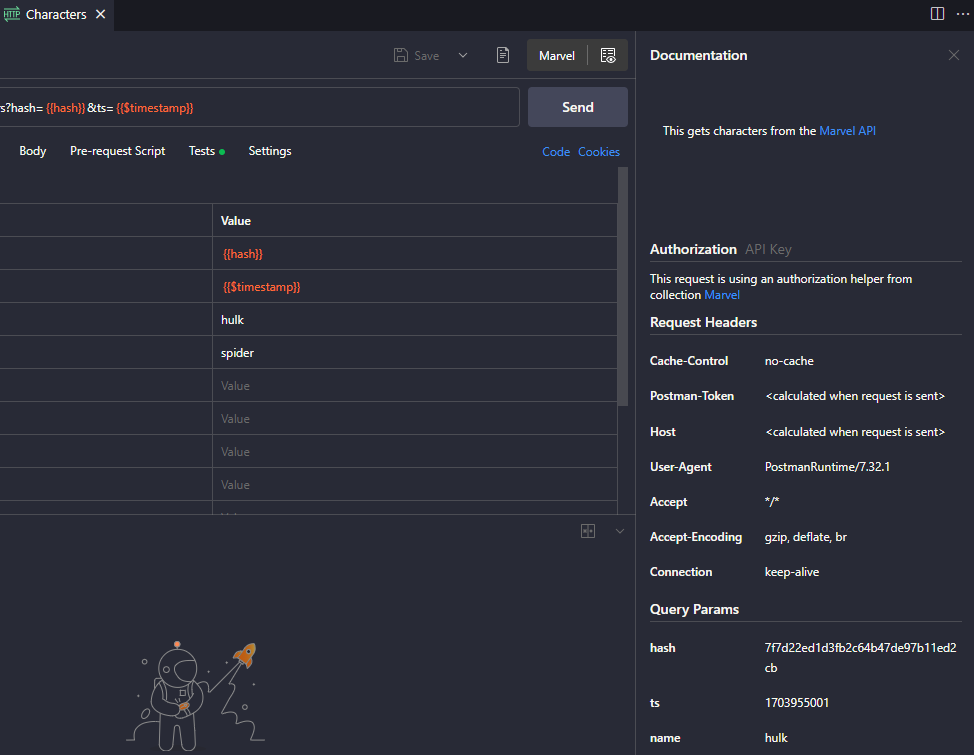
Documentation
You can view documentation at the request level in the VS code extension, but you cannot edit things like query parameter descriptions.
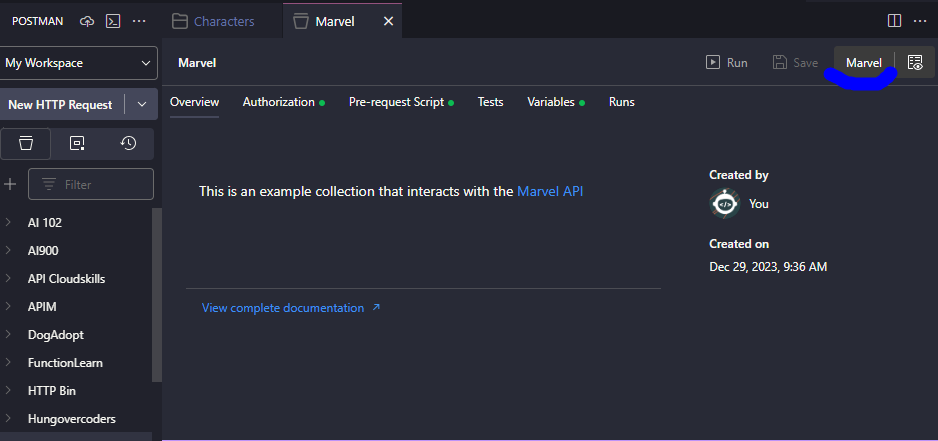
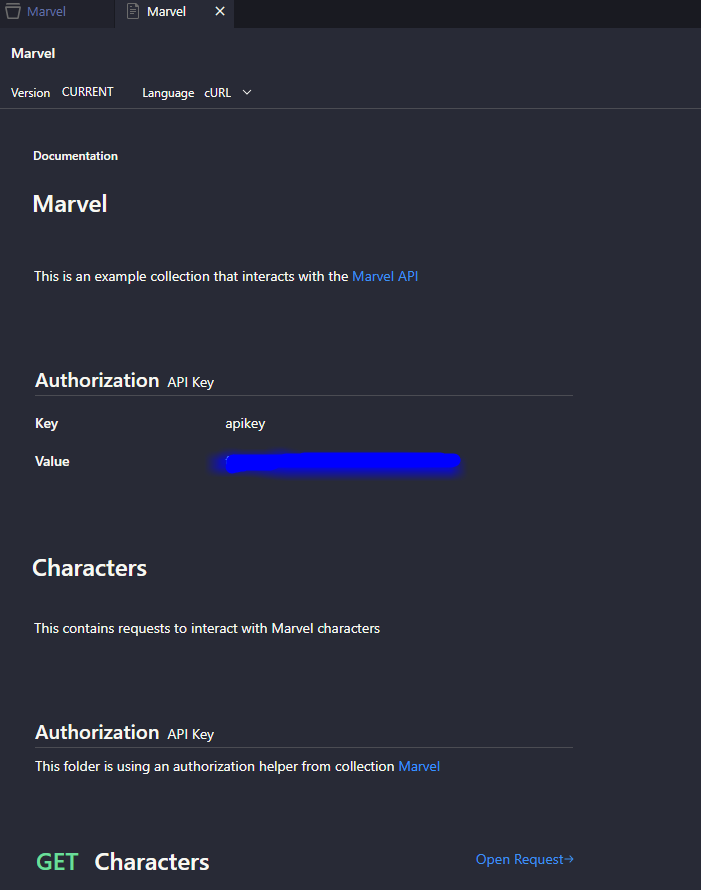
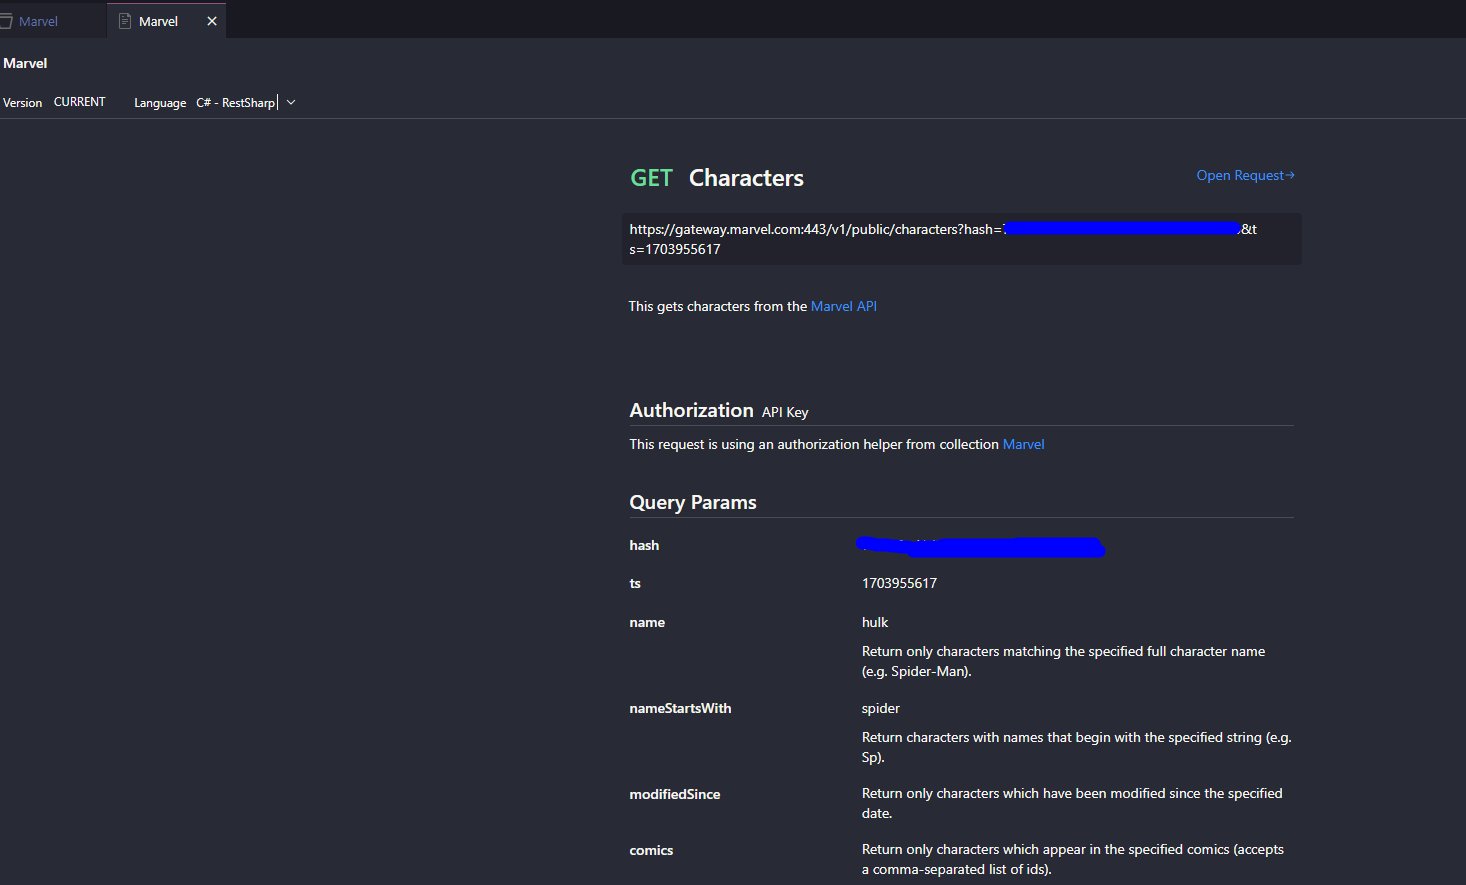
You can also view documentation at the collection level.
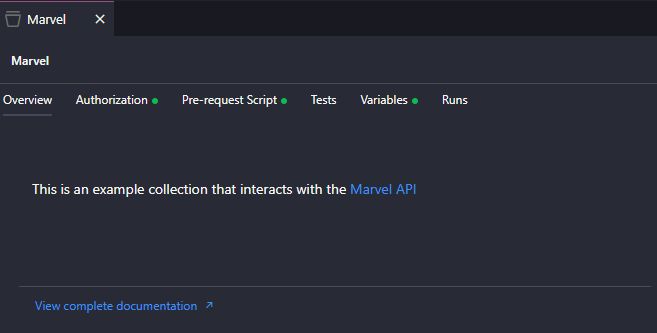
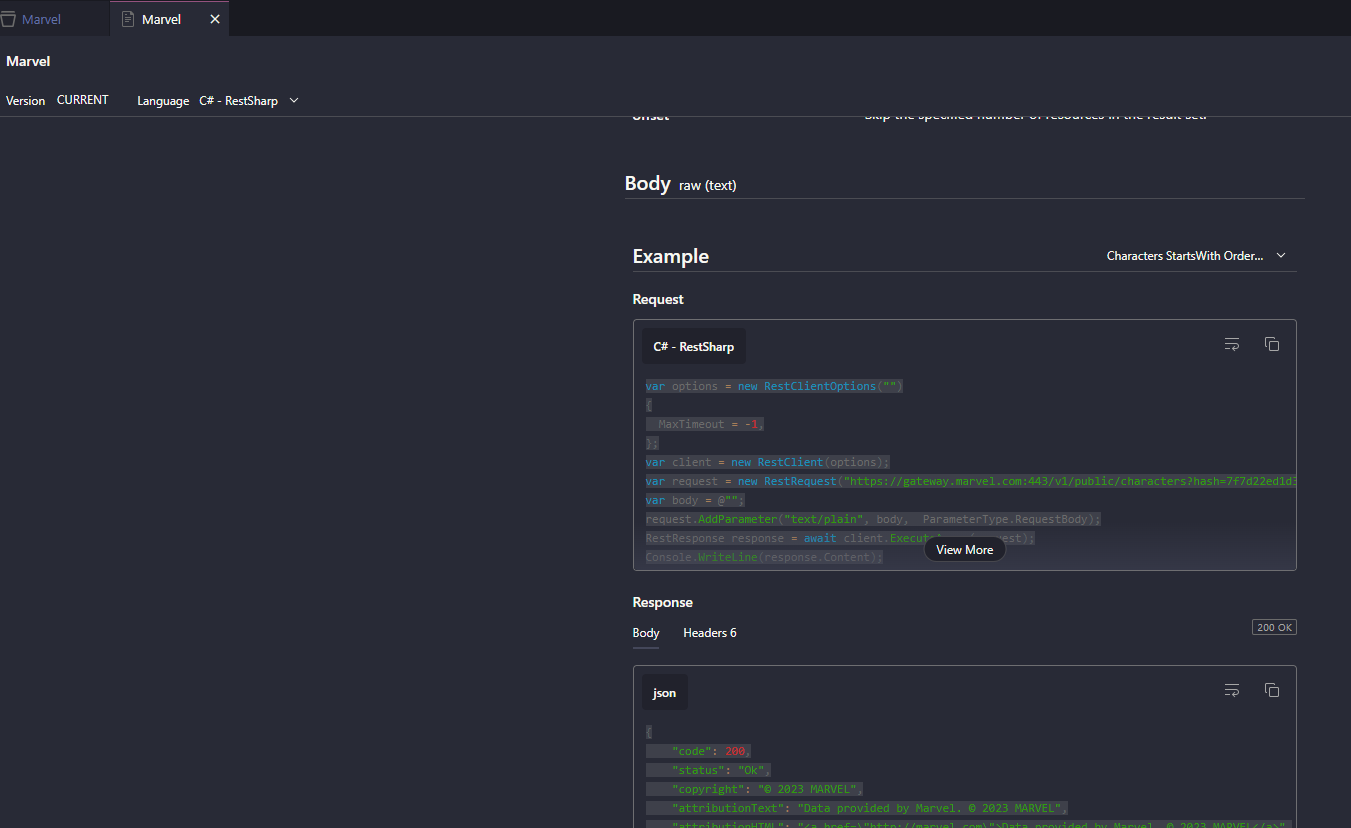
This also allows you to pick a particular language for your API interactions too as a quick start for your application code…
However as I couldn’t add examples in the VS Code extension which allows for this feature to kick-in, this was the first reason for me to go back to the postman app. I also wanted to edit documentation at the query parameter description level so this again led me to venturing back into the Postman app. Fear not we will be back to see it all synced up in VS code but we’ll need to go into the postman app for some documentation, examples and AI generated testing!
Postman App
I was hoping I’d never have to leave VS code ever again, and in the main this is true. I found the below at least at this point were easier to achieve in the postman app. I’ll definitely be keeping an eye on this in the future to see if I never do have to leave VS code…
Add Descriptions
First I added descriptions to the characters API query parameters by taking them from the Marvel API docs.
Add Example
I then generated a request with “Spider as the first part of the name and simply said save this as an example. This is great for documentation and will allow me to generate language specific code Quick Starts! We’ll look at this in VS code when we revisit the documentation in the last part of this post.
Add Tests (Using Postman AI)
While I was in the postman app I was distracted by tests and the “Postbot”… Could I yet again handover my lack of knowledge to AI to get me going??? Yes I could! I asked it to “Add tests to this request” and it generated four simple tests. The only one I had to edit to get them all to pass (4/4) was the description property as this was more often than not blank in the API response.
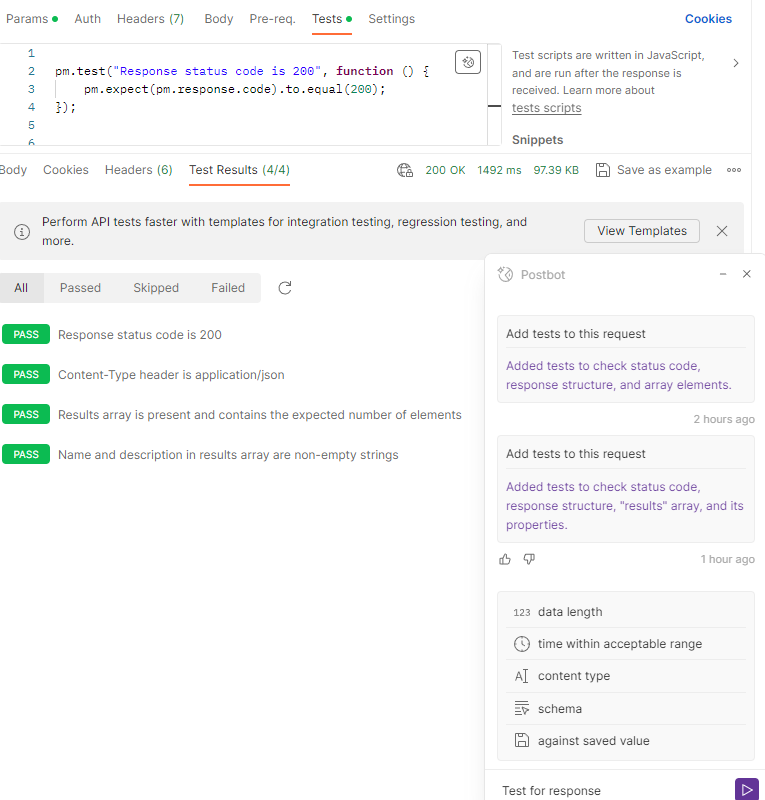
pm.test("Response status code is 200", function () {
  pm.expect(pm.response.code).to.equal(200);
});

pm.test("Content-Type header is application/json", function () {
  pm.expect(pm.response.headers.get("Content-Type")).to.include(
    "application/json",
  );
});

pm.test(
  "Results array is present and contains the expected number of elements",
  function () {
    const responseData = pm.response.json();

    pm.expect(responseData).to.have.property("data");
    pm.expect(responseData.data).to.have.property("results");
    pm.expect(responseData.data.results).to.be.an("array");
    pm.expect(responseData.data.results).to.have.lengthOf.at.least(1);
  },
);

pm.test(
  "Name and description in results array are non-empty strings",
  function () {
    const responseData = pm.response.json();

    pm.expect(responseData.data.results).to.be.an("array");
    responseData.data.results.forEach(function (result) {
      pm.expect(result.name)
        .to.be.a("string")
        .and.to.have.lengthOf.at.least(1, "Name should not be empty");
      //pm.expect(result.description).to.be.a('string').and.to.have.lengthOf.at.least(1, "Description should not be empty");
    });
  },
);
VS Code Extension Revisited
When I now go back into the VS code extension I can see that the documentation has been added to the query parameters.
I can also go to the collection documentation and get starter code for my example requests in a range of languages! Sweet.
This has been a great introduction for me into a well formed API and given me a lot of thought of how I can make my own hungovercoder APIs accessible and usable in the future.