
Data Layer with Javascript
I wanted to make some local breweries available to the browser client side so I can then use this in tagging exploits. Below talks through how I can make these alcoholic hotpots available in the data layer!
- PreRequisities
- What is the Data Layer?
- Setup a Basic Web Page with DataLayer
- Observe the Values of the DataLayer
- Create a GTM Data Layer Variable
- Debug Data Layer
PreRequisities
- You can do this with notepad but I use VS Code as my IDE and text editor.
- I recommend the live server VS code extension to easily test running web pages in a browser.
- A google tag manager container setup for testing.
What is the Data Layer?
The data layer is a Javascript object that stores key value pairs client side in a browser. You can access this in chrome for example by going to developer tools, going to the console, typing in dataLayer on a page that has this object implemented, and hey presto there’s the data layer! This object is commonly used to push data into web analytics tools such as google tag manager for insights. In google tag manager implementations it will be referred to as dataLayer.
Setup a Basic Web Page with DataLayer
Its quite straight forward to setup a basic data layer. You first initiate an empty dataLayer at the start of your script. Then you can initiate custom events with dataLayer.push. It is important to always add an event value with the data layer push event so its easier for any users of the data to understand the context of any other labels. Below shows a basic webpage with some buttons that push the brewery name into the dataLayer on a click event. Copy and paste this into a breweries.html file.
<head>
  <script>
    window.dataLayer = window.dataLayer || [];
  </script>
</head>
<body>
  <h1>Breweries</h1>
  <button
    onclick="window.dataLayer.push({'event': 'Click','brewery': 'Tiny Rebel'});"
  >
    Tiny Rebel
  </button>
  <button
    onclick="window.dataLayer.push({'event': 'Click','brewery': 'Crafty Devil'});"
  >
    Crafty Devil
  </button>
</body>
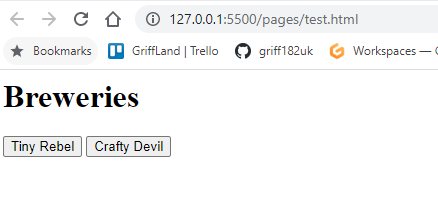
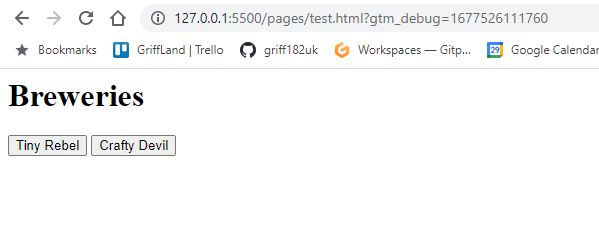
If you are using VS code open this with live server or if you are using a simple text editor just open the file in your favourite browser. You should see a simple web page with two buttons.
Observe the Values of the DataLayer
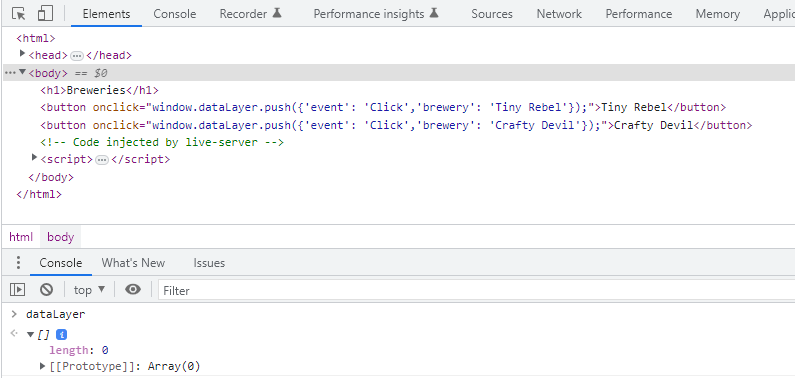
Now to observer the values in the data layer. Open your developer tools and in the console type dataLayer and then press return. You should at first see an empty object as below.
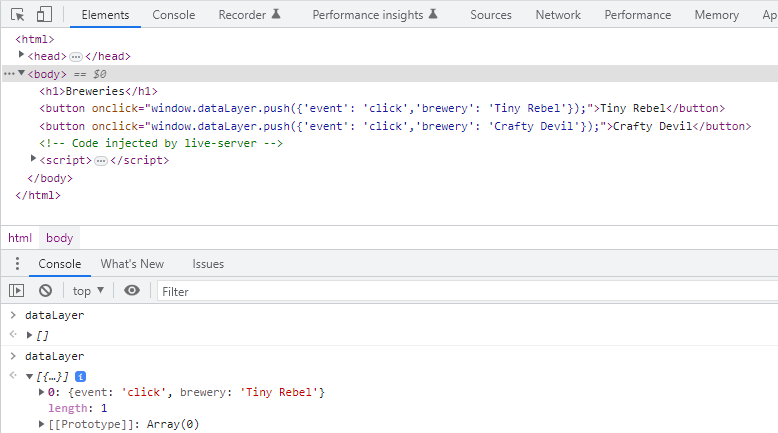
Now click a button and type in dataLayer again, press return and you should see a brewery value available in the dataLayer as a result of a click event. This is now available to be use in tag manager tools.
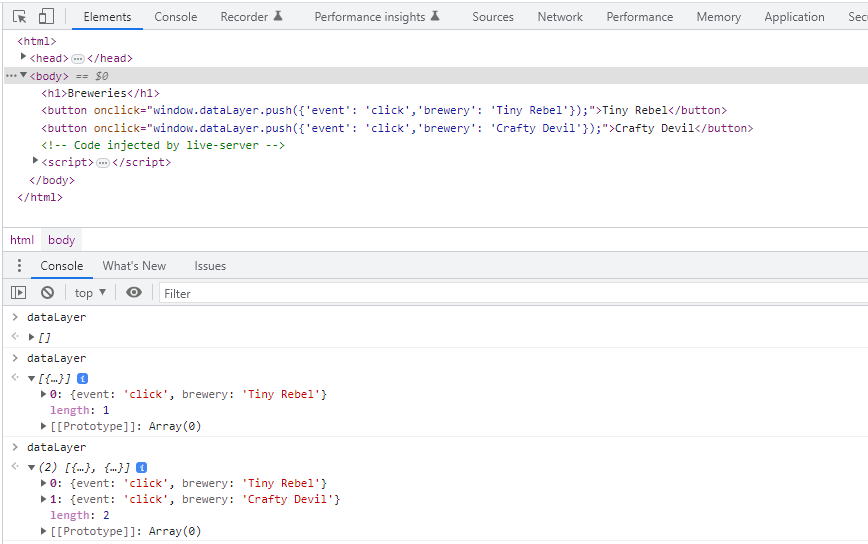
If you click the other button and repeat the process you should then see the new brewery value and another click event.
Create a GTM Data Layer Variable
Go to your GTM account and the relevant container. First you’ll need to add the GTM container code to your HTML page. You can get this from Admin > Instal Google Tag Manager. When you add the code to your HTML make sure to put the head script below the dataLayer script.
<head>
  <script>
    window.dataLayer = window.dataLayer || [];
  </script>
  <!-- Google Tag Manager -->
  ...
  <!-- End Google Tag Manager -->
</head>
<body>
  <!-- Google Tag Manager (noscript) -->
  ...
  <!-- End Google Tag Manager (noscript) -->
  <h1>Breweries</h1>
  <button
    onclick="window.dataLayer.push({'event': 'click','brewery': 'Tiny Rebel'});"
  >
    Tiny Rebel
  </button>
  <button
    onclick="window.dataLayer.push({'event': 'click','brewery': 'Crafty Devil'});"
  >
    Crafty Devil
  </button>
</body>
Now in the container add a data layer variable called “brewery”. This will capture the brewery value you pushed into the dataLayer.
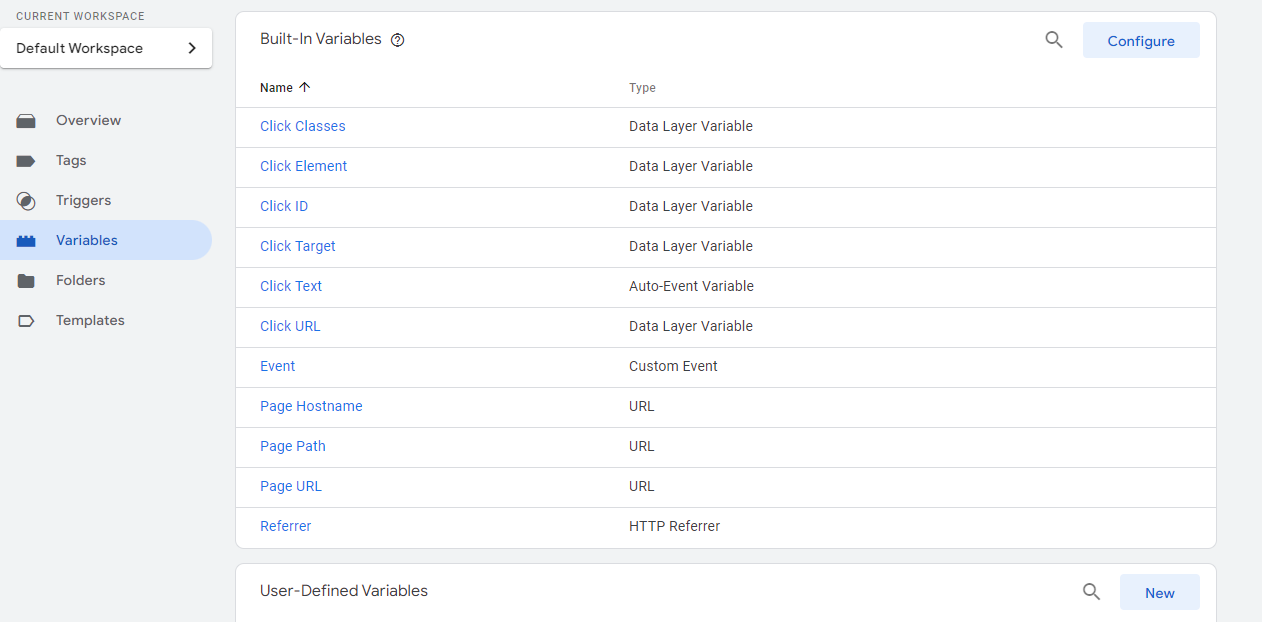
Configure the new variable as below.
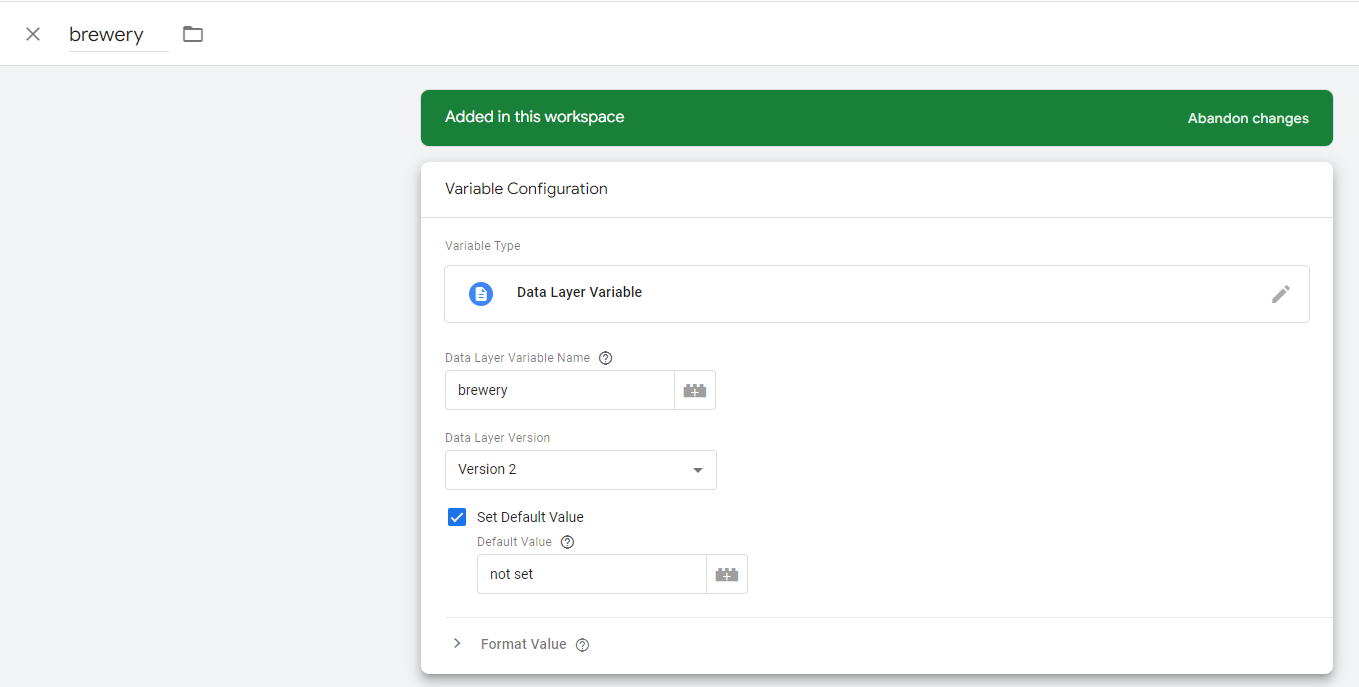
You should then see a new data layer variable called “brewery” that is a data layer variable.

Debug Data Layer
In your tag manager container preview your changes.
When asked for the URL use the one that is running on your local server e.g. http://127.0.0.1:5500/pages/test.html. When this opens in the debug window you will see that the URL has a gtm parameter in the URL showing it is debugging.
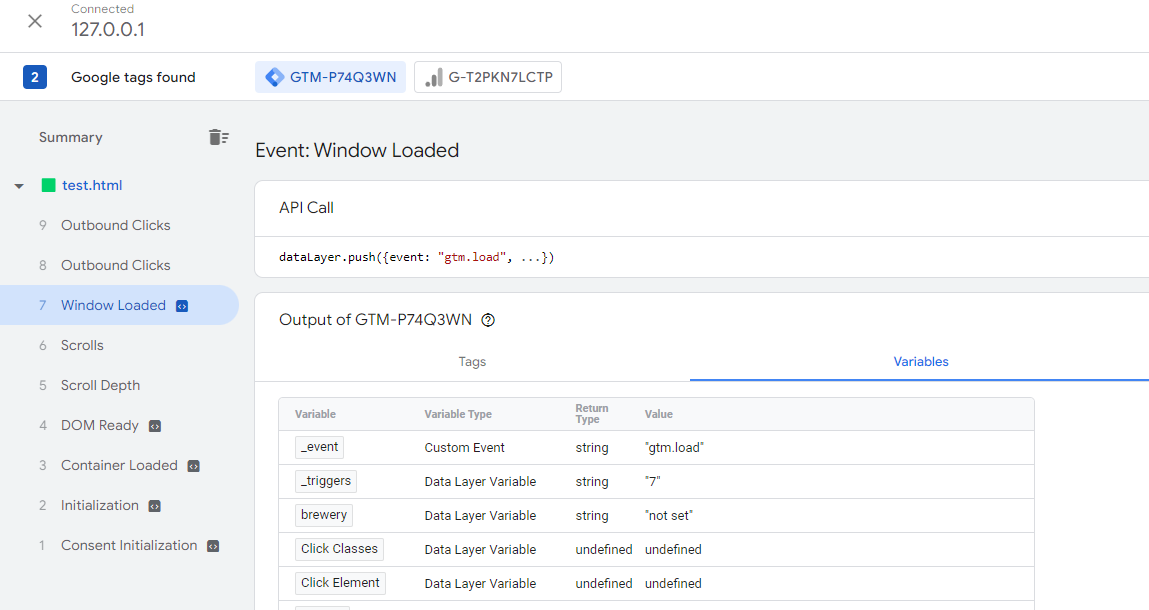
If you look at tag assistant under variables you will see that _event is gtm.load and the brewery is “not set” as per the default we gave it.
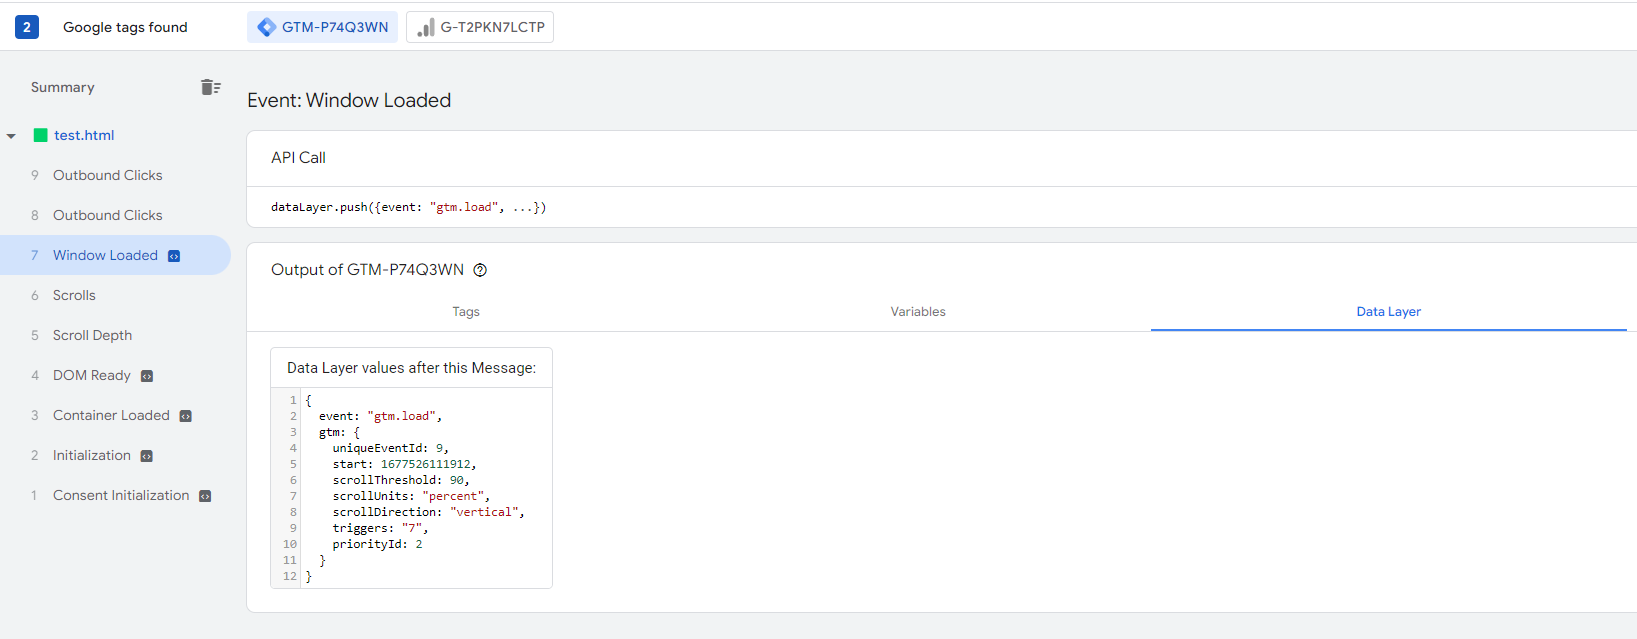
The dataLayer tab reflects this as well.
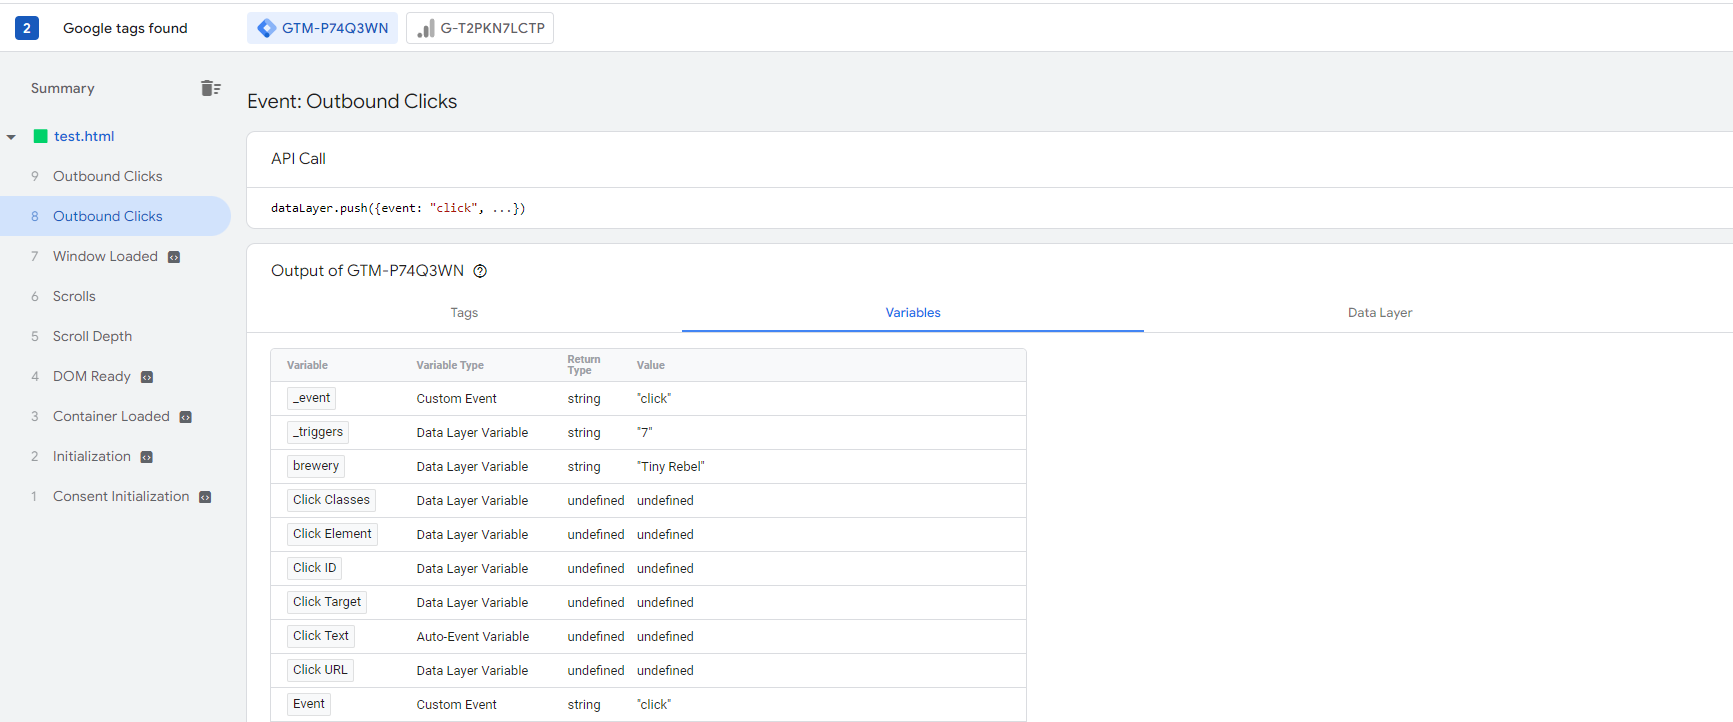
If we go back to the debug page and click a button we will see the values update to what we have set in the data layer. The event is click and the brewery value is what we expect.
If you are happy with the behaviour you can then go back to your GTM container and submit the changes.