
Creating a Beer Form with React
With the festive season upon us I have been more hungover than coder recently… However I was able to do this quick react course by NetNinja and can now show you how to start creating beers in a simple single page app!
- PreRequisites
- Codebase End State
- Setup Boilerplate React App
- Quick File Tour
- Example Beer Data
- Adding Not Found
- Adding NavBar
- UseFetch and Beer List
- Homepage
- Create a Beer
- BeerDetails
PreRequisites
- You”ll need a decent IDE - I use visual studio code.
- You”ll need the latest version of NodeJs installed. You can check if you already have this installed using the command:
node -v
The following will also make your life easier…
- You’ll want to install react snippets and ES7 for VS code.
- You’ll want to get react dev tools too for chrome, firefox or edge.
- Use emmet abbreviations in VS code to cut down some coding time. In VS code settings update the emmet include languages to look like this.
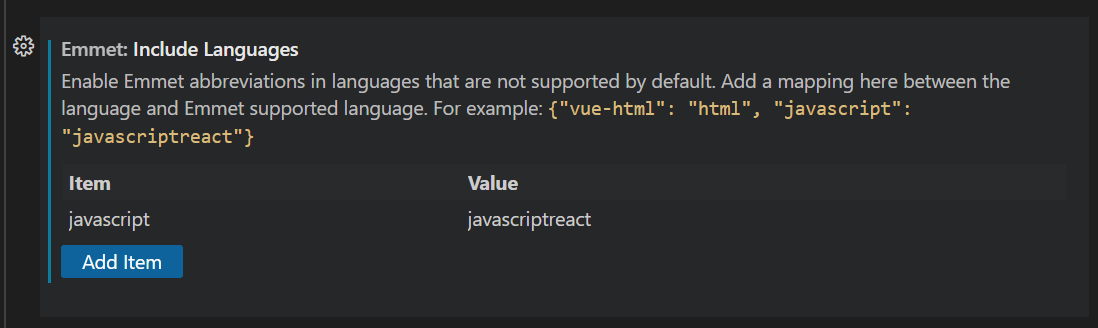
If you then type div.test in VS code and then press tab you get the following:
<div className="test"></div>
Codebase End State
We are going to use some boiler plate command line tools to create our file structure, but lets use this a guide to know what our rough end state will be and which are the most important files for this demo.
beer-demo
│   README.md
|   .gitignore
|   package-lock.json
|   package.json
│
└───data
│   │   db.json
node_modules
│   │   *
└───public
│   │   index.html
└───src
│   │   App.js
│   │   BeerDetails.js
│   │   BeerList.js
│   │   Create.js
│   │   Home.js
│   │   index.css
│   │   index.js
│   │   Navbar.js
│   │   NotFound.js
│   │   useFetch.js
Setup Boilerplate React App
Setting up a new react app is easy using create-react-app {app-name}. In your app directory type in the following code and press return:
npx create-react-app beer-demo
cd beer-demo
npm start
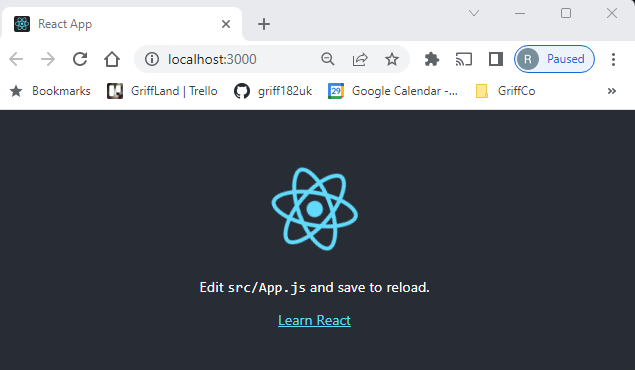
At the end of this you should have a the boilerplate directory file structure setup (except data) and a react app running at localhost:3000.
The gitignore will already have the node_modules removed from source control. This contains all the packages required to run the react app and so is quite bulky. If you ever need to start these modules afresh, say when synching with your git repo anew, just run:
npm install
It will then pick up all the packages required to install from Packages.json in the app directory.
Note: Its worth running the below now too as I found sometimes I got an error without running it explicitly:
npm install react-router-dom --save
Quick File Tour
Public Folder
The public folder contains the index.html file that is the main page of your web application. This file is incredible simply however as it contains this piece of html:
  <title>React App</title>
  </head>
  <body>
    <noscript>You need to enable JavaScript to run this app.</noscript>
    <div id="root"></div>
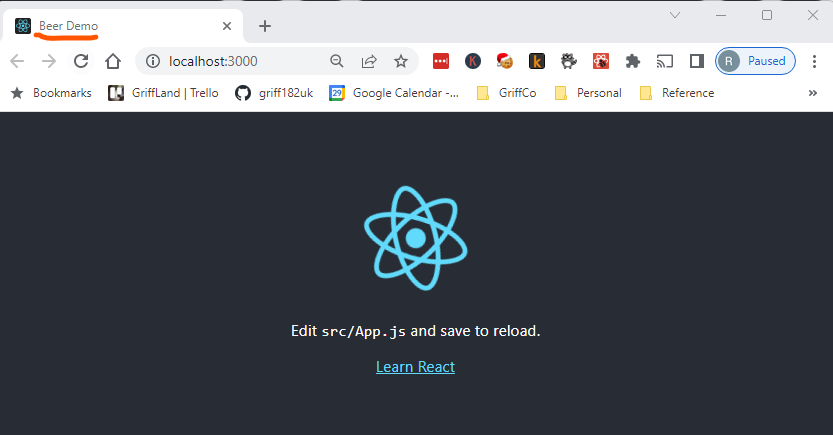
The div referencing the root id is what then calls our react javascript files in the src folder that contains all of our application logic. To simply rename the tab of the webpage, change the title to be “Beer Demo” instead of “React App”.
<title>Beer Demo</title>
You should then see the tab renamed:
This gives you an idea of the changes you can make to this file to update images etc also contained in this directory. The robots.txt file is dictating what search engine crawlers can access your site. This outside the scope of this blog buy you can find an example here.
Src Folder
The src folder contains all the react and javascript application logic. The main ones we are interested in are:
- index.css - This contains the main styling for the app. We can have individual css files for each app component but to make this easier we’ll just use this file.
- index.js - This contains the div root entry point for the public/index.html and immediately references app.js using
<App />. - App.js - This contains the main routes to each component of the app. We’ll be adding more of these to our beer form below.
Example Beer Data
To make our app testing easier we’re going to create some test beer data and leverage Json Server. This allows us to simulate a local fake API source for testing!
First install JSON Server (in another command terminal if you already have the react app running) in the directory of your react app:
npm install json-server
Then create a data directory and add a db.json file to this. Paste in the following beer data:
{
  "beers": [
    {
      "name": "Mike Rayer",
      "brewer": "Crafty Devil",
      "strength": 4.6,
      "flavours": null,
      "id": 1
    },
    {
      "name": "Stay Puft",
      "brewer": "Tiny Rebel",
      "strength": 4.8,
      "flavours": null,
      "id": 2
    },
    {
      "name": "beer",
      "brewer": "mikabrew",
      "strength": "5.7",
      "flavours": "",
      "id": 3
    }
  ]
}
Now in the second command terminal again, run the following (port 8000 specified to ensure runs on different port to react app on 3000):
npx json-server --watch data/db.json --port 8000
If you navigate to localhost:8000/beers you should see a list of the beers above returned showing that the API is working! You can even specify localhost:8000/beers/1 to pick a specific beer, perform POST, DELETE and anything else you might do with an API. You can see all the logs in the command line window that has this open too. This is going to be really useful for the creation of our beer demo react application which will interact with this test API.
Adding Not Found
We’re going to add the simplest page to our application first which will cater for all the placeholder pages and functionality that won’t exist yet - the NotFound.js. In your src folder add the file NotFound.js and add the following code:
import { Link } from "react-router-dom";

const NotFound = () => {
  return (
    <div className="not-found">
      <h2>You seem to be lost or drunk...</h2>
      <p>That page cannot be found</p>
      <Link to="/">Go to the homepage...</Link>
    </div>
  );
};

export default NotFound;
This creates a NotFound function with a className of “not-found”, with the latter being used to generate styling. Within this function is the simplest html we’ll create that just notifies the user the page does not exist and provides a link to the homepage. You’ll notice the file contains an import for functions it needs from other packages, in this case Link from react-router-dom. It also contains an explicit export at the bottom for NotFound, which means that this function can be imported and utilised by other files. We will see this pattern throughout our react files.
Update the app.js file to look like the following, which will send every page to the Not Found page, including the home page as it doesn’t exist yet!
import { BrowserRouter as Router, Route, Routes } from "react-router-dom";
import NotFound from "./NotFound";

function App() {
  return (
    <Router>
      <div className="App">
        <div className="content">
          <Routes>
            <Route path="*" element={<NotFound />} />
          </Routes>
        </div>
      </div>
    </Router>
  );
}

export default App;
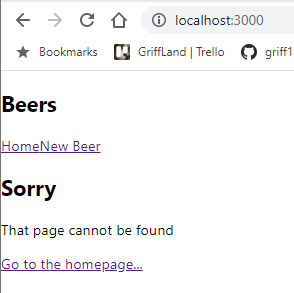
You can see we are using Routes to route parts fo the application specific components, in this one we are sending all paths to the NotFound page. The order of these <Route> tags is important with the order setting precedence, which is why it is important that the NotFound should appear at the bottom. You should see no matter what path you go to in the app, you always get the below:
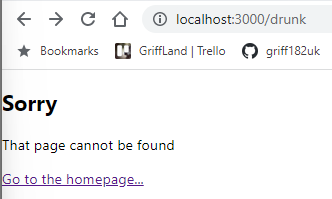
Then clicking on Go to the homepage will display the same page, but take you to the root path http://localhost:3000/.
Adding NavBar
We’re now going to add a navigation bar component that will take us home or allow us to create a new beer. I’m not going to lie it’s all going to look like we designed this drunk during an earthquake at the moment, but we’ll sort out styling at the end.
Add a new file called NavBar.js to the src directory and add the following code:
import { Link } from "react-router-dom";

const Navbar = () => {
  return (
    <nav className="navbar">
      <h1>Beers</h1>
      <div className="links">
        <Link to="/">Home</Link>
        <Link to="/create">New Beer</Link>
      </div>
    </nav>
  );
};

export default Navbar;
This again adds a new component with class for styling called “navbar”. It then injects some html with a Beers heading and some links to the homepage (which is yet to exist) and a create beer page (also yet to be created).
Then update the app.js to look like this to include the navbar:
import Navbar from "./Navbar";
import { BrowserRouter as Router, Route, Routes } from "react-router-dom";
import NotFound from "./NotFound";

function App() {
  return (
    <Router>
      <div className="App">
        <Navbar />
        <div className="content">
          <Routes>
            <Route path="*" element={<NotFound />} />
          </Routes>
        </div>
      </div>
    </Router>
  );
}

export default App;
Your app should now look like the following disgusting page, but both the “Home” and “New Beer” links should change the url paths appropriately when clicked on.
UseFetch and Beer List
Before we add our home page component we need to add 2 “behind the scenes” components that will allow us to handle data using a fetch hook (UseFetch.js file) and then list all our beers (BeerList.js file).
UseFetch
UseFetch is going to be our swiss-army function that allows us to interact with any API url we pass into it. It handles three properties:
- Data - So this will be the body we receive from an API, in this applications case it will be beers.
- IsPending - Allowing us to handle whether the data is in the process of being retrieved meaning we can display appropriate messages like “waiting…”.
- Error - We can capture errors in this property and display it appropriately.
Each of these is handled in “useState” at the top of the code which allows us to set each constant and handle its state.
Add a new file called useFetch.js to your src directory and add the following code:
import { useEffect, useState } from "react";

// This is a custom hook we made
const useFetch = (url) => {
  // state
  const [data, setData] = useState(null);
  const [isPending, setIsPending] = useState(true);
  const [error, setError] = useState(null);

  useEffect(() => {
    const abortCont = new AbortController();

    fetch(url, { signal: abortCont.signal })
      .then((res) => {
        if (!res.ok) {
          // error coming back from server
          throw Error("Could not fetch the data for that resource.");
        }
        return res.json();
      })
      .then((data) => {
        setIsPending(false);
        setData(data);
        setError(null);
      })
      .catch((err) => {
        // auto catches network / connection error
        if (err.name === "AbortError") {
          console.log("fetch aborted");
        } else {
          setIsPending(false);
          setError(err.message);
        }
      });

    return () => abortCont.abort();
  }, [url]);

  return { data, isPending, error };
};

export default useFetch;
To see further details on this UseFetch function see this section of the course provided by the excellent Net Ninja.
Beer List
We now need to add something that will nicely display a list of beers once our homepage passes the data into it. The following creates a list of beers from a beers object passed into it and displays it appropriately in html. To do this add a file called BeerList.js to your src directory and add the following code:
import { Link } from "react-router-dom";

const BeerList = ({ beers }) => {
  return (
    <div className="beer-list">
      {beers.map((beer) => (
        <div className="beer-preview" key={beer.id}>
          <Link to={`/beers/${beer.id}`}>
            <h2>{beer.name}</h2>
            <p>Brewed by {beer.brewer}</p>
          </Link>
        </div>
      ))}
    </div>
  );
};

export default BeerList;
Homepage
Now lets get back to adding this data to our homepage now that we have the ability to fetch any data and also return a list of beers. Add a Home.js file to your src directory and add the following code:
import BeerList from "./BeerList";
import useFetch from "./useFetch";

const Home = () => {
  const {
    data: beers,
    isPending,
    error,
  } = useFetch("http://localhost:8000/beers");

  return (
    <div className="home">
      {error && <div>{error}</div>}
      {isPending && <div>Pouring...</div>}
      {beers && <BeerList beers={beers} />}
    </div>
  );
};

export default Home;
This utilises the BeerList and UseFetch components created in the previous section. It passes in our local beers API to the useFetch function, then if there is an error it will display that, if it is pending it will display “Pouring…”, then finally if there is no error or waiting on pending, it will display the list of beers that has been retrieved from the API.
To enable this functionality update the app.js file to the following:
import Navbar from "./Navbar";
import Home from "./Home";
import { BrowserRouter as Router, Route, Routes } from "react-router-dom";
import NotFound from "./NotFound";

function App() {
  return (
    <Router>
      <div className="App">
        <Navbar />
        <div className="content">
          <Routes>
            <Route path="/" element={<Home />} />
            <Route path="*" element={<NotFound />} />
          </Routes>
        </div>
      </div>
    </Router>
  );
}

export default App;
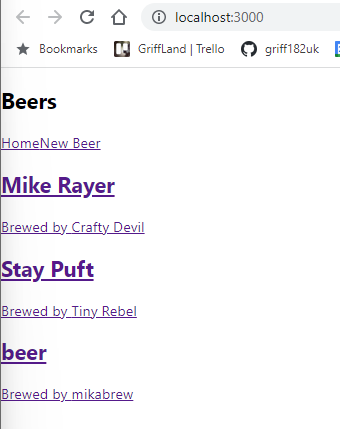
You should now get some ugly beers being shown on the homepage.
Create a Beer
Now for our favourite, creating a beer (well maybe drinking it is better, but we digress)… Add a new file to your src directory called Create.js and add the following code:
import { useState } from "react";
import { useNavigate } from "react-router-dom";

const Create = () => {
  //state
  const [name, setName] = useState("");
  const [brewer, setBrewer] = useState("");
  const [strength, setStrength] = useState("");
  const [flavours, setFlavours] = useState("");
  const [isPending, setIsPending] = useState(false);
  const navigate = useNavigate();

  const handleSubmit = (e) => {
    e.preventDefault(); //stops page refresh
    const beer = { name, brewer, strength, flavours };
    setIsPending(true);

    fetch("http://localhost:8000/beers", {
      method: "POST",
      headers: { "Content-Type": "application/json" },
      body: JSON.stringify(beer),
    }).then(() => {
      console.log(JSON.stringify(beer));
      setIsPending(false);
      navigate("/");
    });
  };

  return (
    <div className="create">
      <h2>Add a New Beer</h2>
      <form onSubmit={handleSubmit}>
        <label>Beer Name</label>
        <input
          type="text"
          required
          value={name}
          onChange={(e) => setName(e.target.value)}
        />
        <label>Brewer</label>
        <textarea
          required
          value={brewer}
          onChange={(e) => setBrewer(e.target.value)}
        ></textarea>
        <label>Strength</label>
        <input
          type="text"
          required
          value={strength}
          onChange={(e) => setStrength(e.target.value)}
        />
        <select value={flavours} onChange={(e) => setFlavours(e.target.value)}>
          <option value="hoppy">hoppy</option>
          <option value="caramel">caramel</option>
        </select>
        {!isPending && <button>Add Beer</button>}
        {isPending && <button disabled>Adding Beer...</button>}
      </form>
    </div>
  );
};

export default Create;
Then update the app.js file to the following to include the create functionality which can be reached easily via the navbar:
import Navbar from "./Navbar";
import Home from "./Home";
import { BrowserRouter as Router, Route, Routes } from "react-router-dom";
import Create from "./Create";
import NotFound from "./NotFound";

function App() {
  return (
    <Router>
      <div className="App">
        <Navbar />
        <div className="content">
          <Routes>
            <Route path="/" element={<Home />} />
            <Route path="/create" element={<Create />} />
            <Route path="*" element={<NotFound />} />
          </Routes>
        </div>
      </div>
    </Router>
  );
}

export default App;
Click “New Beer” in the nav bar and you should get this shonky looking form.
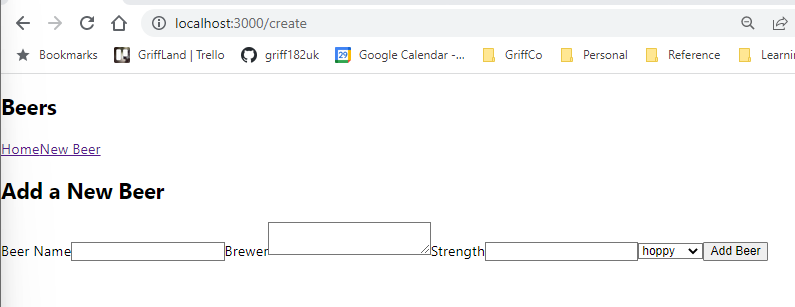
Add a new beer then return to the homepage and you should see it in the beer list (as well as appearing in your data/db.json file).

BeerDetails
Now we want to use the UseFetch function to get our BeerDetails from our locally running API using json-server. To do this add a BeerDetails.js file and add the following code:
import { useNavigate, useParams } from "react-router-dom";
import useFetch from "./useFetch";

const BeerDetails = () => {
  const { id } = useParams();
  const {
    data: beer,
    error,
    isPending,
  } = useFetch("http://localhost:8000/beers/" + id);
  const navigate = useNavigate();

  const handleClick = () => {
    fetch("http://localhost:8000/beers/" + beer.id, {
      method: "DELETE",
    }).then(() => {
      navigate("/");
    });
  };

  return (
    <div className="beer-details">
      {isPending && <div>Pouring...</div>}
      {error && <div>{error}</div>}
      {beer && (
        <article>
          <h2>{beer.name}</h2>
          <p>Brewed by {beer.brewer}</p>
          <div>Strength: {beer.strength} %</div>
          <div>Flavours: {beer.flavours}</div>
          <button onClick={handleClick}>Delete Beer</button>
        </article>
      )}
    </div>
  );
};

export default BeerDetails;
This code imports the UseFetch component then creates a BeerDetail function. The function:
- Sets constants handling the beer id.
- Sets the beer data, pending and error using UseFetch. The specific beer data is handled by passing the beers API url as a constant plus the current beer id into the function.
- Sets a navigate constant which allows us to navigate to different paths.
- It provides the ability to delete a beer from the beer details which then routes back to the homepage using navigate.
- It returns a div which parses the beer detailed properties into something legible, along with a button that references the delete functionality in the handleClick function.
To add this functionality to your application, update your app.js file to look like the following:
import Navbar from "./Navbar";
import Home from "./Home";
import { BrowserRouter as Router, Route, Routes } from "react-router-dom";
import Create from "./Create";
import BeerDetails from "./BeerDetails";
import NotFound from "./NotFound";

function App() {
  return (
    <Router>
      <div className="App">
        <Navbar />
        <div className="content">
          <Routes>
            <Route path="/" element={<Home />} />
            <Route path="/create" element={<Create />} />
            <Route path="/beers/:id" element={<BeerDetails />} />
            <Route path="*" element={<NotFound />} />
          </Routes>
        </div>
      </div>
    </Router>
  );
}

export default App;
Now if you click on a beer you will get these details:

If you click the delete button it will be removed from your beer list and no longer be present in data/db.json.
That was a whistle stop tour of creating a basic CRUD form for beers in react. I think we’ll take a breather now and I’ll do a short follow-up of how to use some CSS in the index.css file to make it a bit more alcoholic in its styling.