
Get by with Git
Drinking too much? Can’t remember all those git commands and methods without googling them every time?? Google no more, this page will help you… get by with git!
- PreRequisites
- WTF is git?
- Quick Reference
- Git Local
- Git Remote
- Protecting Main with Pull Requests
- Git Ignore
- Using Visual Studio Code
PreRequisites
- Install git.
- A github account.
- (optional) Install a decent IDE to work in such as Visual Studio Code.
WTF is git?
Git is a distributed source control solution that allows you to version control your code locally and then push to a remote repository such as github. History is maintained with each copy of the code repository. You can also protect key branches of code by mandating pull requests occur that require code reviews by your peers before a commit to that branch is allowed. These key branches are often called master or main, with feature branches being the development code that is worked on before it is merged into the master branch.
Quick Reference
Git is often used from the command-line and just so you don’t have to read the following sections every time… here is a quick reference that will help you most of the time. If you’ve stopped drinking you may remember all the commands anyway, I however need a constant prompt (hic!).
Local
git init ## initialise a new git repo
git add . ## add all files in the directory to git repo
git add "filename" ## add specific file to the git repo
git status ## check the status of files in the git repo
git commit -m "message" ## commit your working code to the git repo with a message
Remote
git remote add origin "http://github.com/foo" ## add a remote repo to synch your local repo with
git pull "http://github.com/foo" main ## synch your local repo with a remote repo
git push origin main ## push your locally committed changes to the remote repo
git pull ##pull any changes made in the remote repo to your local repo
Branch and Commit Management
git branch branch-name ## create new branch
git checkout branch-name ## checkout the branch
git merge other-branch ## merge other-branch into current branch
git branch --list ## what branches are there in the repo
git log -v ## see the change history in a branch
git log -p ## see actual change for a commit
git reset --hard {versionid} ## revert to previous version
git branch -D branch-name ## hard deletes branch even if not merged
Git Local
Setup local git config
You can find your git configuration file in C:\Users{username}.gitconfig.
It should look something like this:
[user]
    name = HUNGOVER CODER
    email = info@hungovercoders.com
To set your config which should update this file you can use the following:
git config --global user.name "HUNGOVER CODER"
git config --global user.email "info@hungovercoders.com"
If you are in employment and have a pesky proxy in front of you you’ll want to run something like this to punch through the swine.
git config --global http.proxy
http://proxyUsername:proxyPassword@proxy.server.com:port
Setup repo and commit
To initialize a git repository once you have installed git, create a new folder on your machine ready for a repo. Right click that folder and initialise command prompt. Enter the command:
git init
This will initialise a git repo in that folder and you will see a .git file in that folder. The default branch for new git repos is main (used to be master). Add a new file to the directory by entering the command:
echo test > test.txt
Now run:
git status
And you will see that the test.txt file you have just added is currently untracked in the repository. Rectify this by running:
git add .
Then run git status again
git status
You should now see that git repo has a new file tracked. This has not yet been committed to the repository though and included in source. To ensure the new file is part of your local repository we need to commit it using the following command.
git commit -m "adding a new file"
Run git status again and you should see that there is now nothing to commit as all changes have committed to the local repo.
Branching Locally
Right you may have had a few and you don’t want to override your work in the main branch. Therefore you want to make a branch off this branch that you can work with that doesn’t disrupt your working code. To create a new branch run the following command, the prefix of feature is often a practice to highlight that its a new feature for the codebase:
git branch feature-newidea
Now change to work in this branch by running
git checkout feature-newidea
To confirm you are now working in this branch and see all other branches run the following and you should see an asterisk against the branch you expect to be working in.
git branch --list
Now add a new idea files to this branch.
echo idea > newidea.txt
Then add and commit this new file to the new feature branch:
git add .
git commit -m "adding a new idea file"
To check the history of commits of this branch, run the following command:
git log -v
You should see two commits against the feature branch as we have the original file that we added to the master branch and then another new idea in the feature branch. To compare the history with the original master branch and prove nothing has changed there yet, change to that branch and look at the history.
git checkout main
git log -v
You can see the new idea file has not yet changed against the main branch. Lets then merge the changes into main with a check of the history to see if it now includes all the changes from the feature.
git merge feature-newidea
git log -v
You’ll now see all the changes from your feature branch in the main branch. This shows how you can work separately from your production code in a separate branch and then bring that code in when it is ready. This is usually done via a pull request as well to protect your main branch so that it gets peer reviewed. We will see this later in working with git remote.
If you wanted to revert back to a previous commit you can tak one of the commit ids from the history log (git log -v) of that branch and perform a reset. So in order to reset the main branch back to the original commit which takes out the new idea change, we could run the following (id taken from the change history for this example, you would need to add your own).
git reset --hard c7938ef116b5bca8ebc4b2eae079533fecf41782
If you check your directory you should see on the original file and your history will only show the one commit. visualize
git log -v
After that whistle-stop tour of local git we’ll clean up our branches by deleting our feature branch before moving to working remotely…
git branch -D feature-newidea
git branch --list
Git Remote
Being a hungovercoder it is going to be good practice that you synchronize your local repository with something remote to prevent any beer spillage disasters destroying all your code. We’re going to use github in the following demonstration, but other tooling using the same principals for a remote repository can be used.
Setup repo and synch
First create a new repository in your github account and copy the URL of the repo as below.
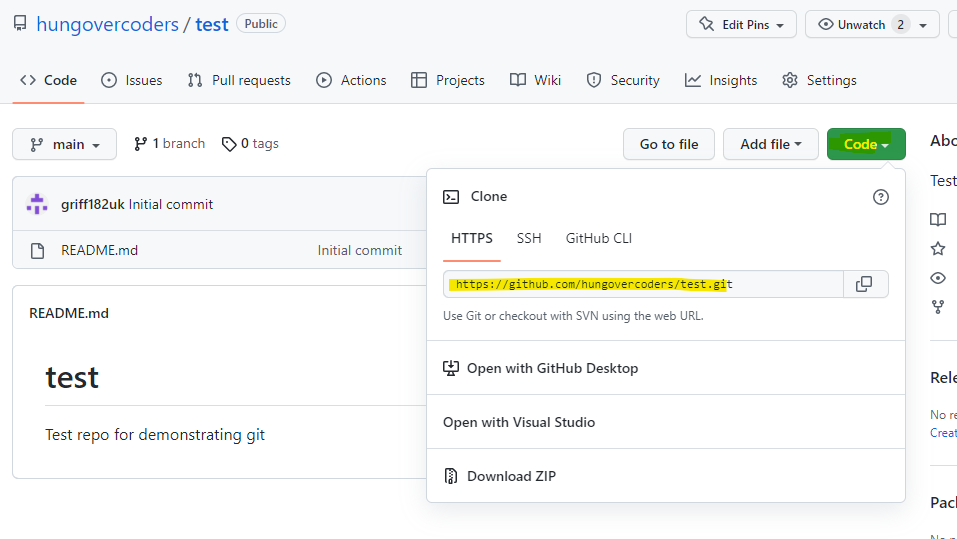
Then run this command in your local repo to add this remote as a synchronisation source for your local git repo, replacing the URL with your git repo url.
git remote add origin "http://github.com/foo"
Now ensure that the remote repo and you local repo are synchronised with the remote first by running
git pull "http://github.com/foo" main --allow-unrelated-histories
Then to push your local changes up to the remote repository run the following:
git push origin main
You should then see your test file in the remote repository. This is the basics of synchronising your local code work with a repository that everyone else can integrate on. This means everyone can retrieve all the code changes that happen in a distributed nature against this copy.
Protecting Main with Pull Requests
We’re going to show how we can protect our main branch in our remote repository using pull requests. This means that our production facing code based off main will always have a peer review before the code is merged into it and committed. This is utilised in team settings and not necessarily in personal repositories where only you contribute code (pull requests demand someone other than the author approve!). It is worth showing the process here though as one of the foundations of git workflow and protecting your production branch.
In your remote github repository go to settings and then branches. Add a branch protection rule on your main branch and state require a pull request before merging. This will mean someone always has to review code that goes into this branch. The likelihood of another hungovercoder being drunk the same time that you are coding may be high, but at least you are giving them the benefit of the doubt.
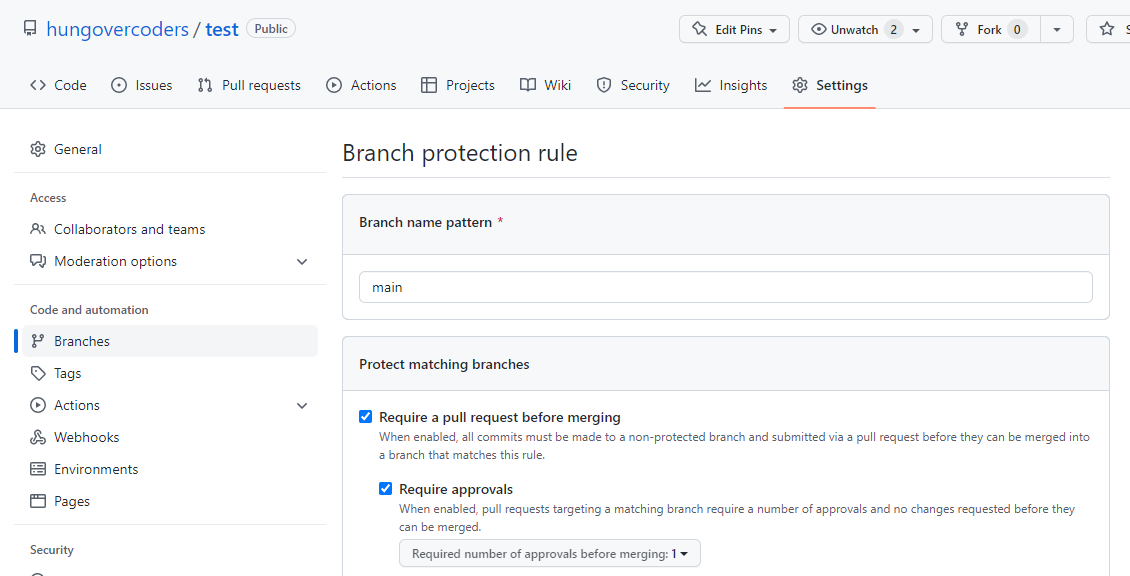
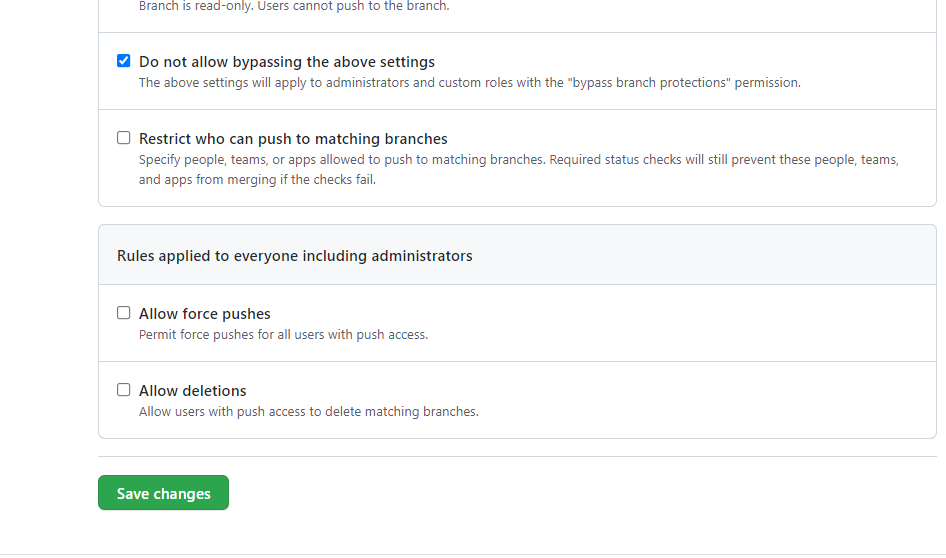
In order to ensure even admins cannot bypass this rule, also tick this checkbox before saving.
If you now go to your local repo and run the following command line sequence, you should get an error because you are trying to merge directly into master from a remote repo.
git branch main
echo newidea > newfile.txt
git add .
git commit -m "added new file to main"
git push origin main
The error will be something like the following, stating that you the main branch can only be updated using a pull request with a reviewer.
remote: error: GH006: Protected branch update failed for refs/heads/main.
remote: error: At least 1 approving review is required by reviewers with write access.
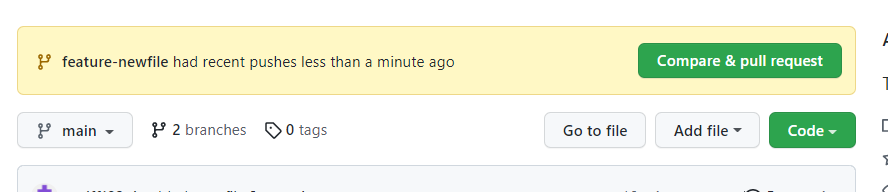
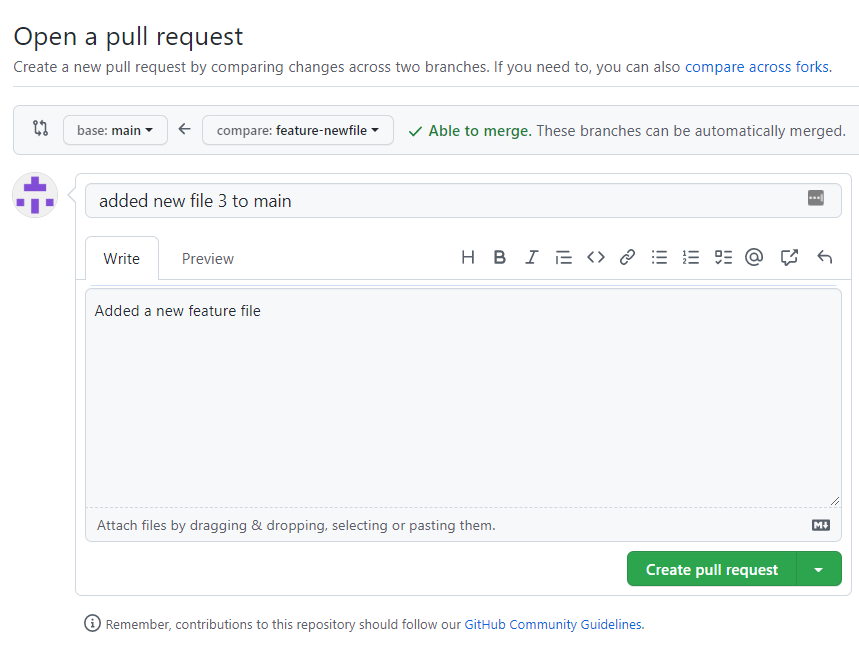
Ok, we have clearly been too hasty in committing to the production main branch without letting someone else have a look first. Lets create run the following code to create a feature branch, add a new file and commit, then synch this to a remote feature branch.
git checkout feature-newfile
git branch feature-newfile
echo newfeature > newfeature.txt
git add .
git commit -m "added new file to feature"
git push origin feature-newfile
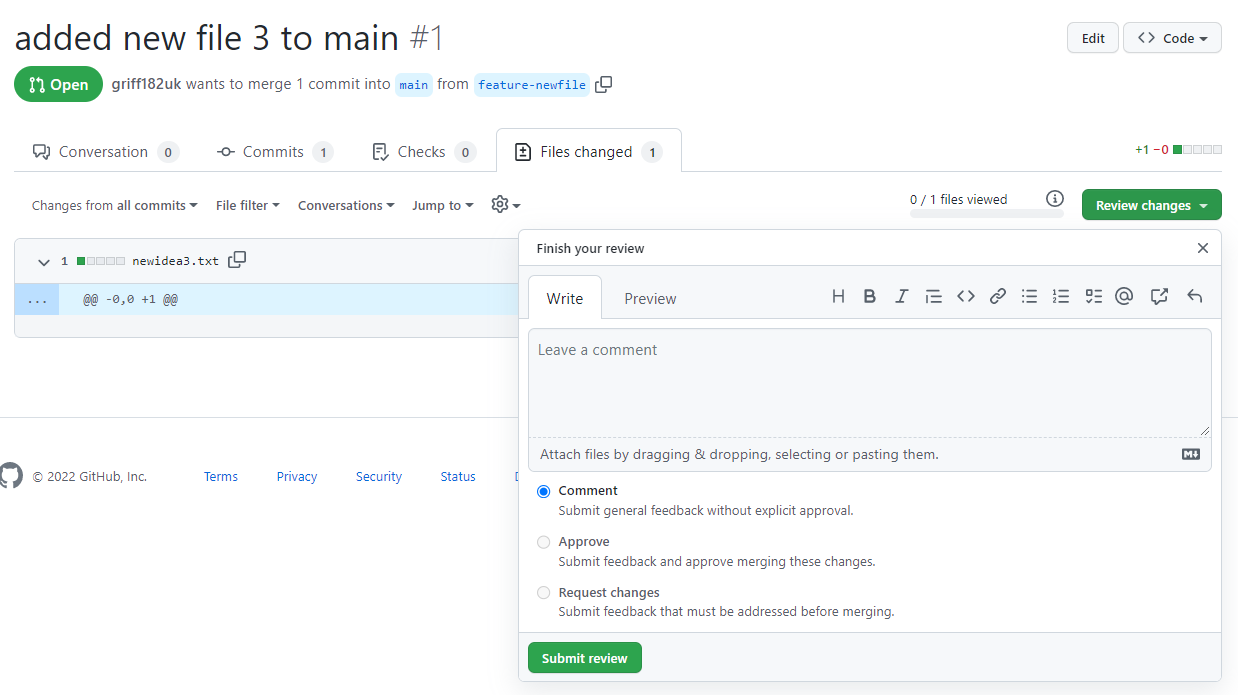
Now that we have a remote feature branch we can perform a pull request and then merge the code into our production main branch safely…
You would then approve the pull request and bingo in it goes. It is likely that you will be denied as the author of the code won’t be allowed to approve their own code. In a team setting though someone else would approve, as long as the code wasn’t written after eight cans of beer of course.
Git Ignore
If you want to ignore any files in your git repo, such as config files for local development or local python libraries you can add a .gitignore file to your repo. The patterns in this file will be ignored from your source control repo so that you do not accidentally check in superfluous libraries or sensitive data.
Example Contents of .gitnore file
The following will ignore anything in the folder venv. This is typically where python libraries are installed for an environment.
venv/*
For further example of standard gitignore files for standard project setups see this standard for python or more at this link.
Using Visual Studio Code
Just a shout out to using the visual studio code git integration when working in the VS code IDE. It is good to know all the command line tools mentioned above, but be aware that the extension makes it very easy to integrate git into your code!
You may need to up date your .gitconfig file to look something like the following to make vs code work with git if it doesn’t work immediately.
[core]
    editor = \"C:\\Users\\{username}\\AppData\\Local\\Programs\\Microsoft VS Code\\Code.exe\" --wait
[user]
    name = HUNGOVER CODER
    email = info@hungovercoders.com